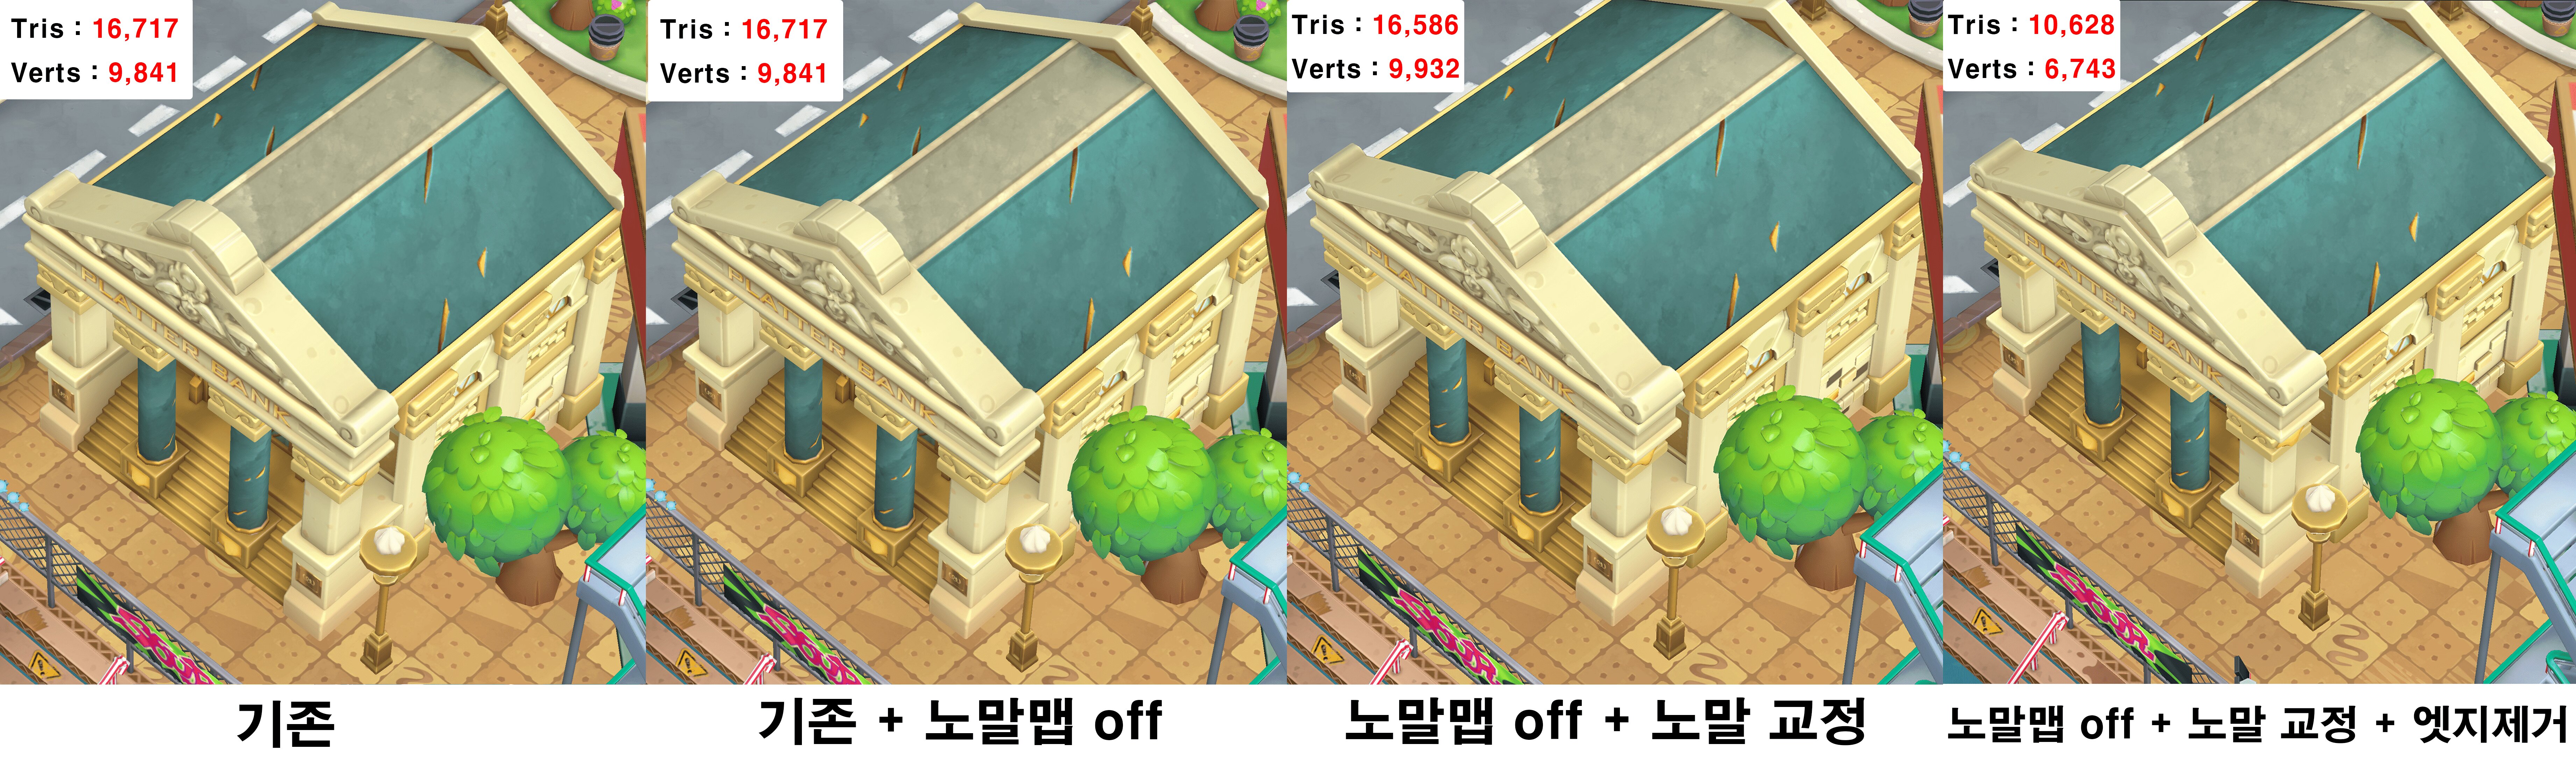
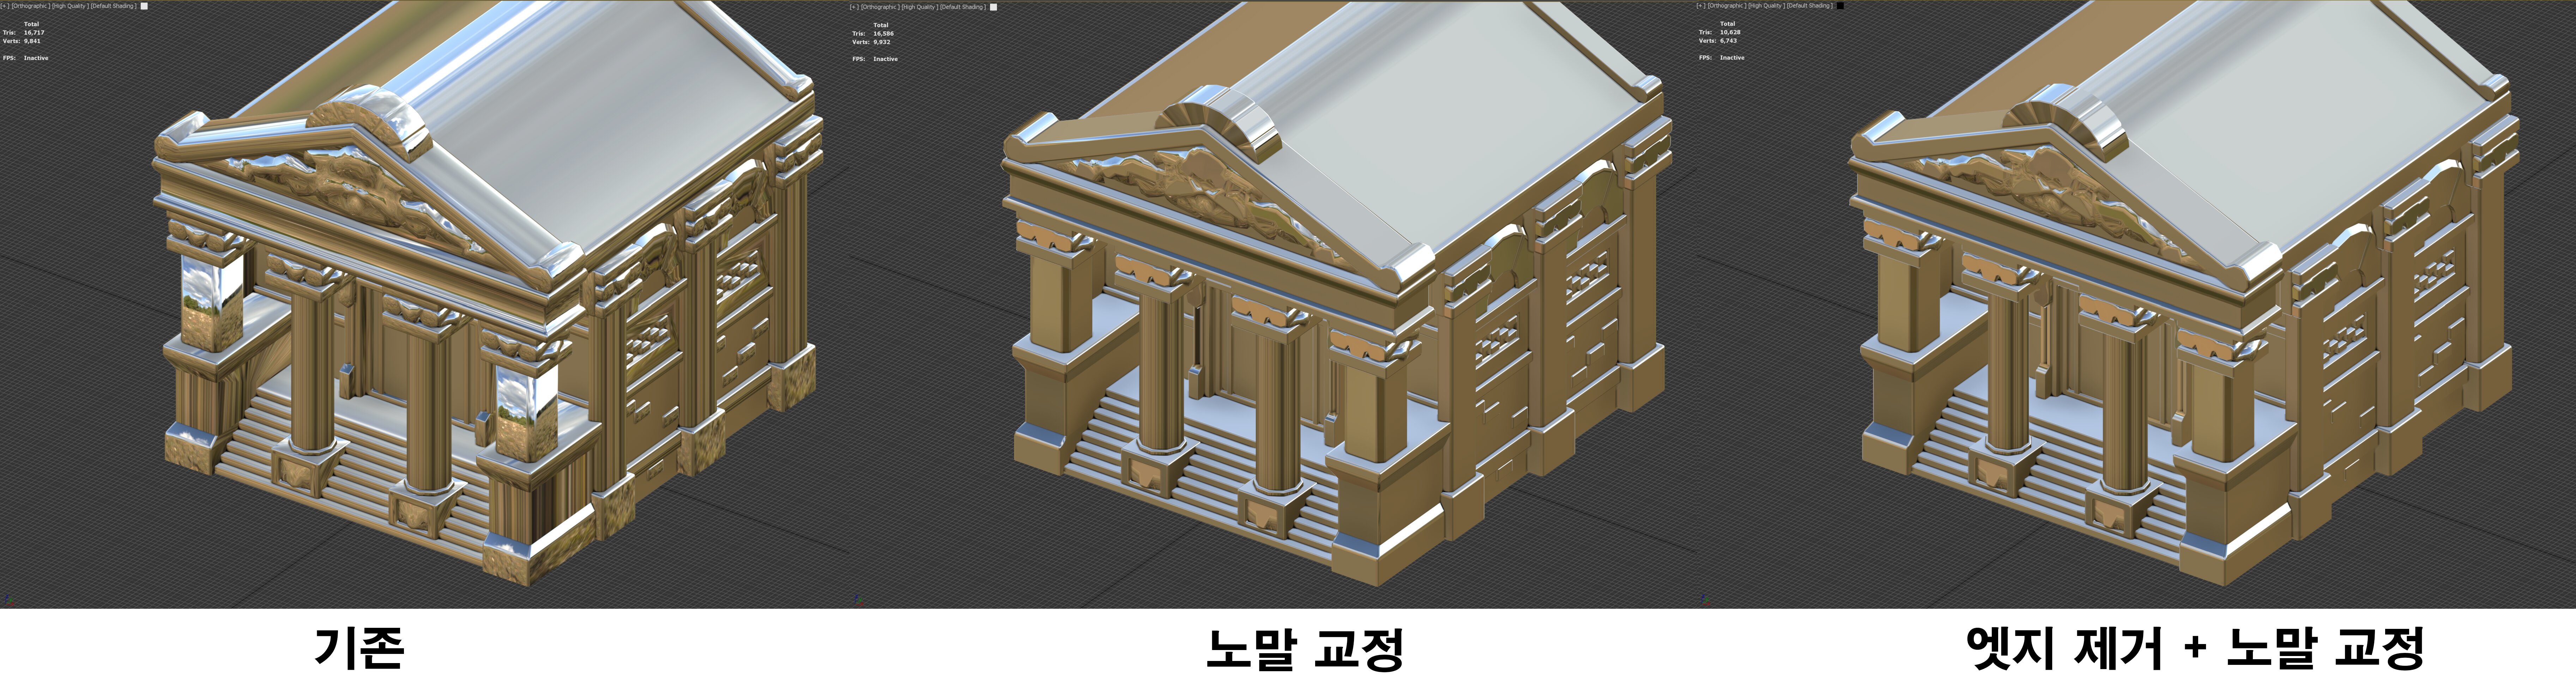
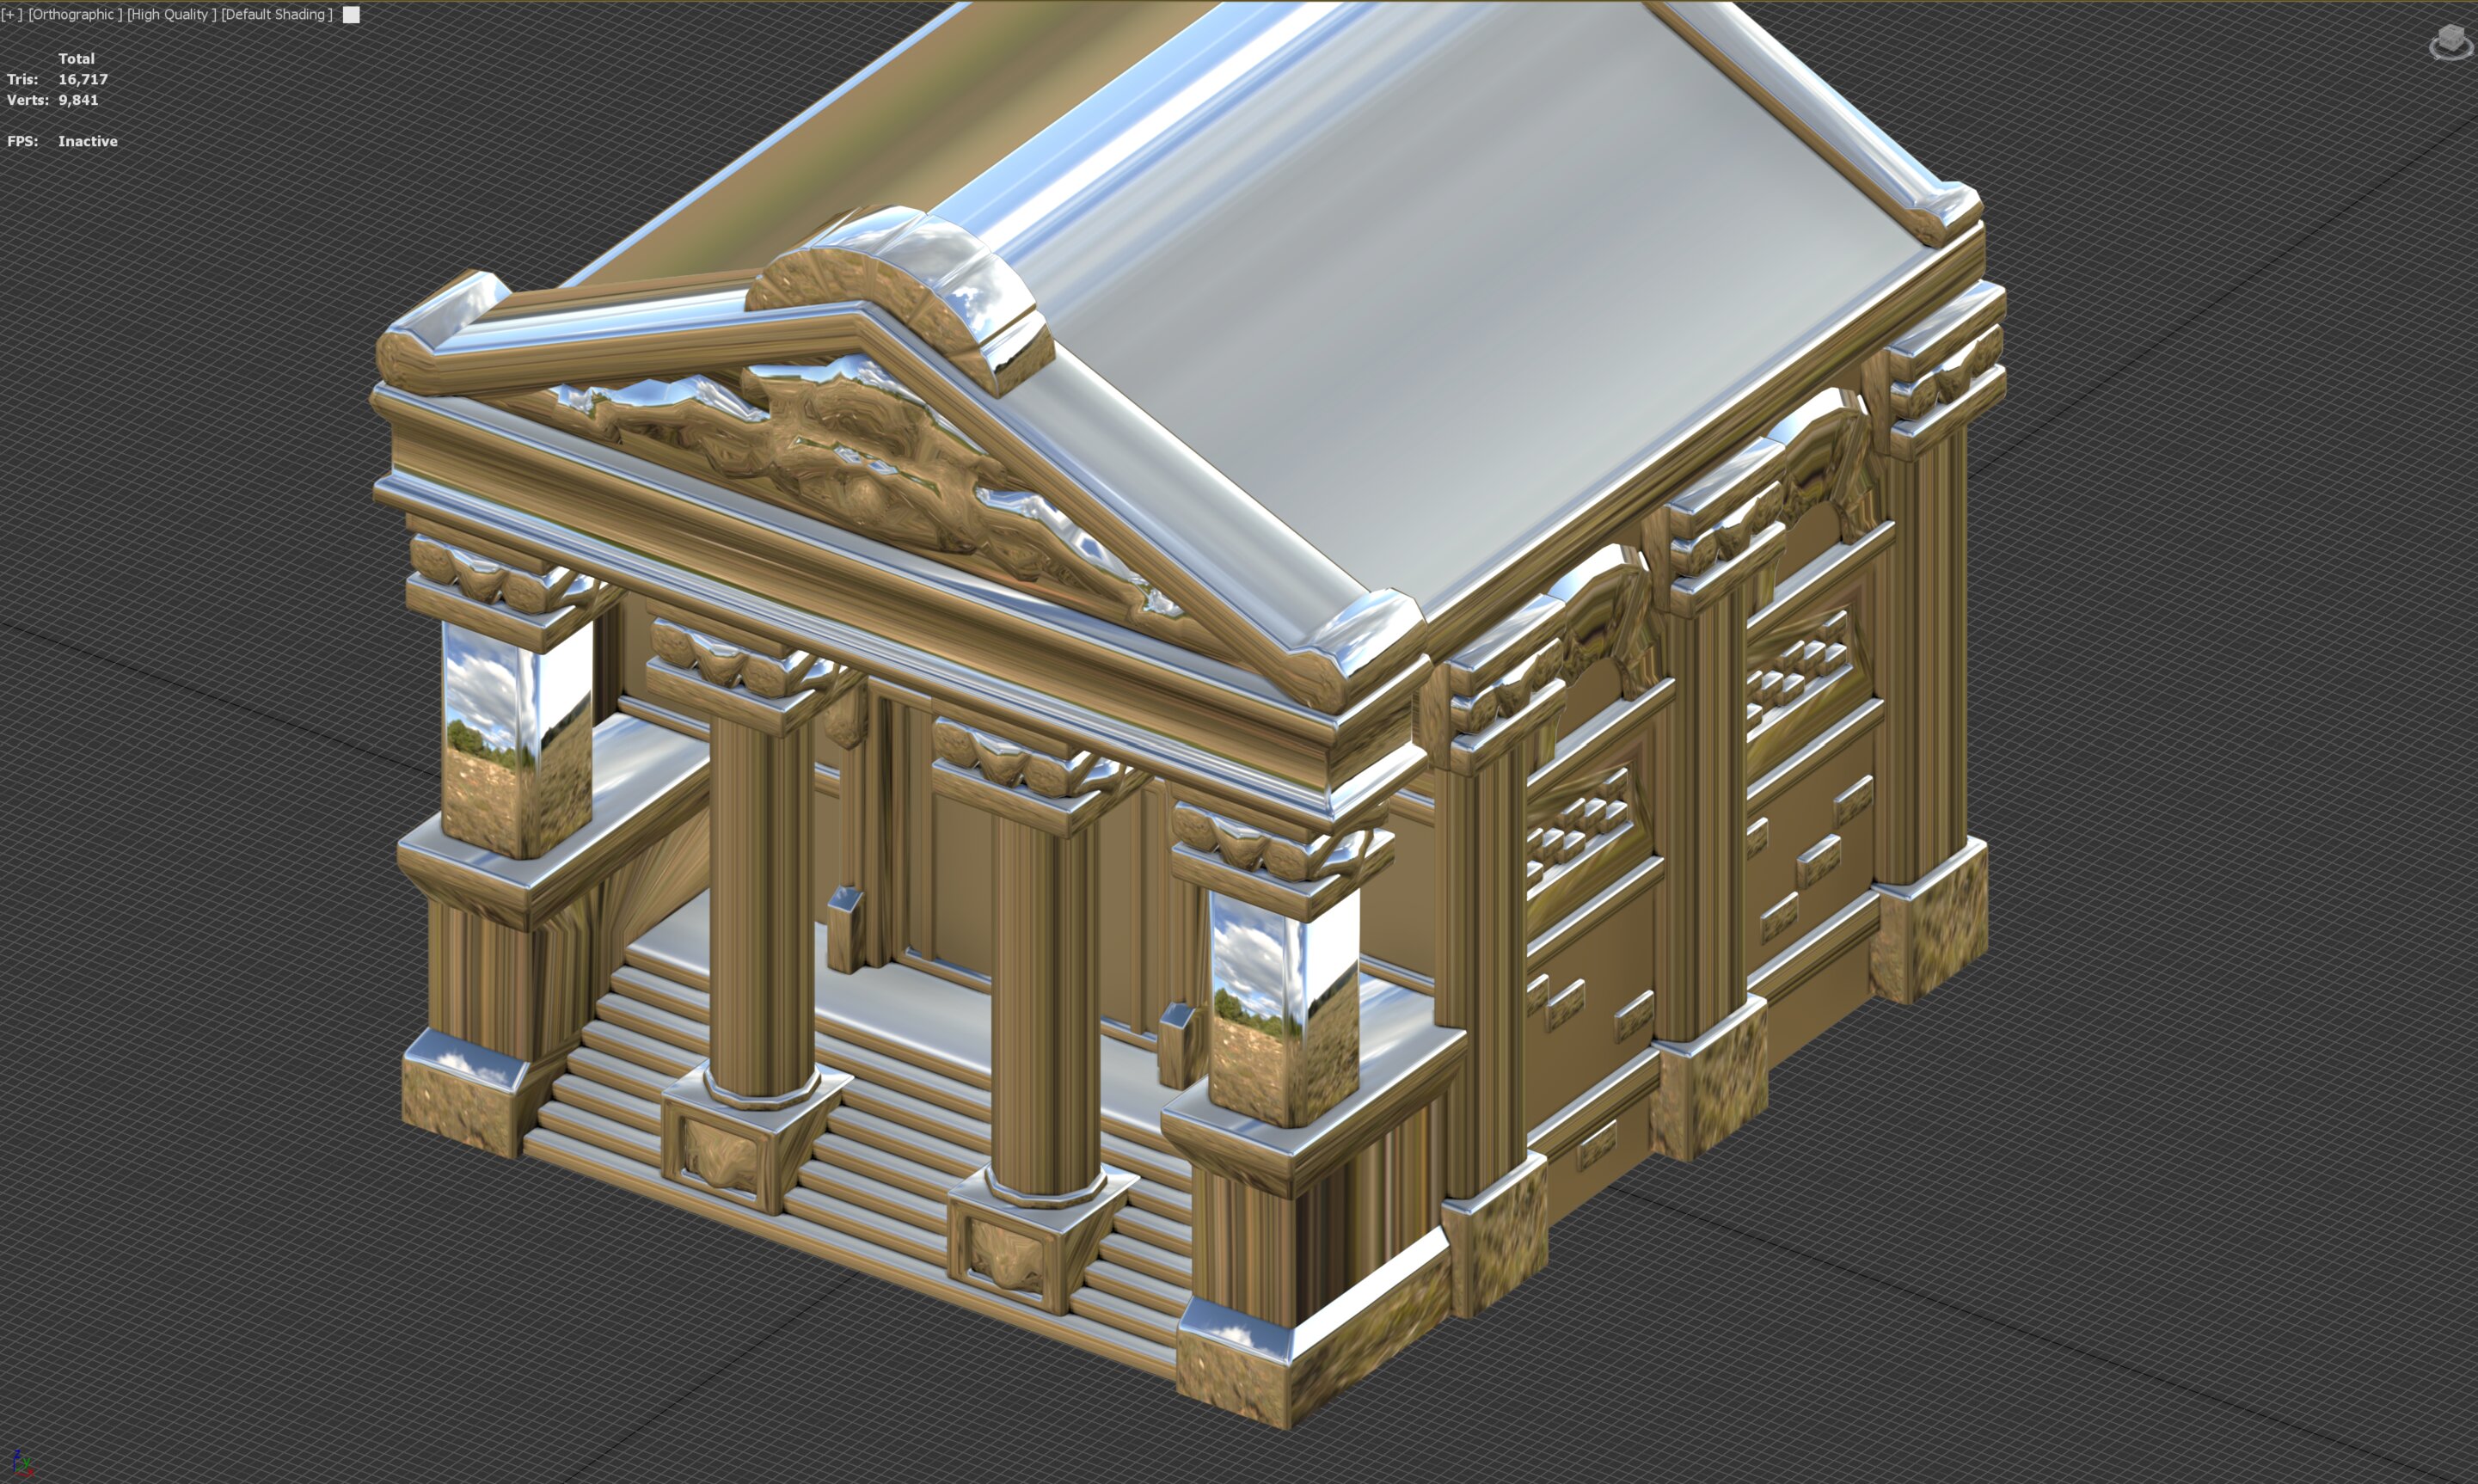
Overall comparison
Vertex Normal work Before/After ( verts 9,841 / verts 6,743 )
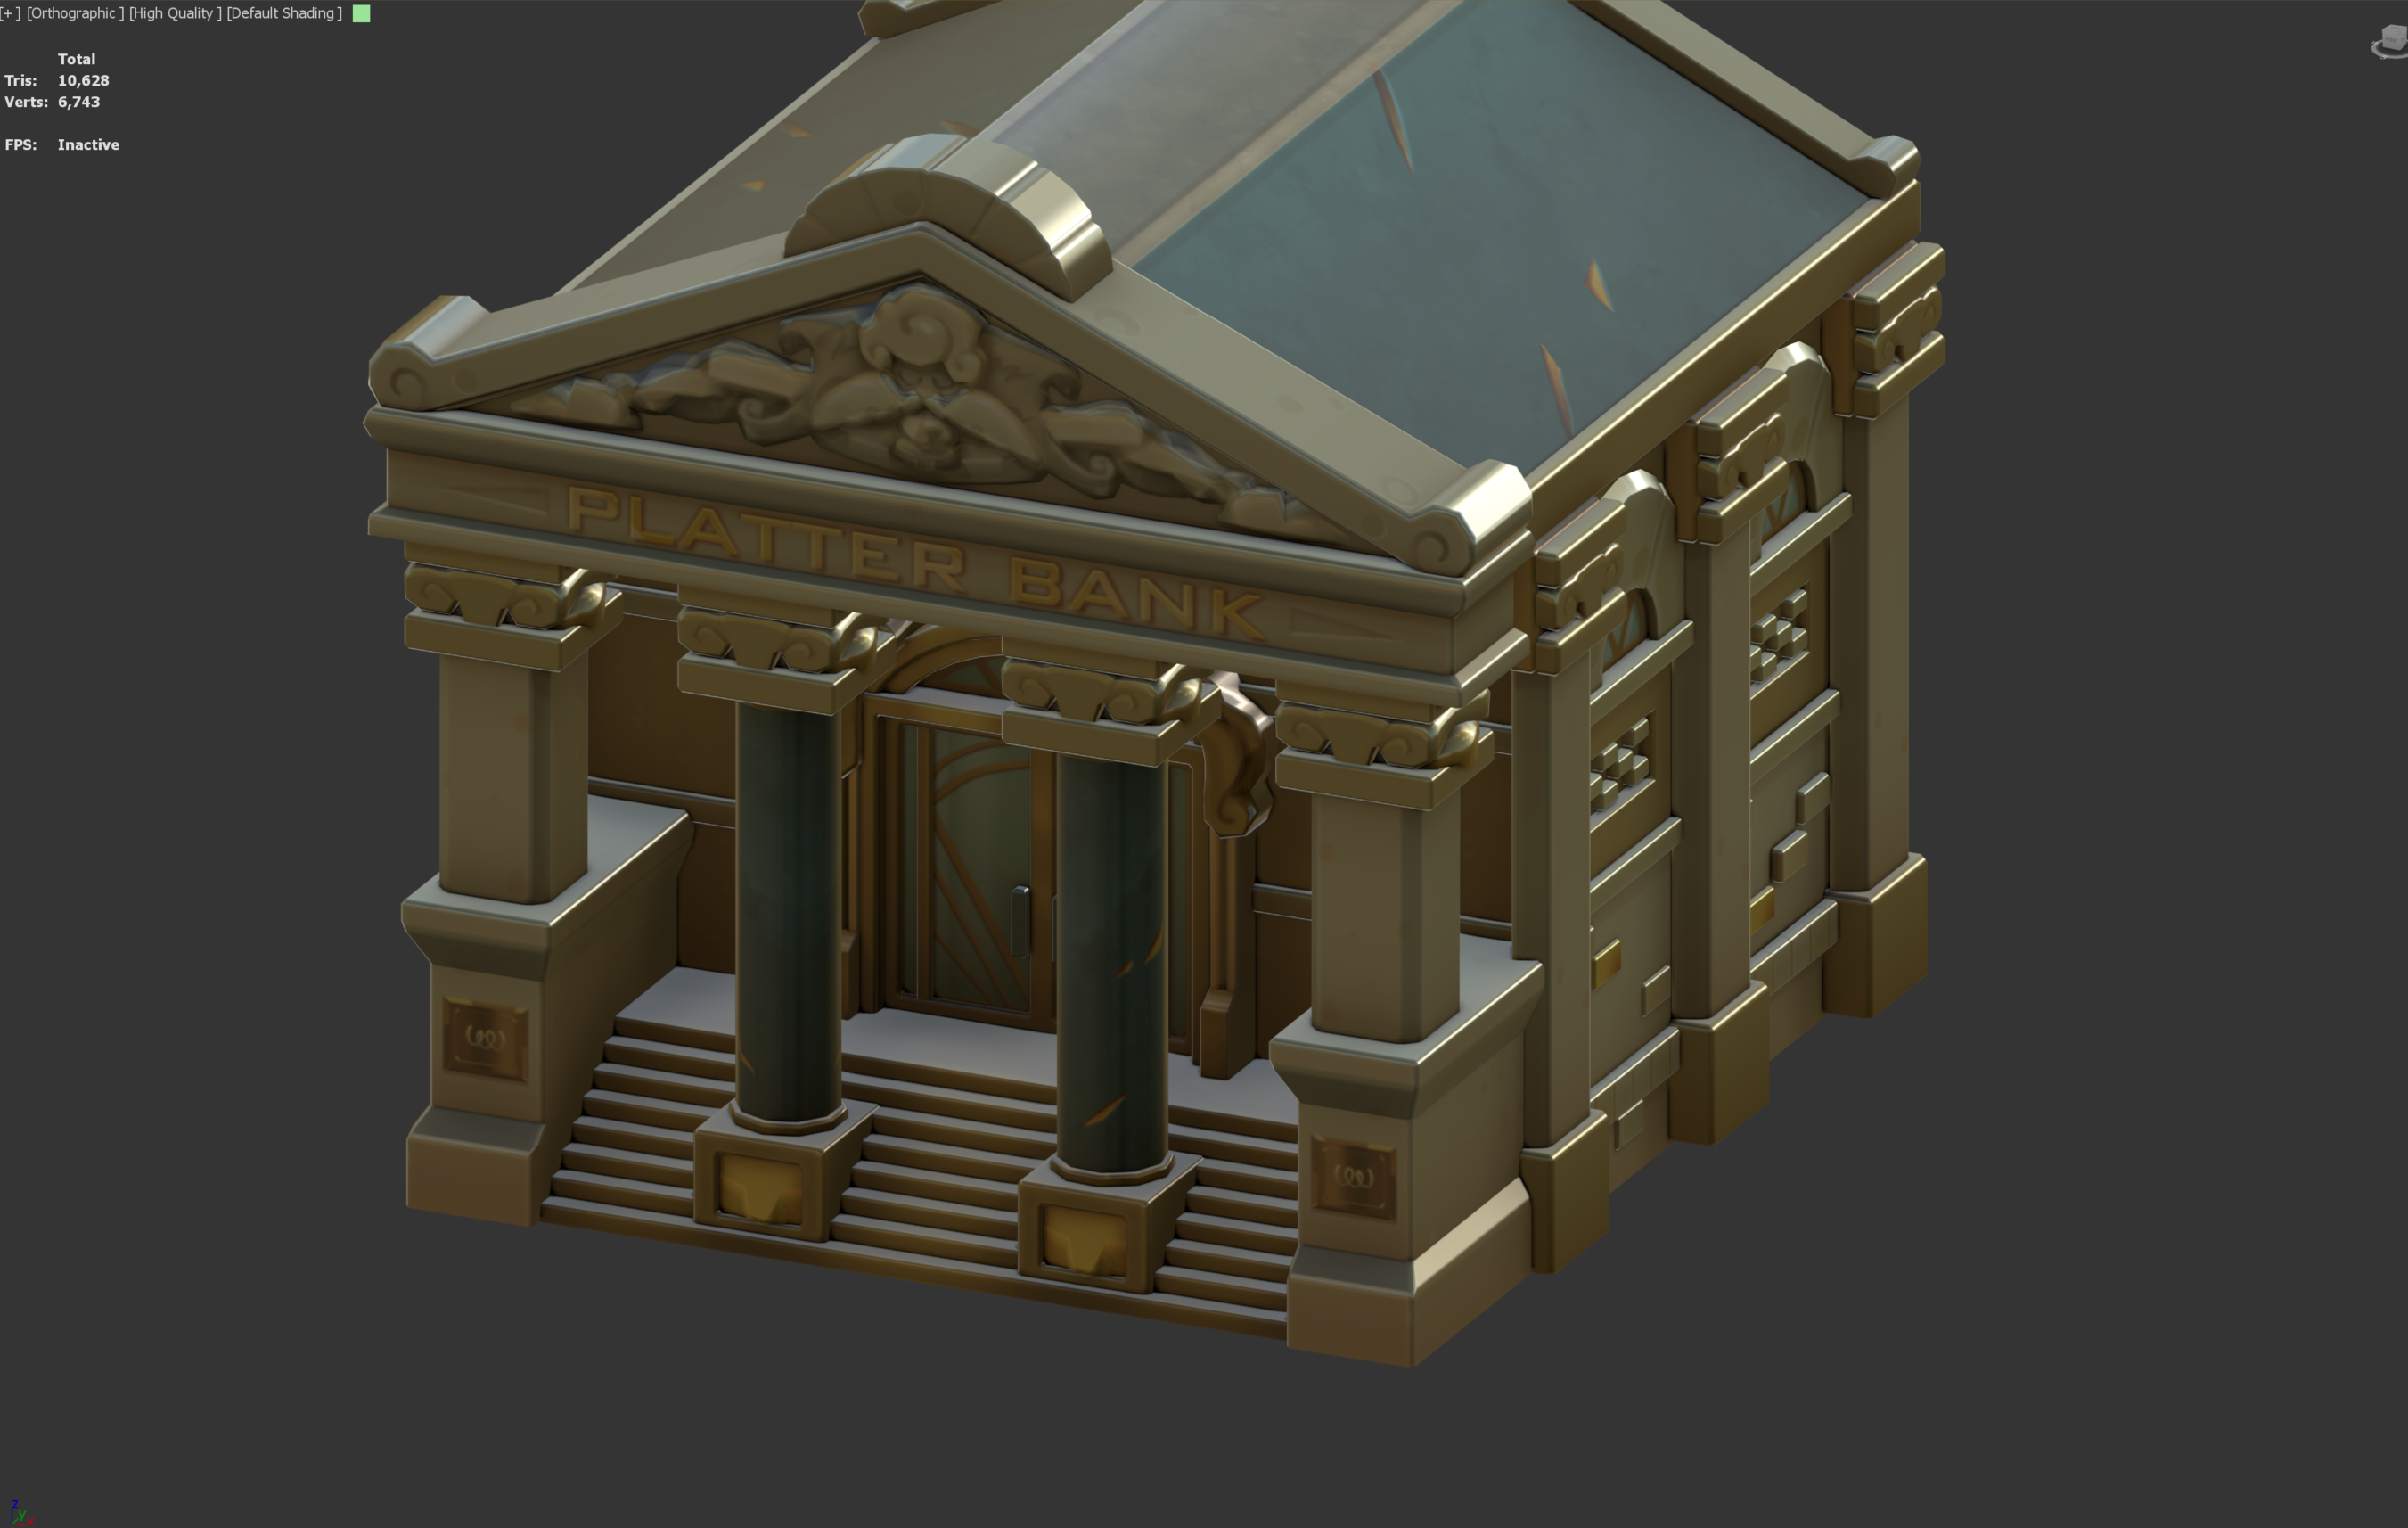
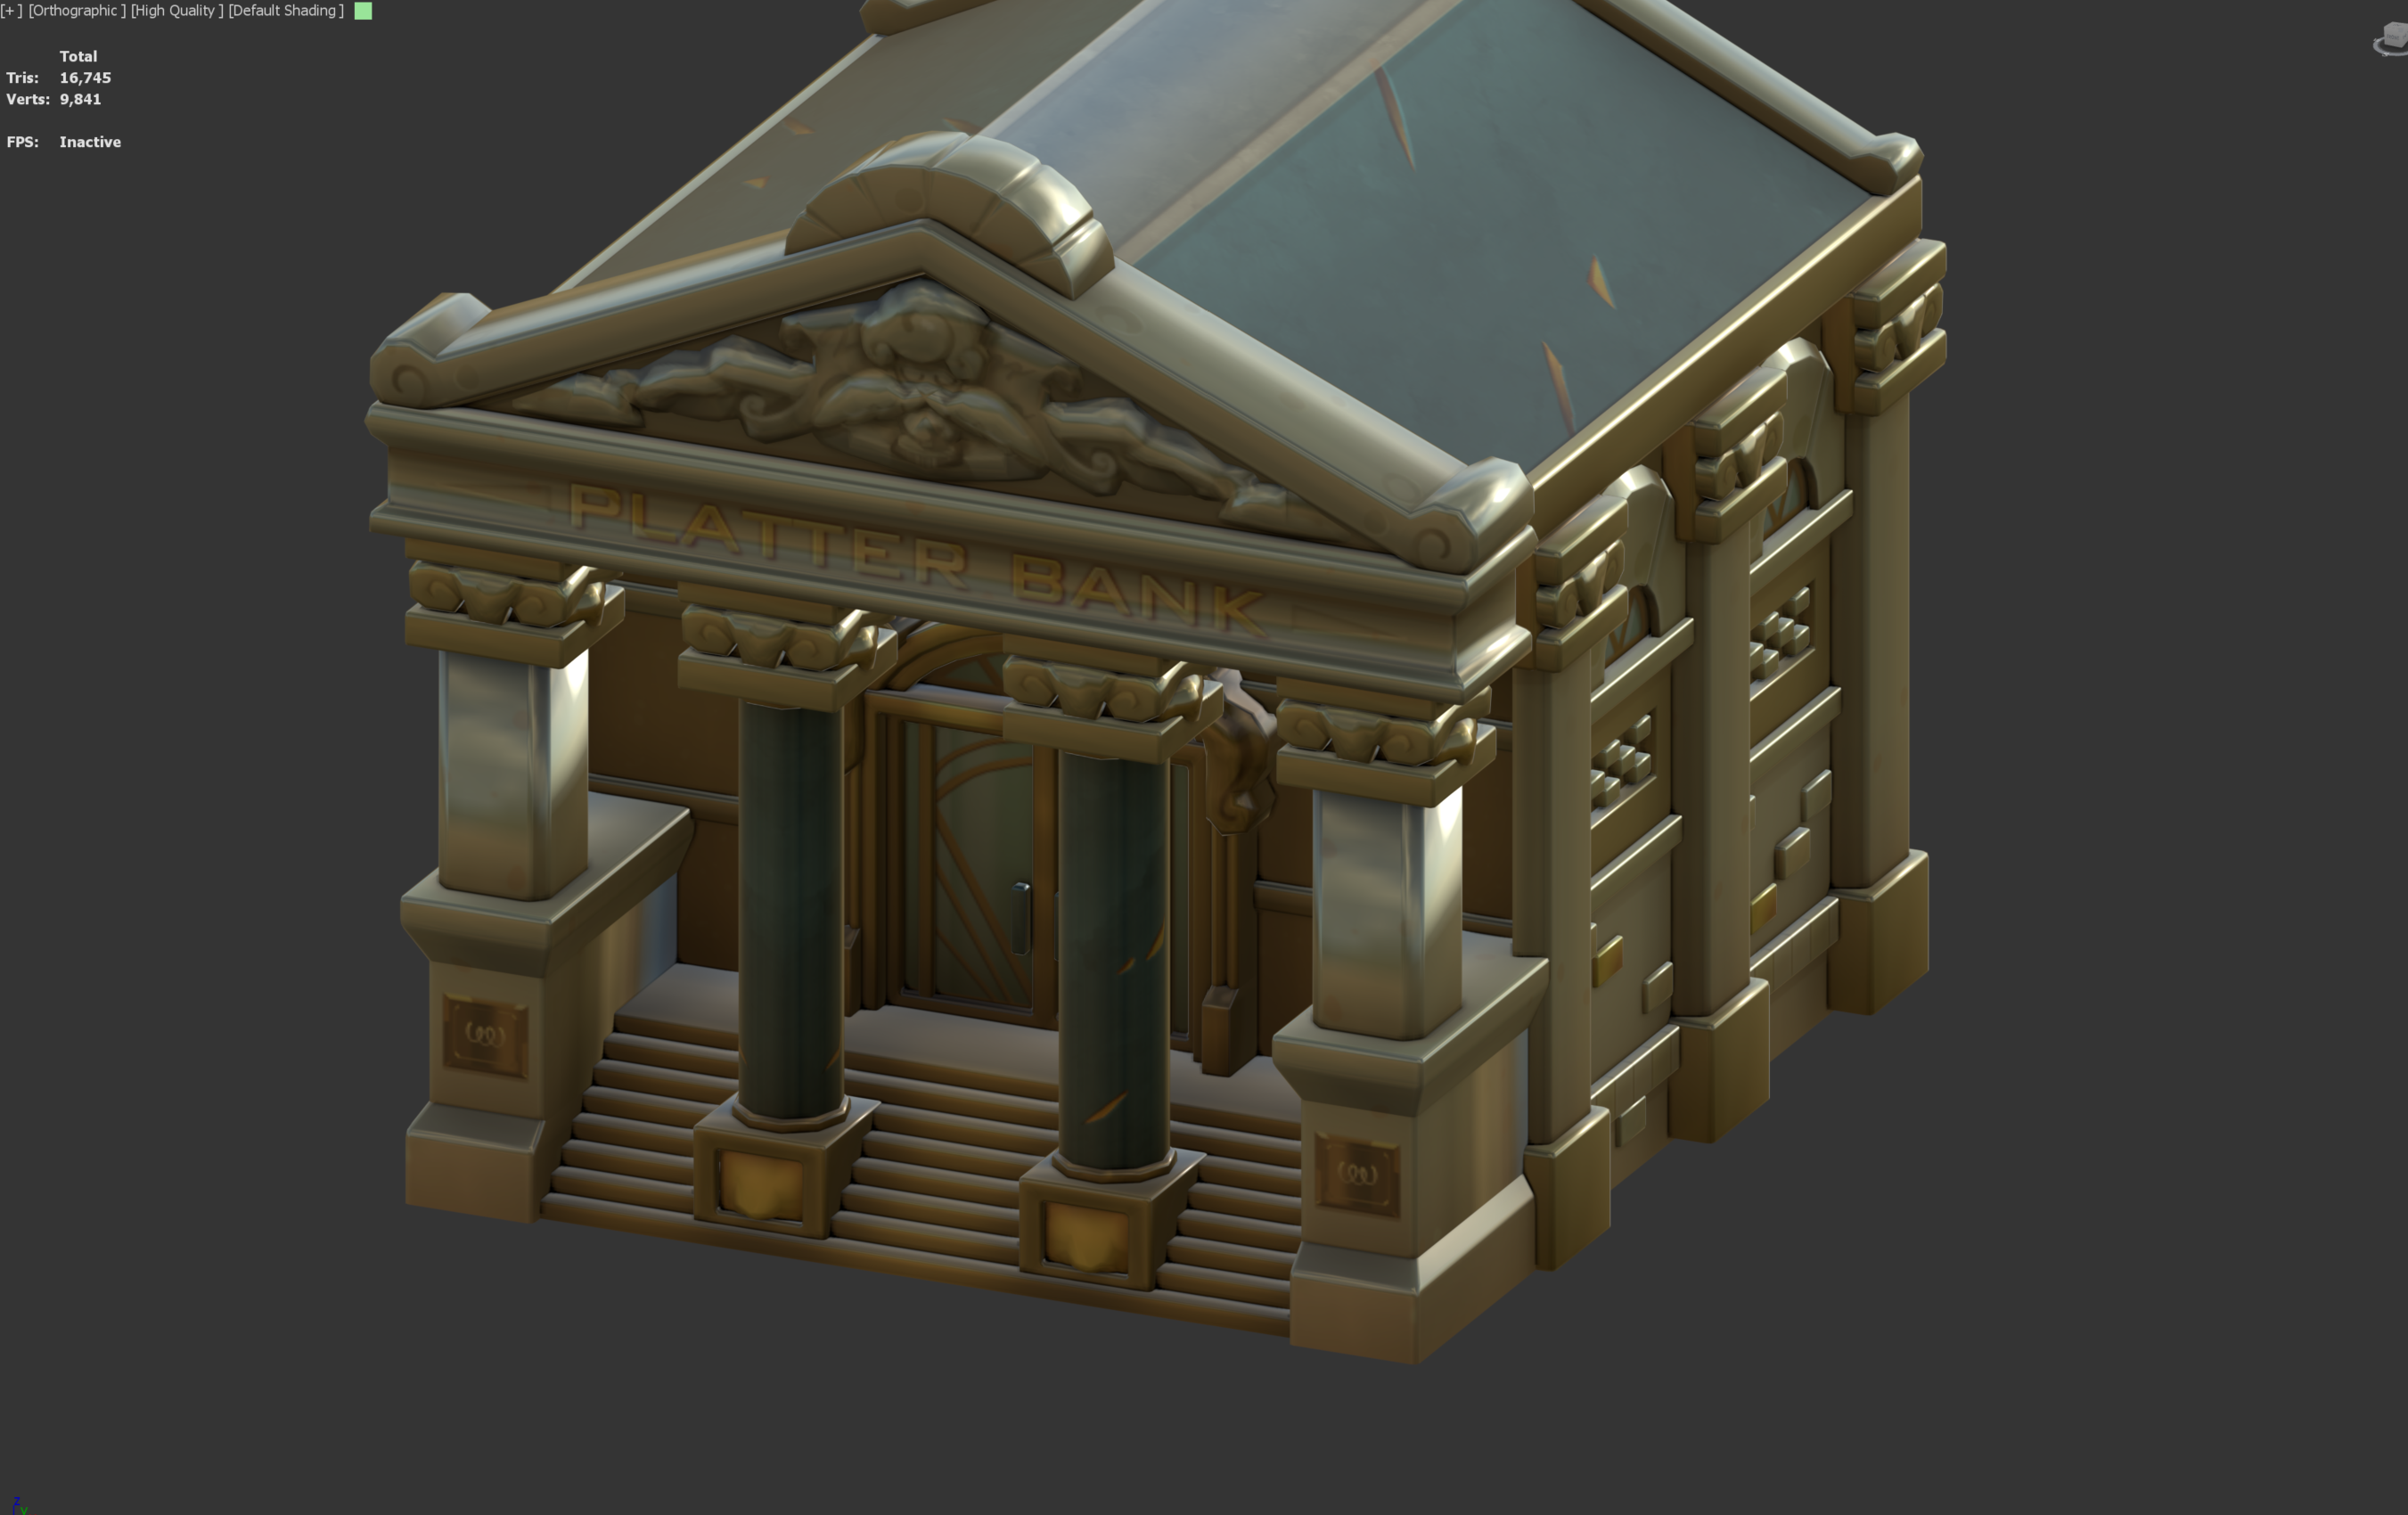
Vertex Normal Workflow
An optimization workflow that creates the intended highlights by directly correcting the mesh's vertex normals, without additional normal maps.
Vertex Normal work Before/After ( verts 9,841 / verts 6,743 )
136 normal maps used in the lobby (texture-finding tool)
136 normal maps were being used across lobby resources, mostly for highlight correction rather than surface detail.
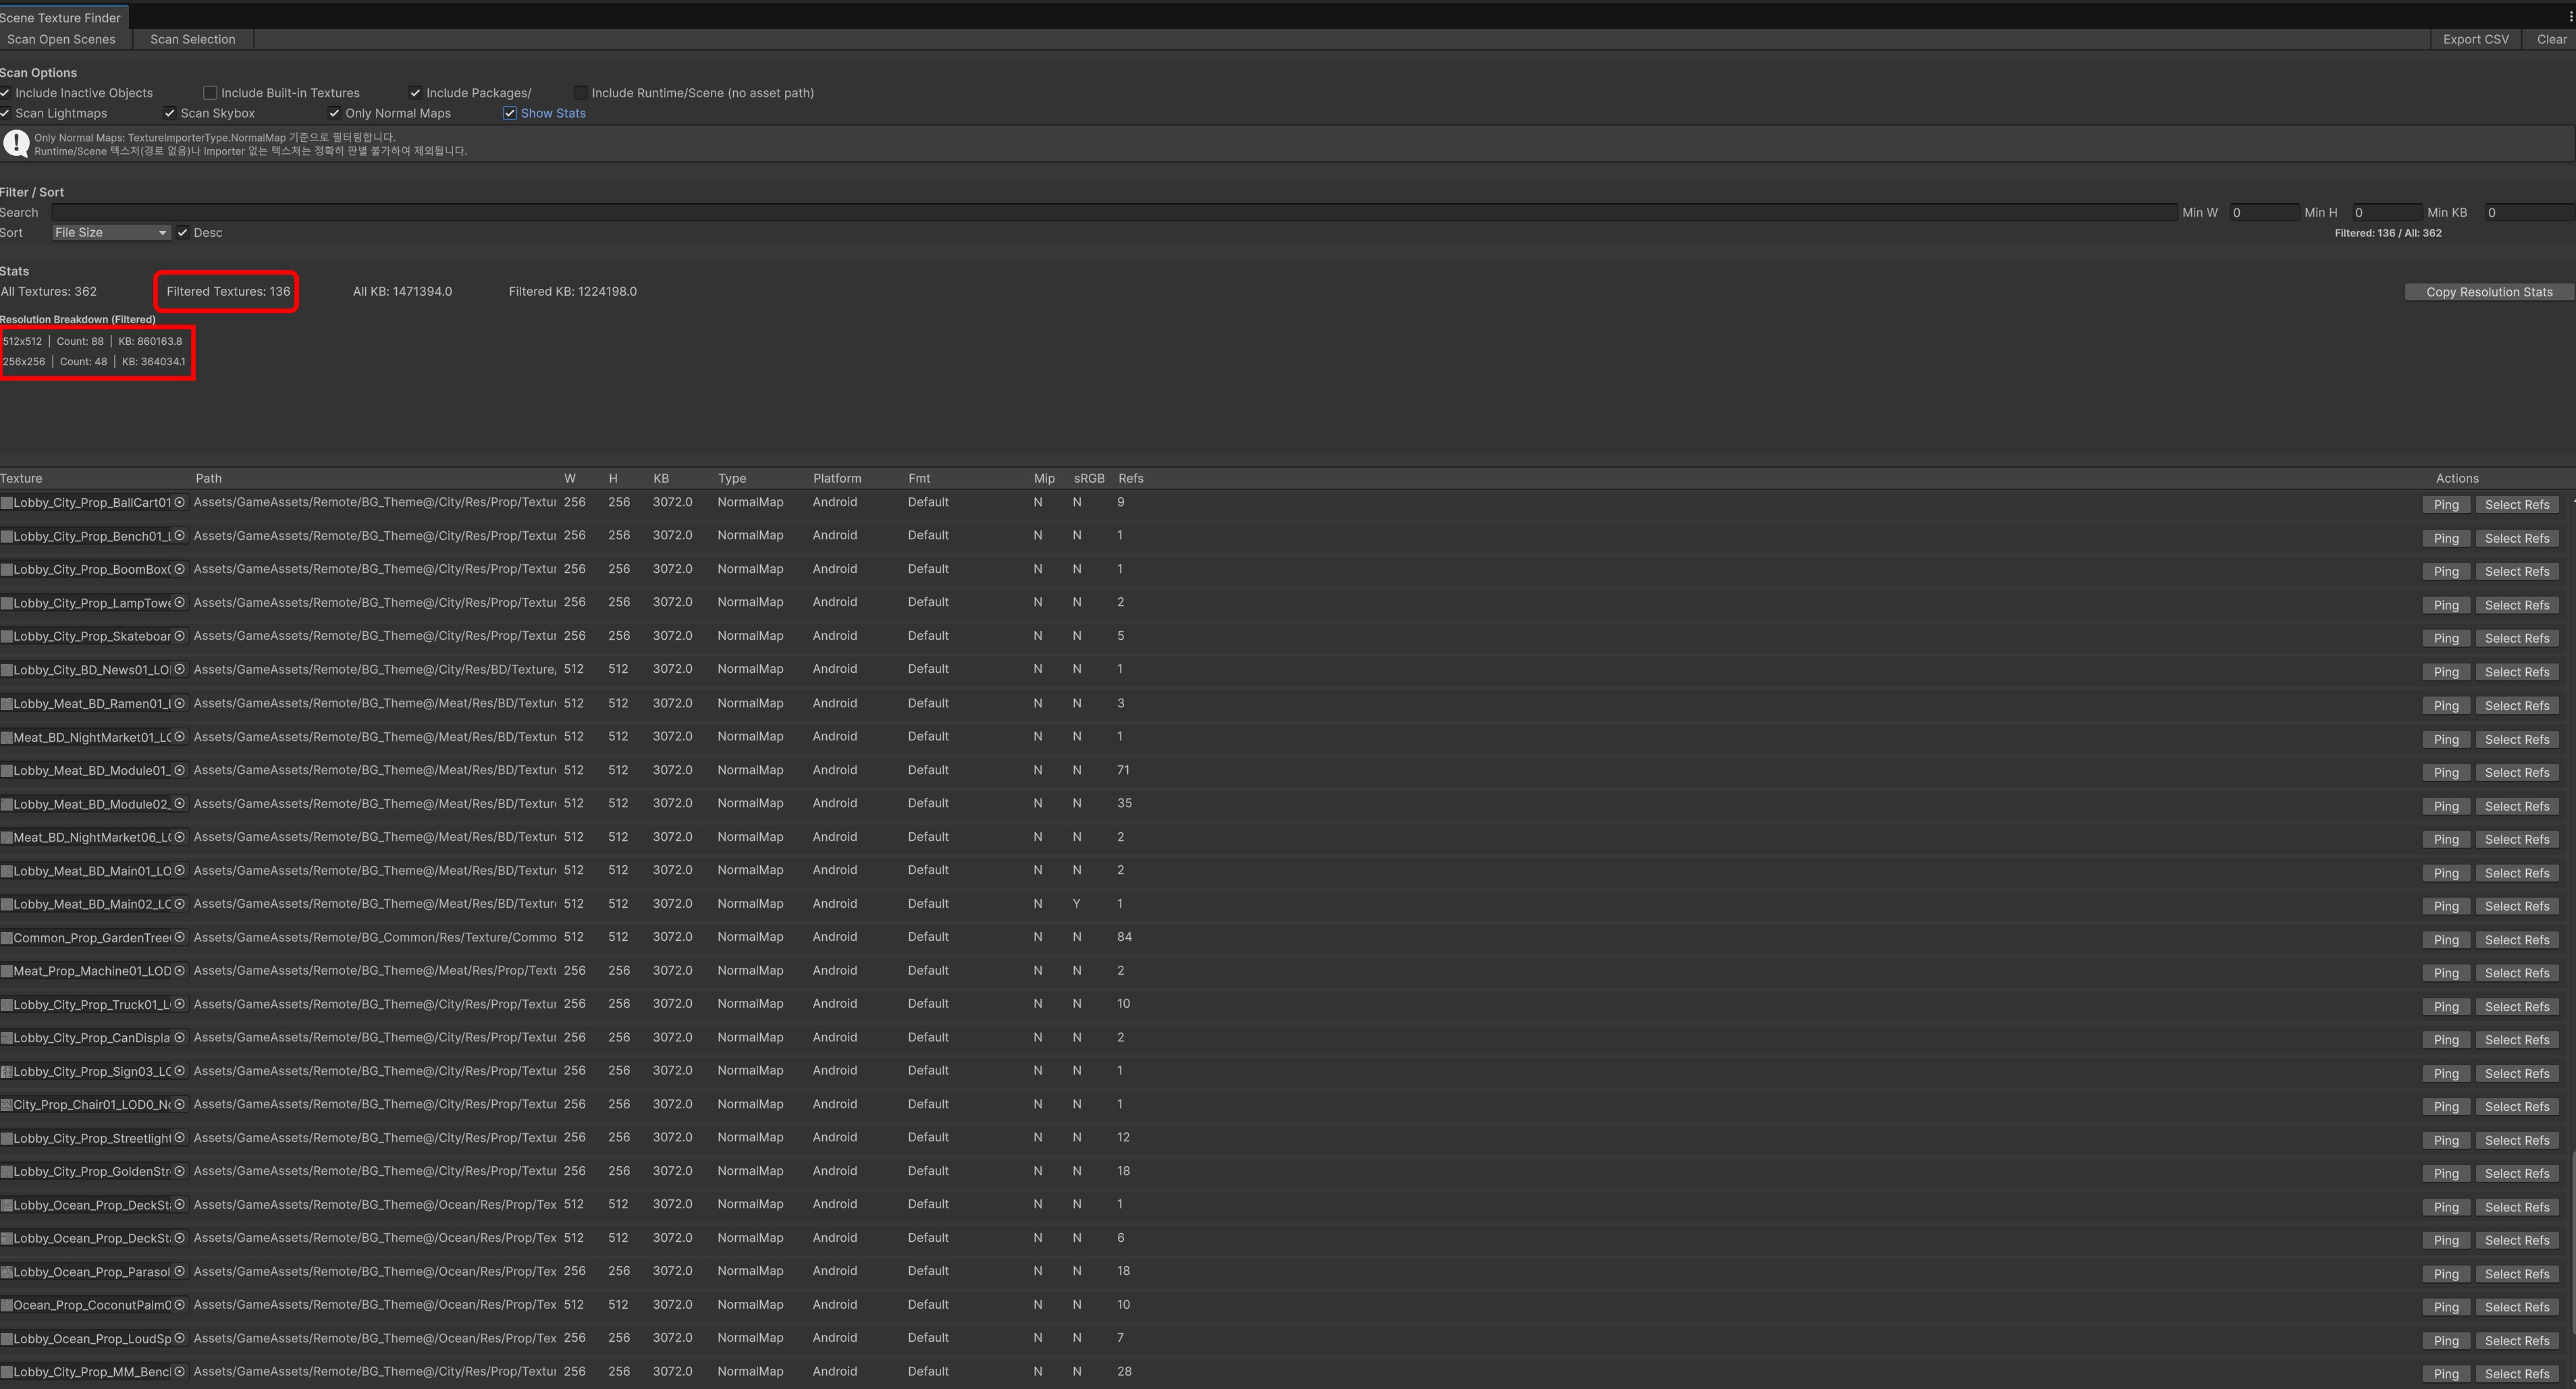
This is a memory optimization guide for creating the intended normal direction by directly adjusting vertex normals without using normal maps.
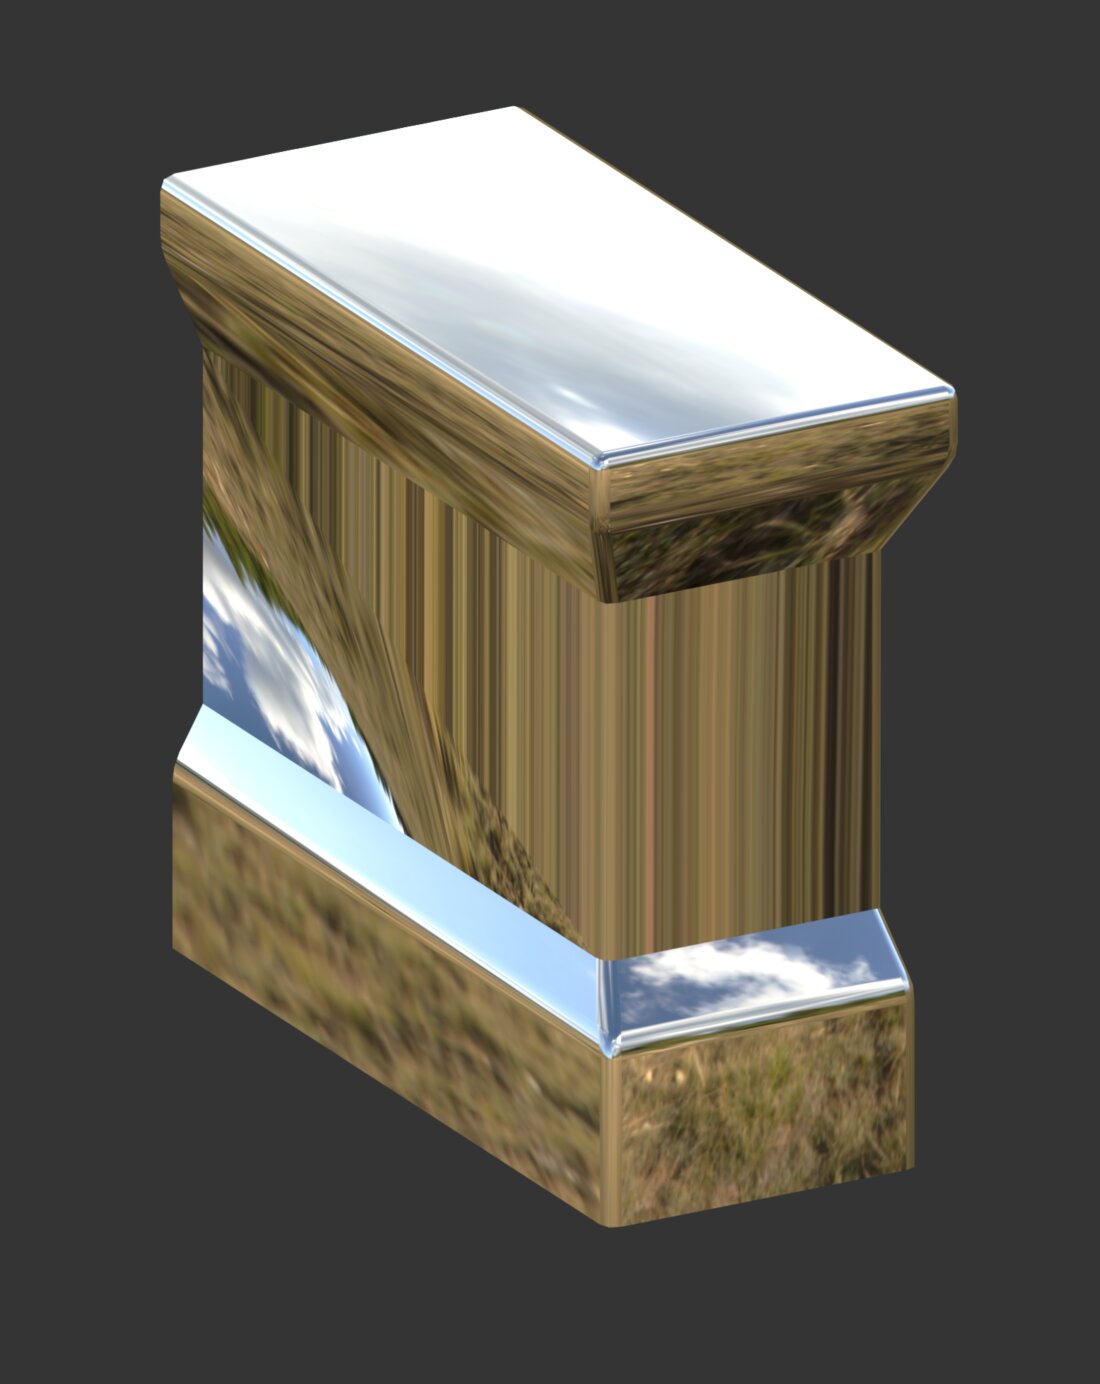
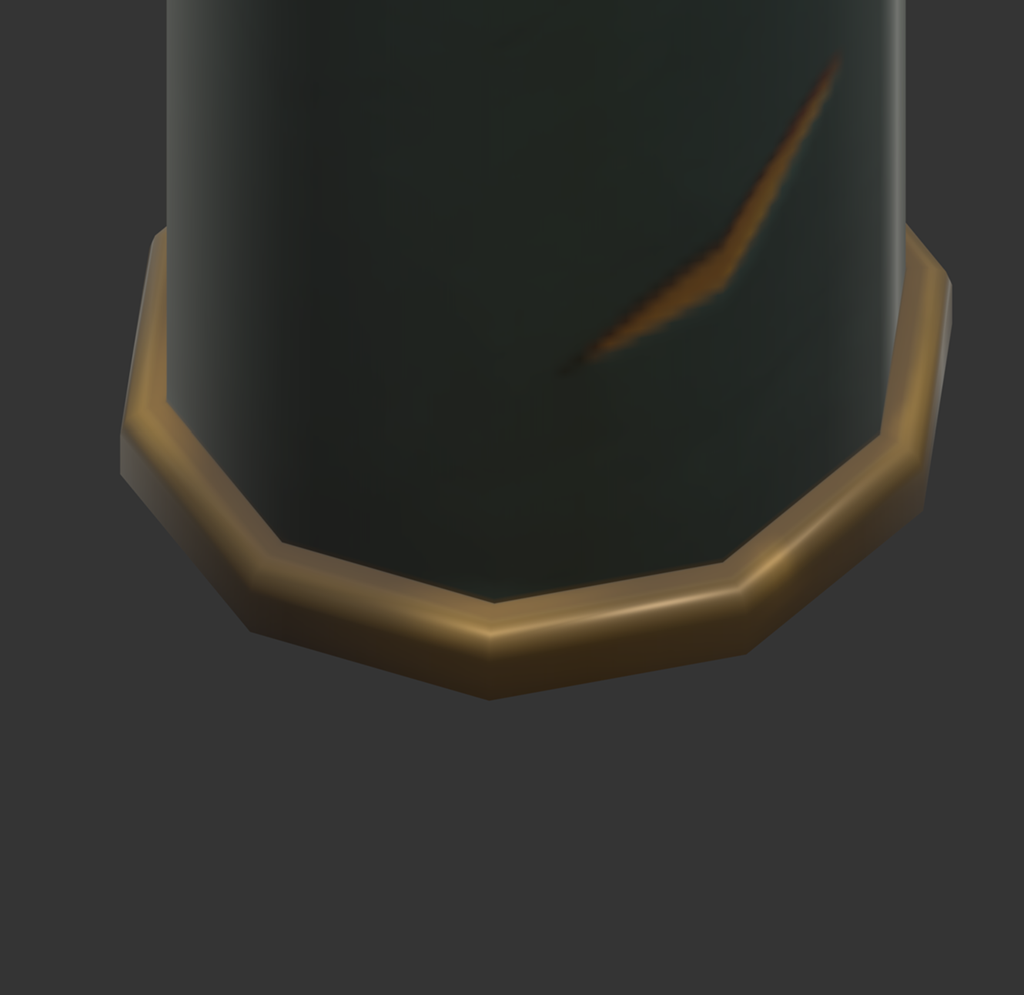
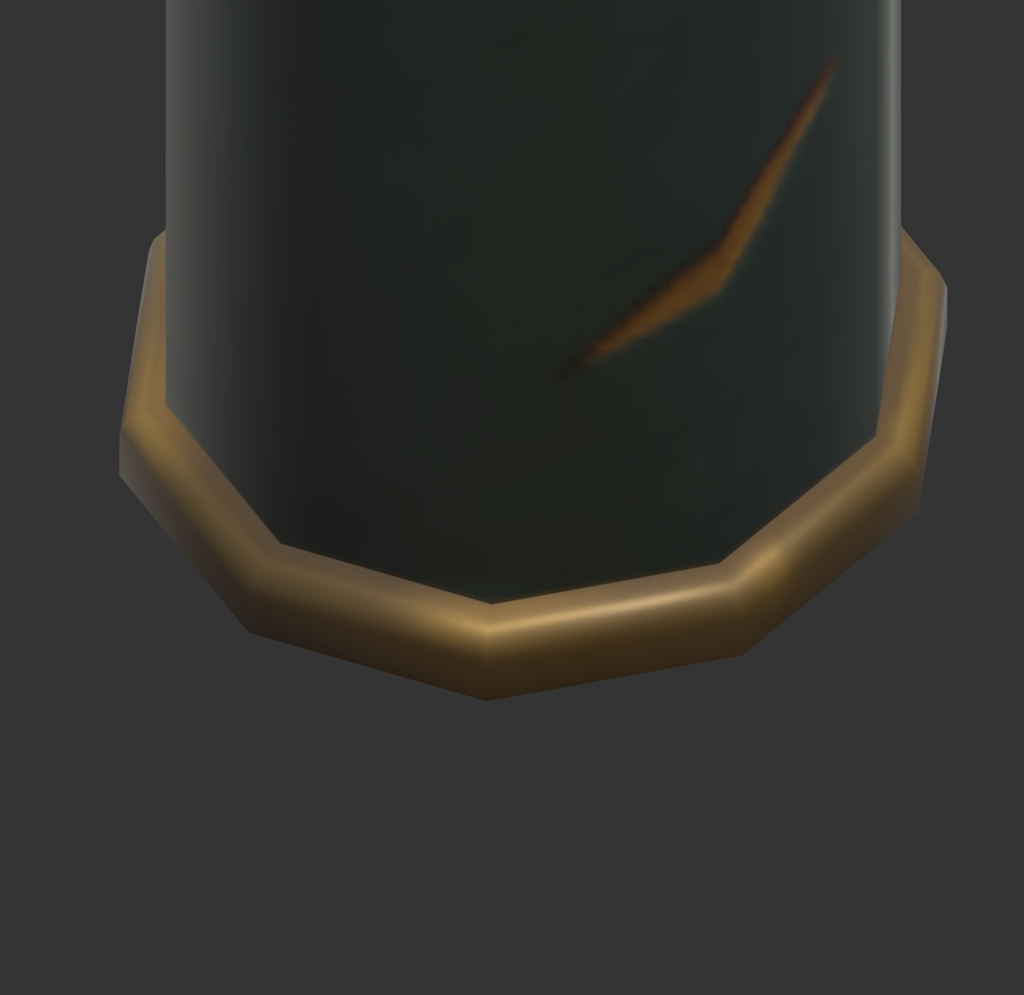
Normal map off / Normal map on
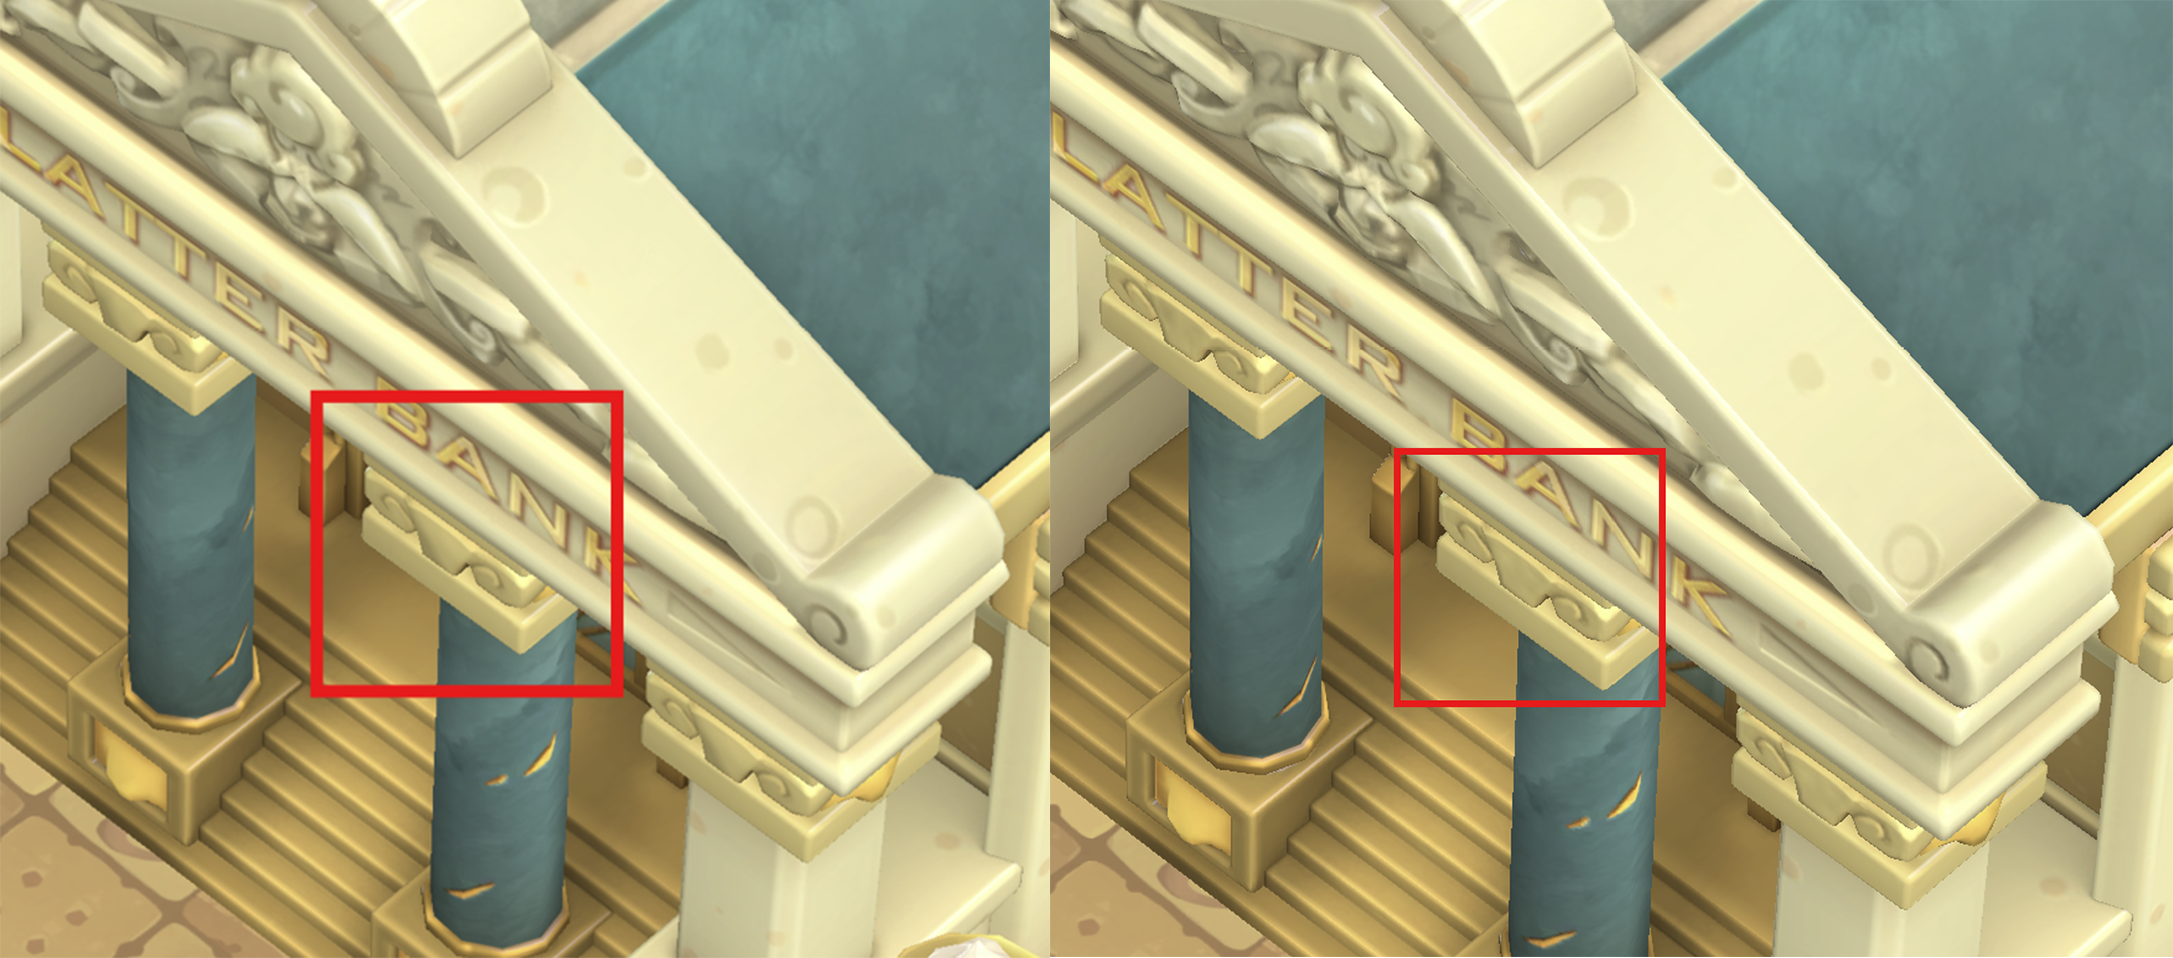
Reviewing the existing mesh
Smooth normals generated via chamfering are in use, but areas that bend against the intent are being interpolated with normal maps.
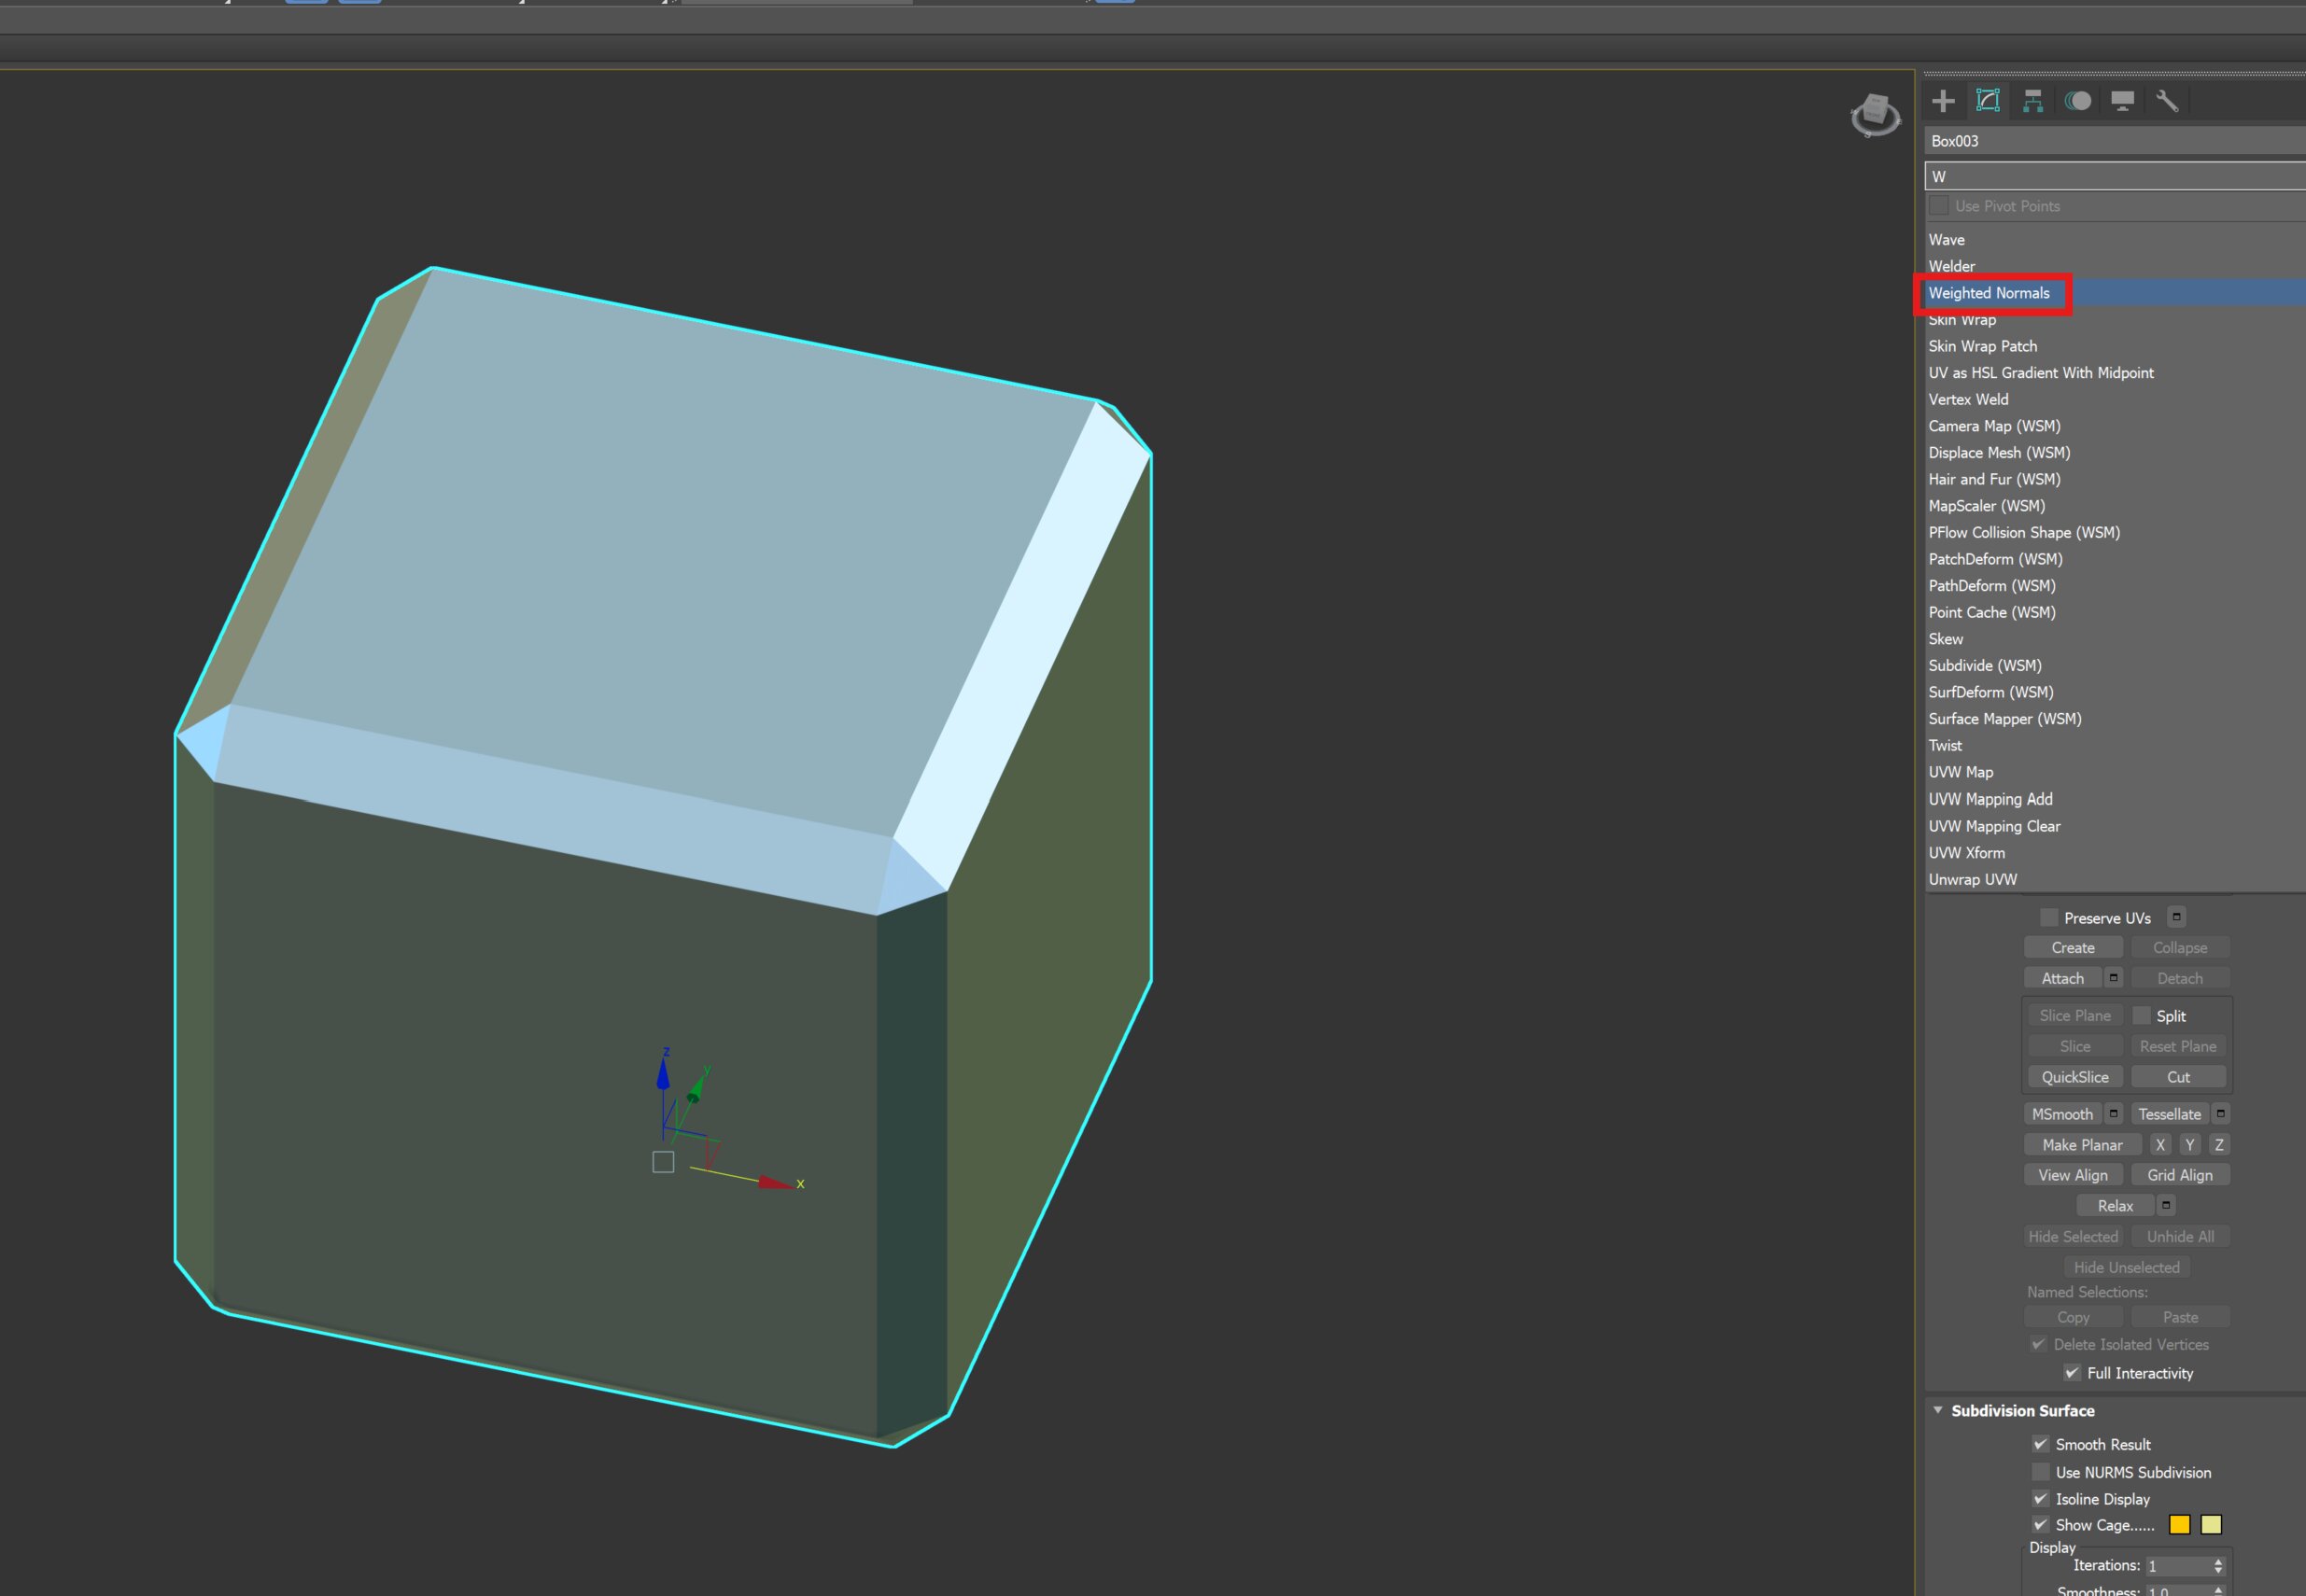
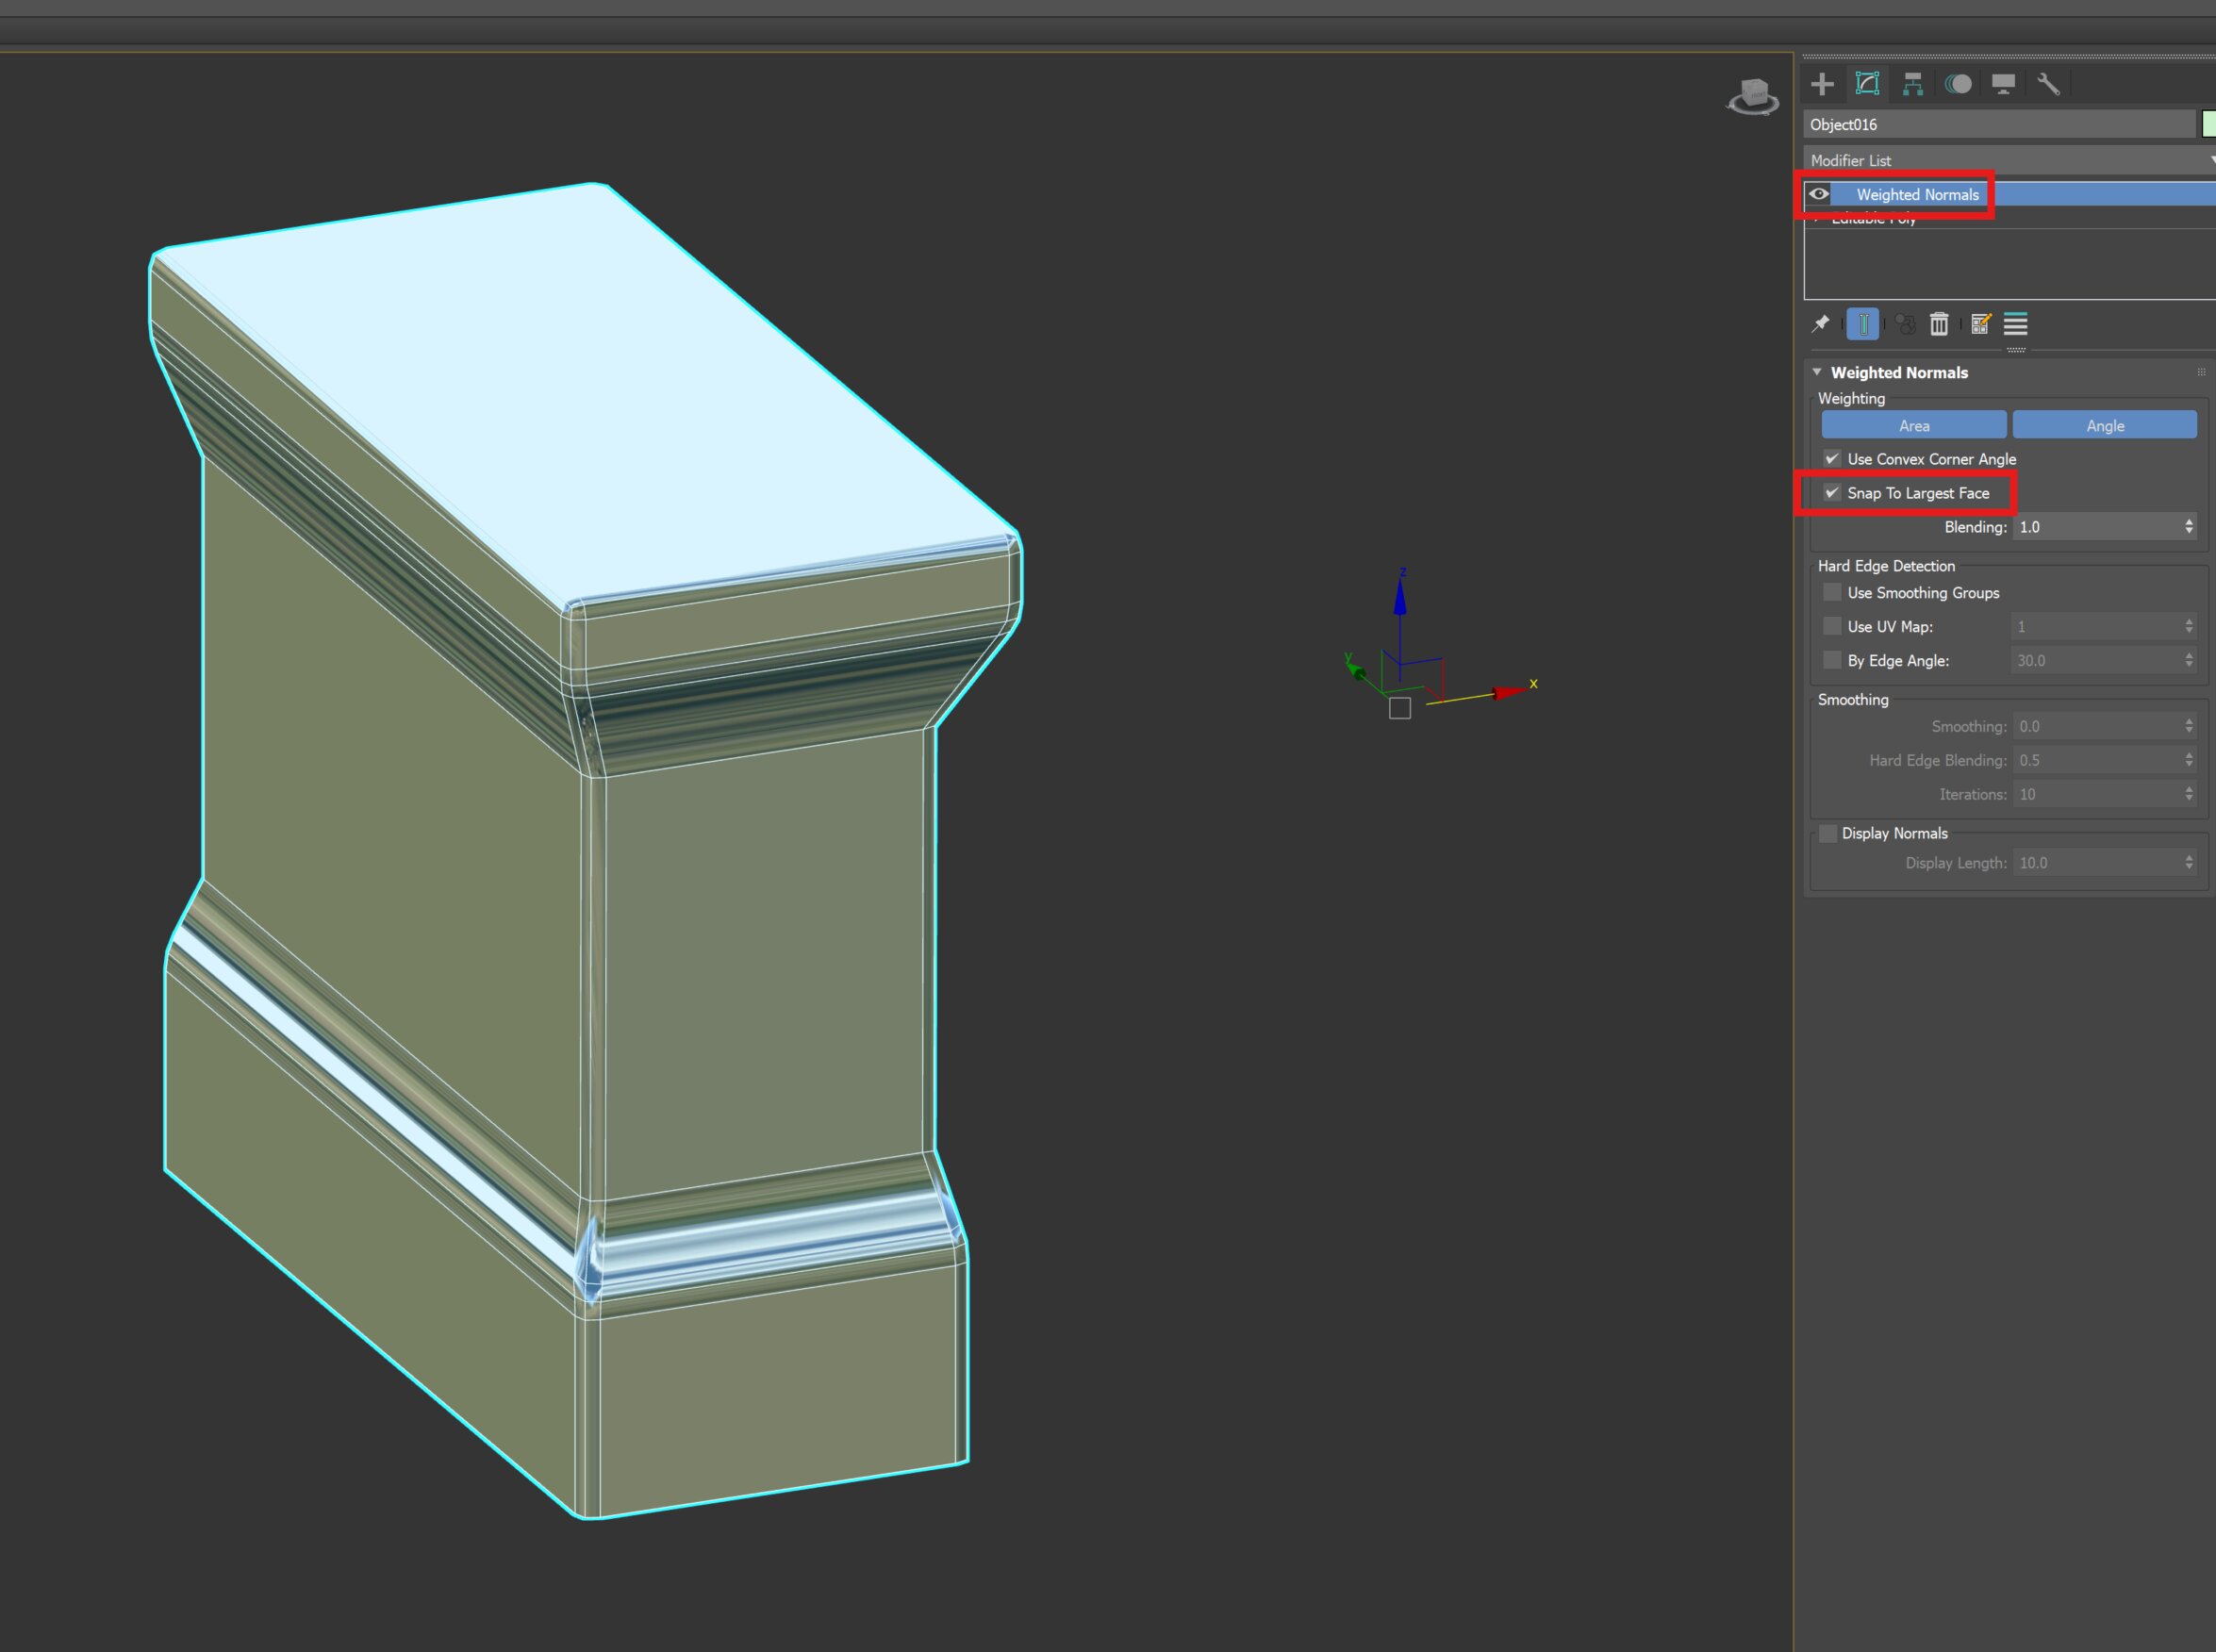
 2. Click Modify → Weighted Normals
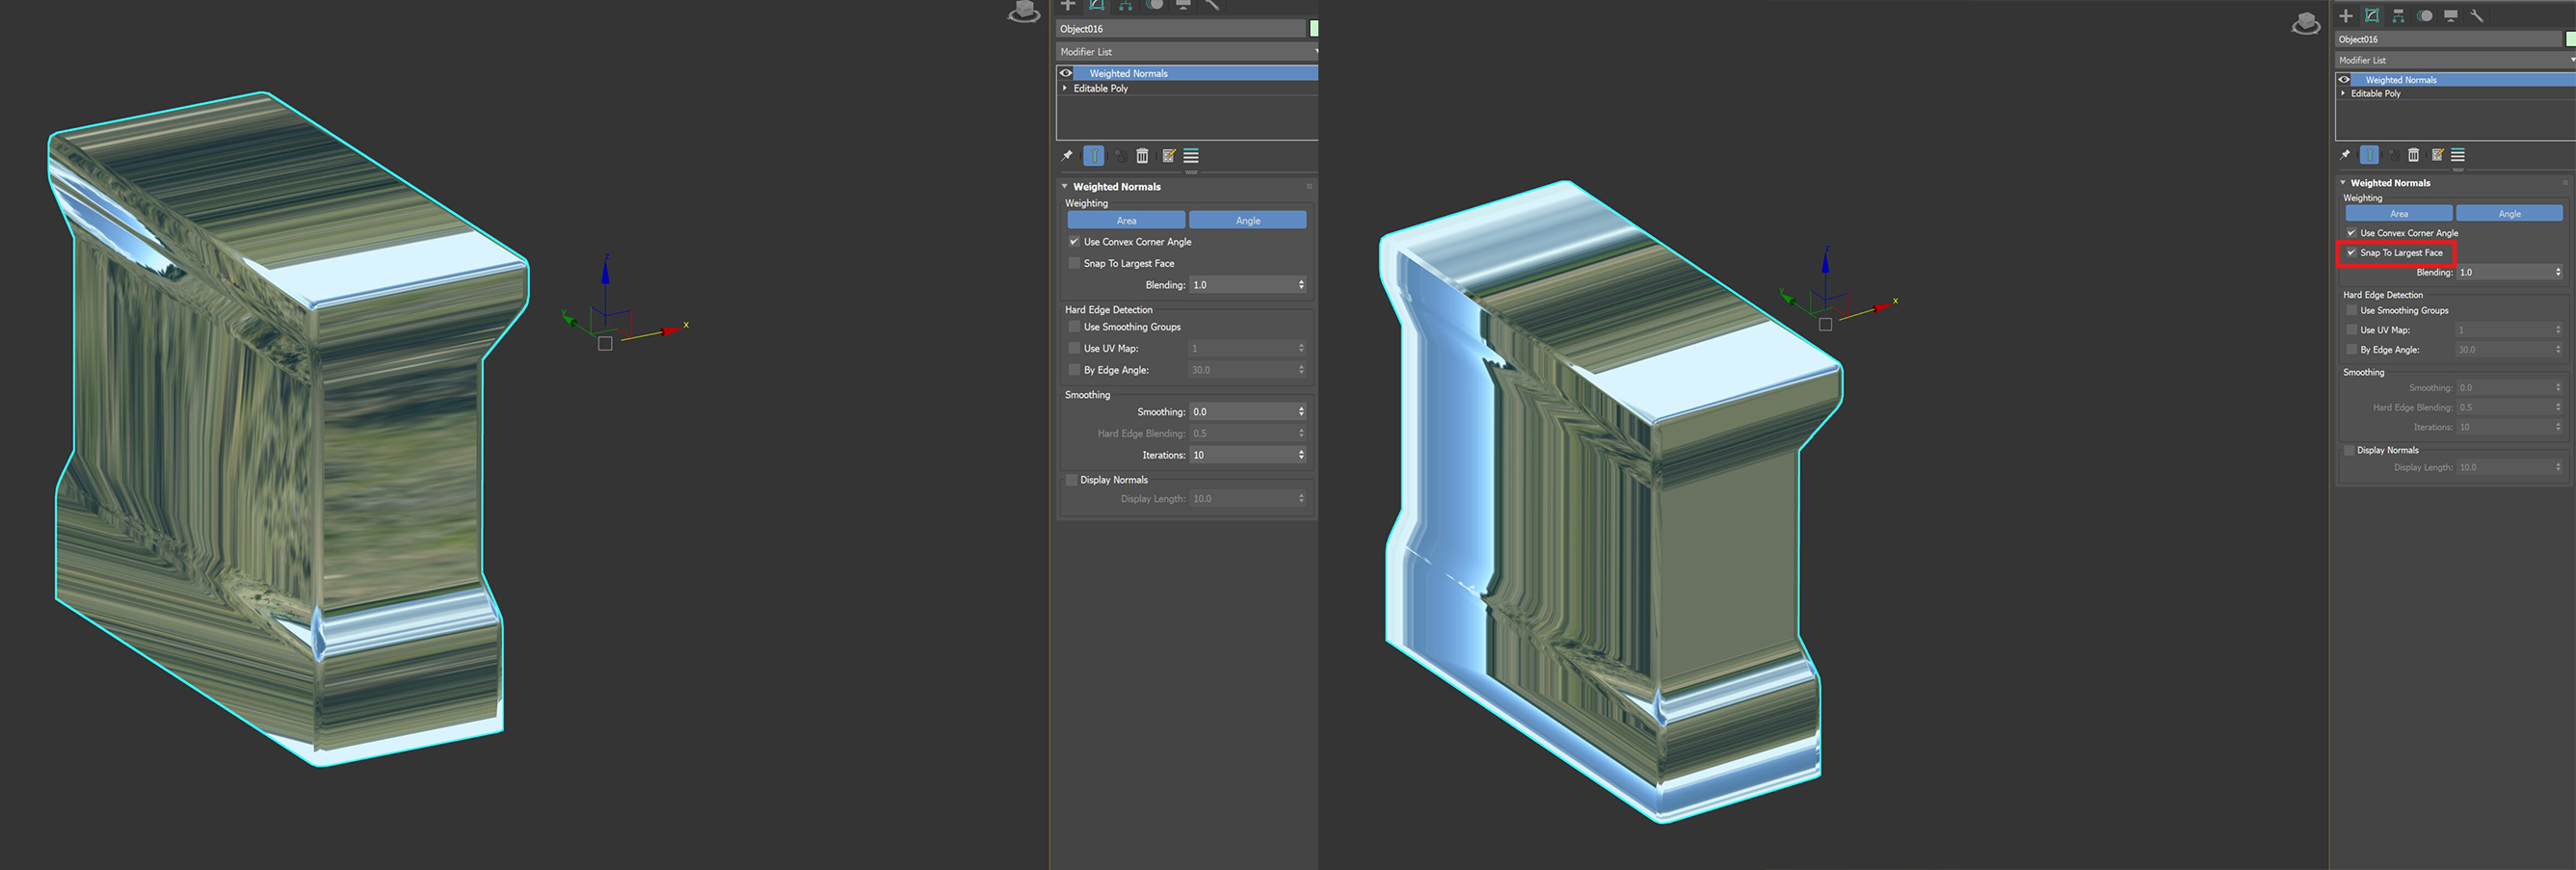
 3. With Weighted Normals, smoothing is generated on edges, but the flat surface is slightly bent.
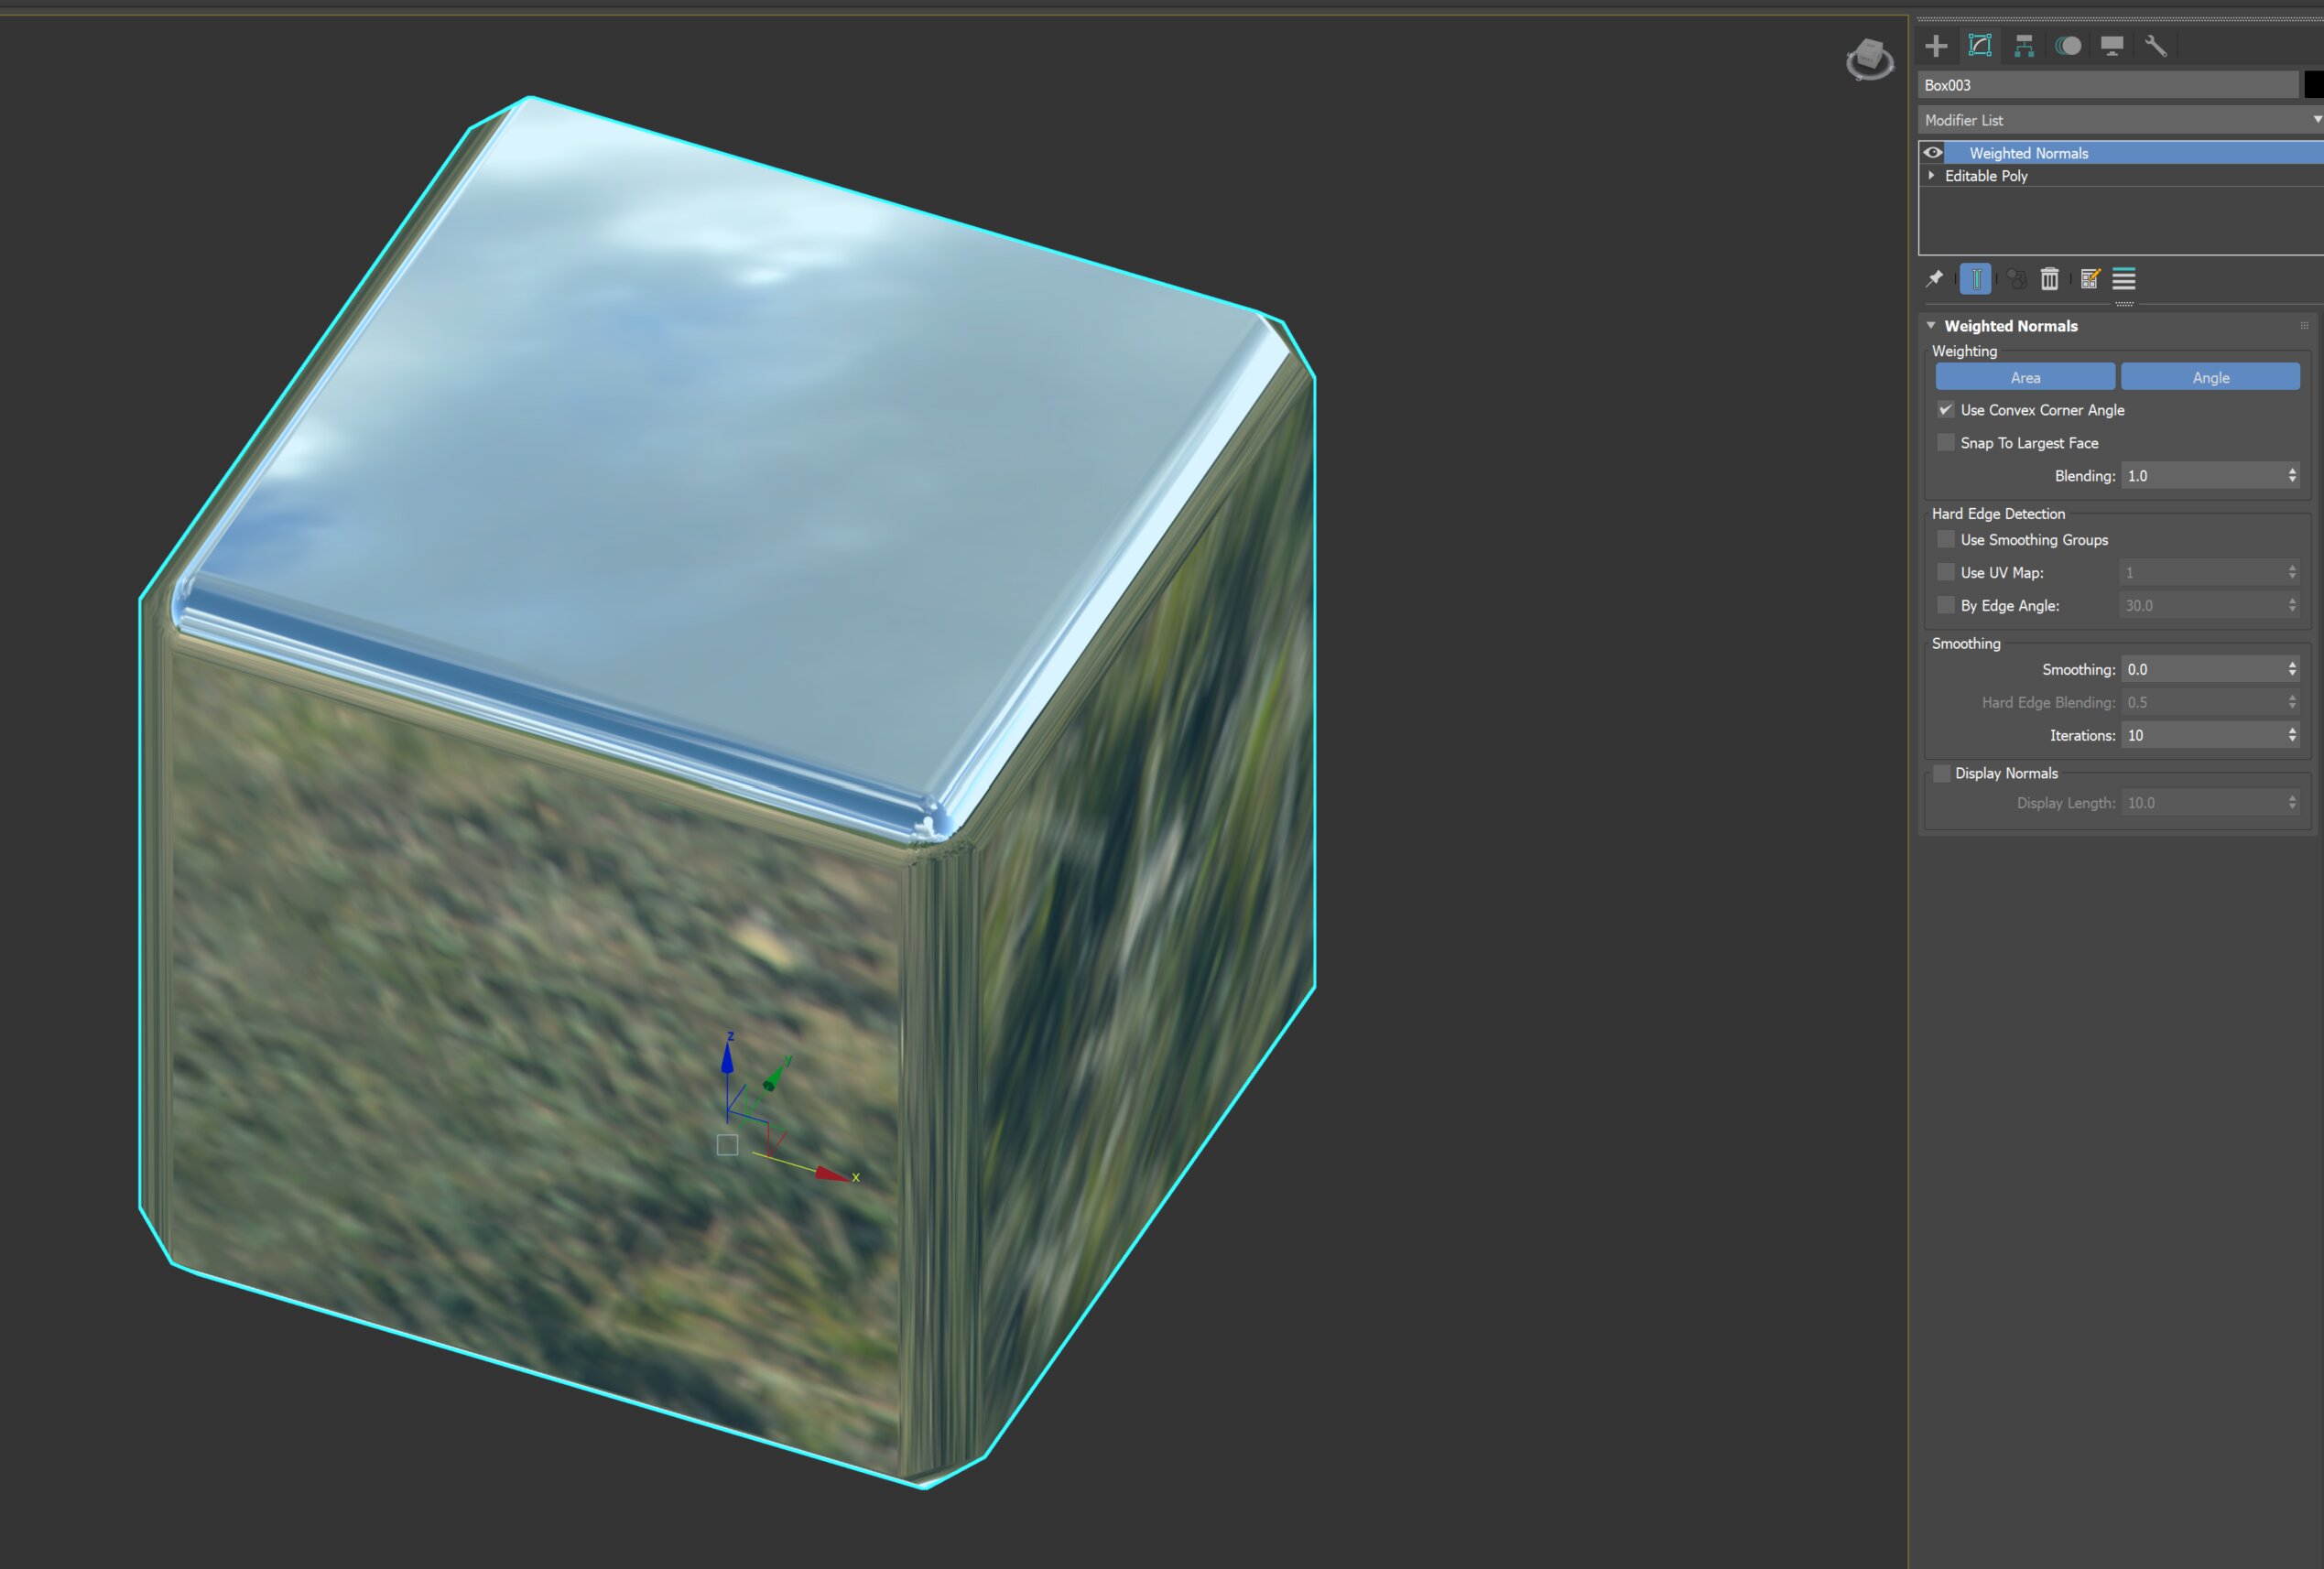 4. Check Snap To Largest Face — finds the larger surrounding face and flattens to it.
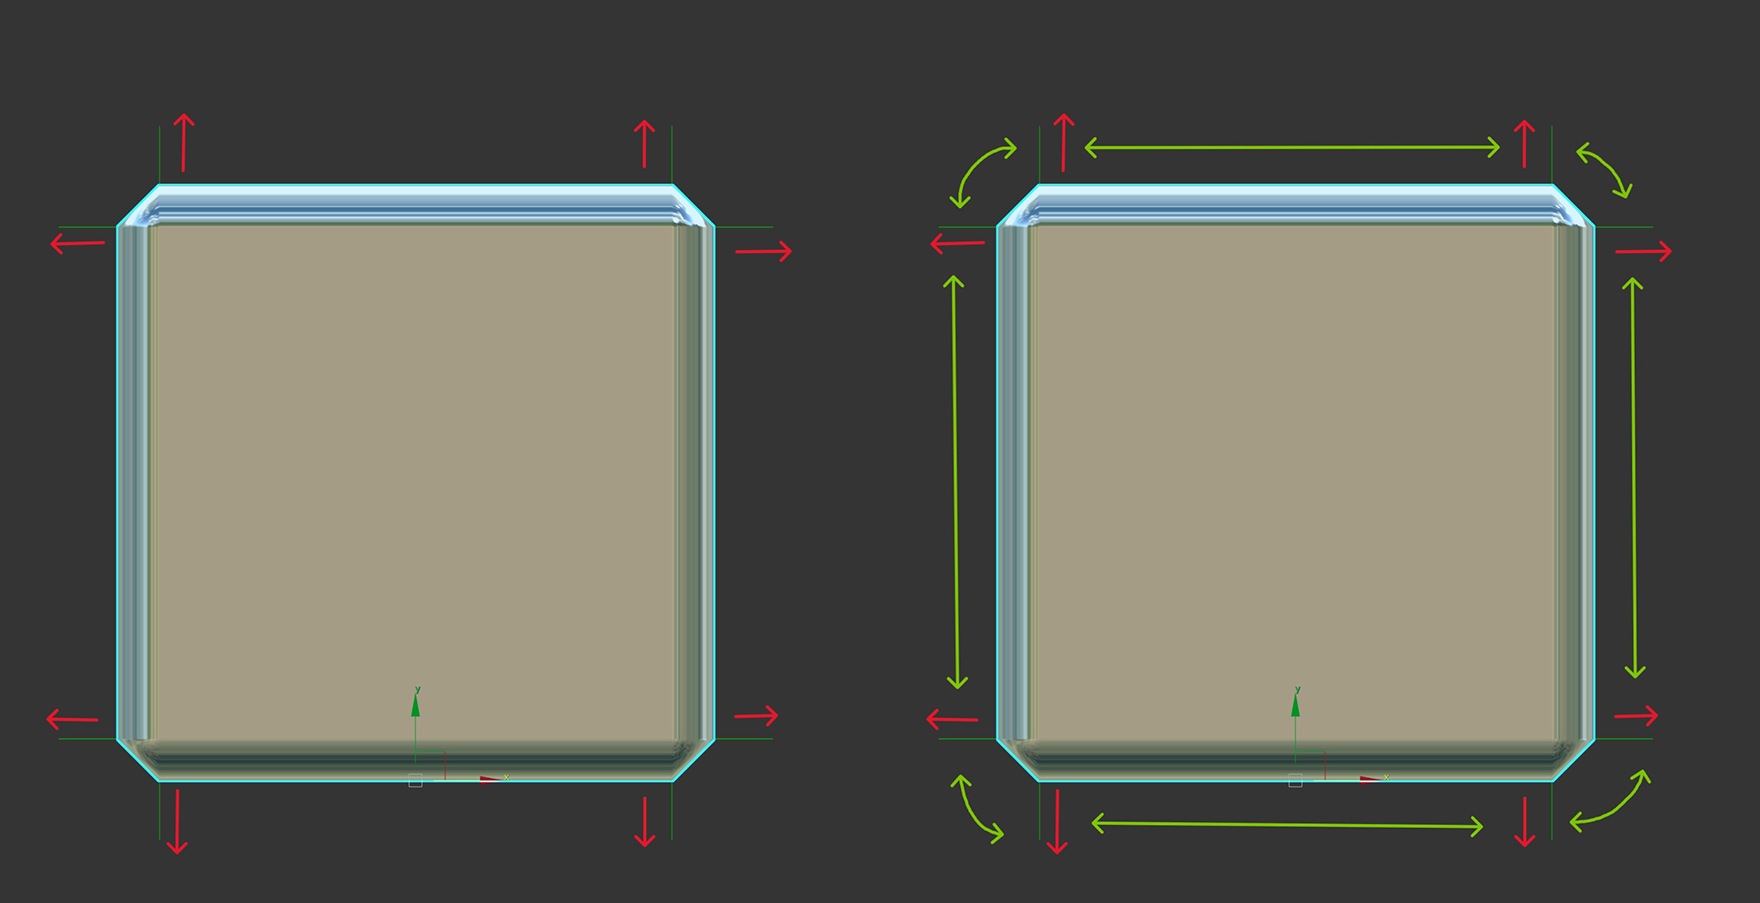
 ### How it works
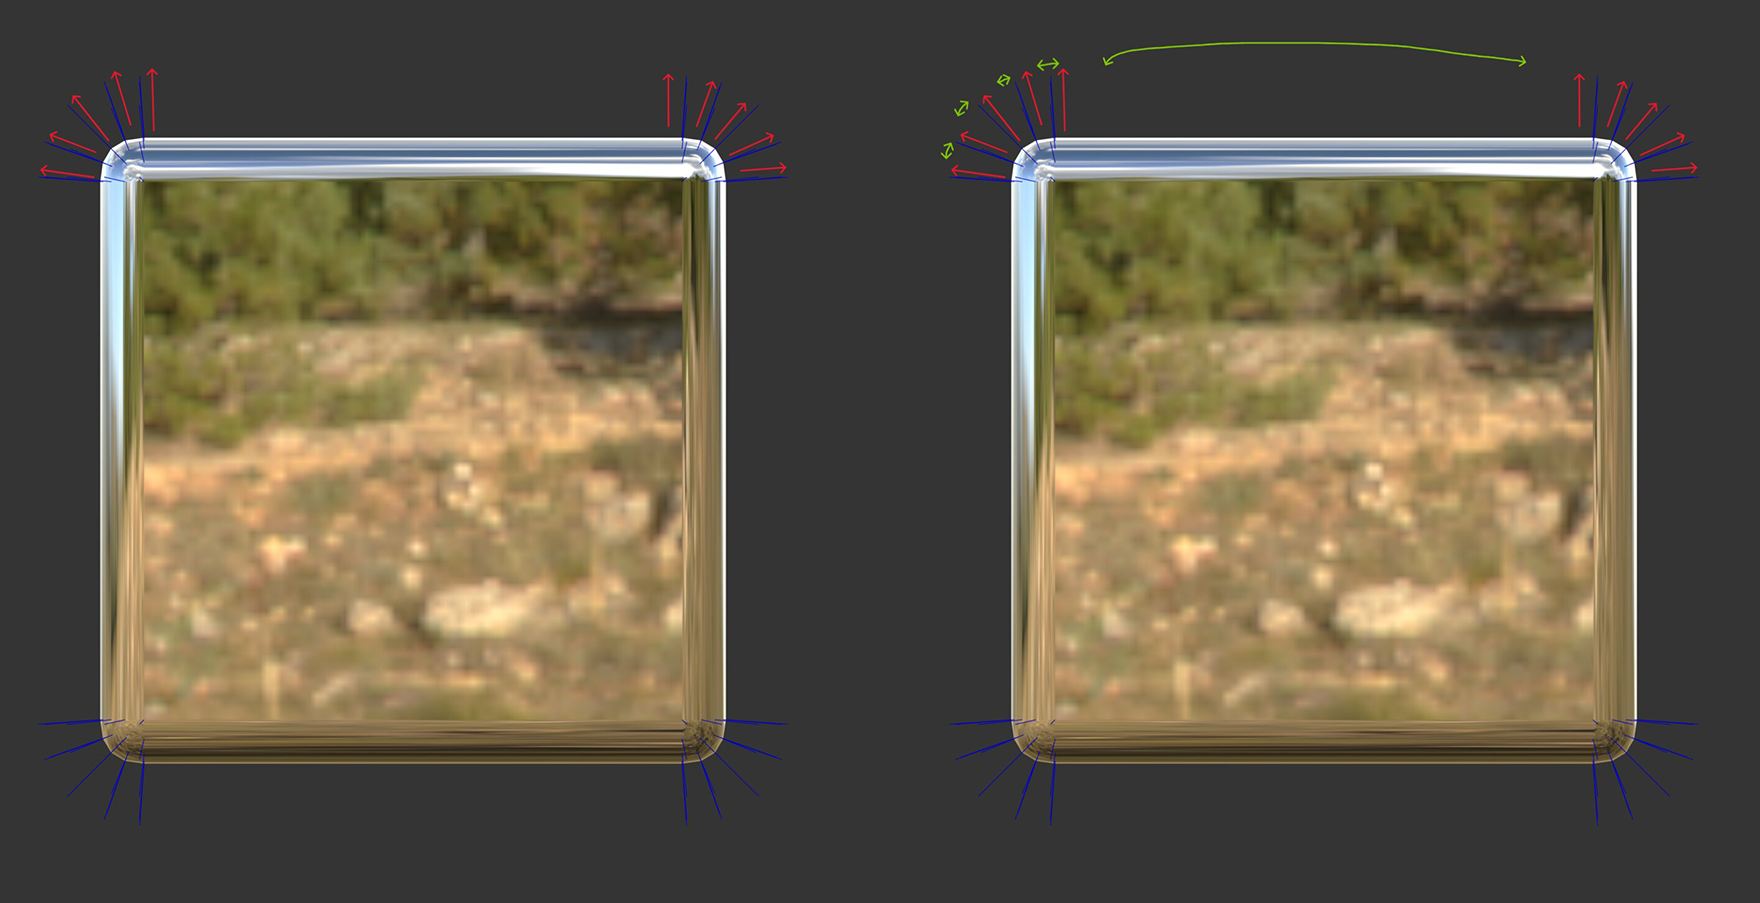 Applying this,
you place vertices only where the surface should bend, and the remaining directions are filled in by interpolation.
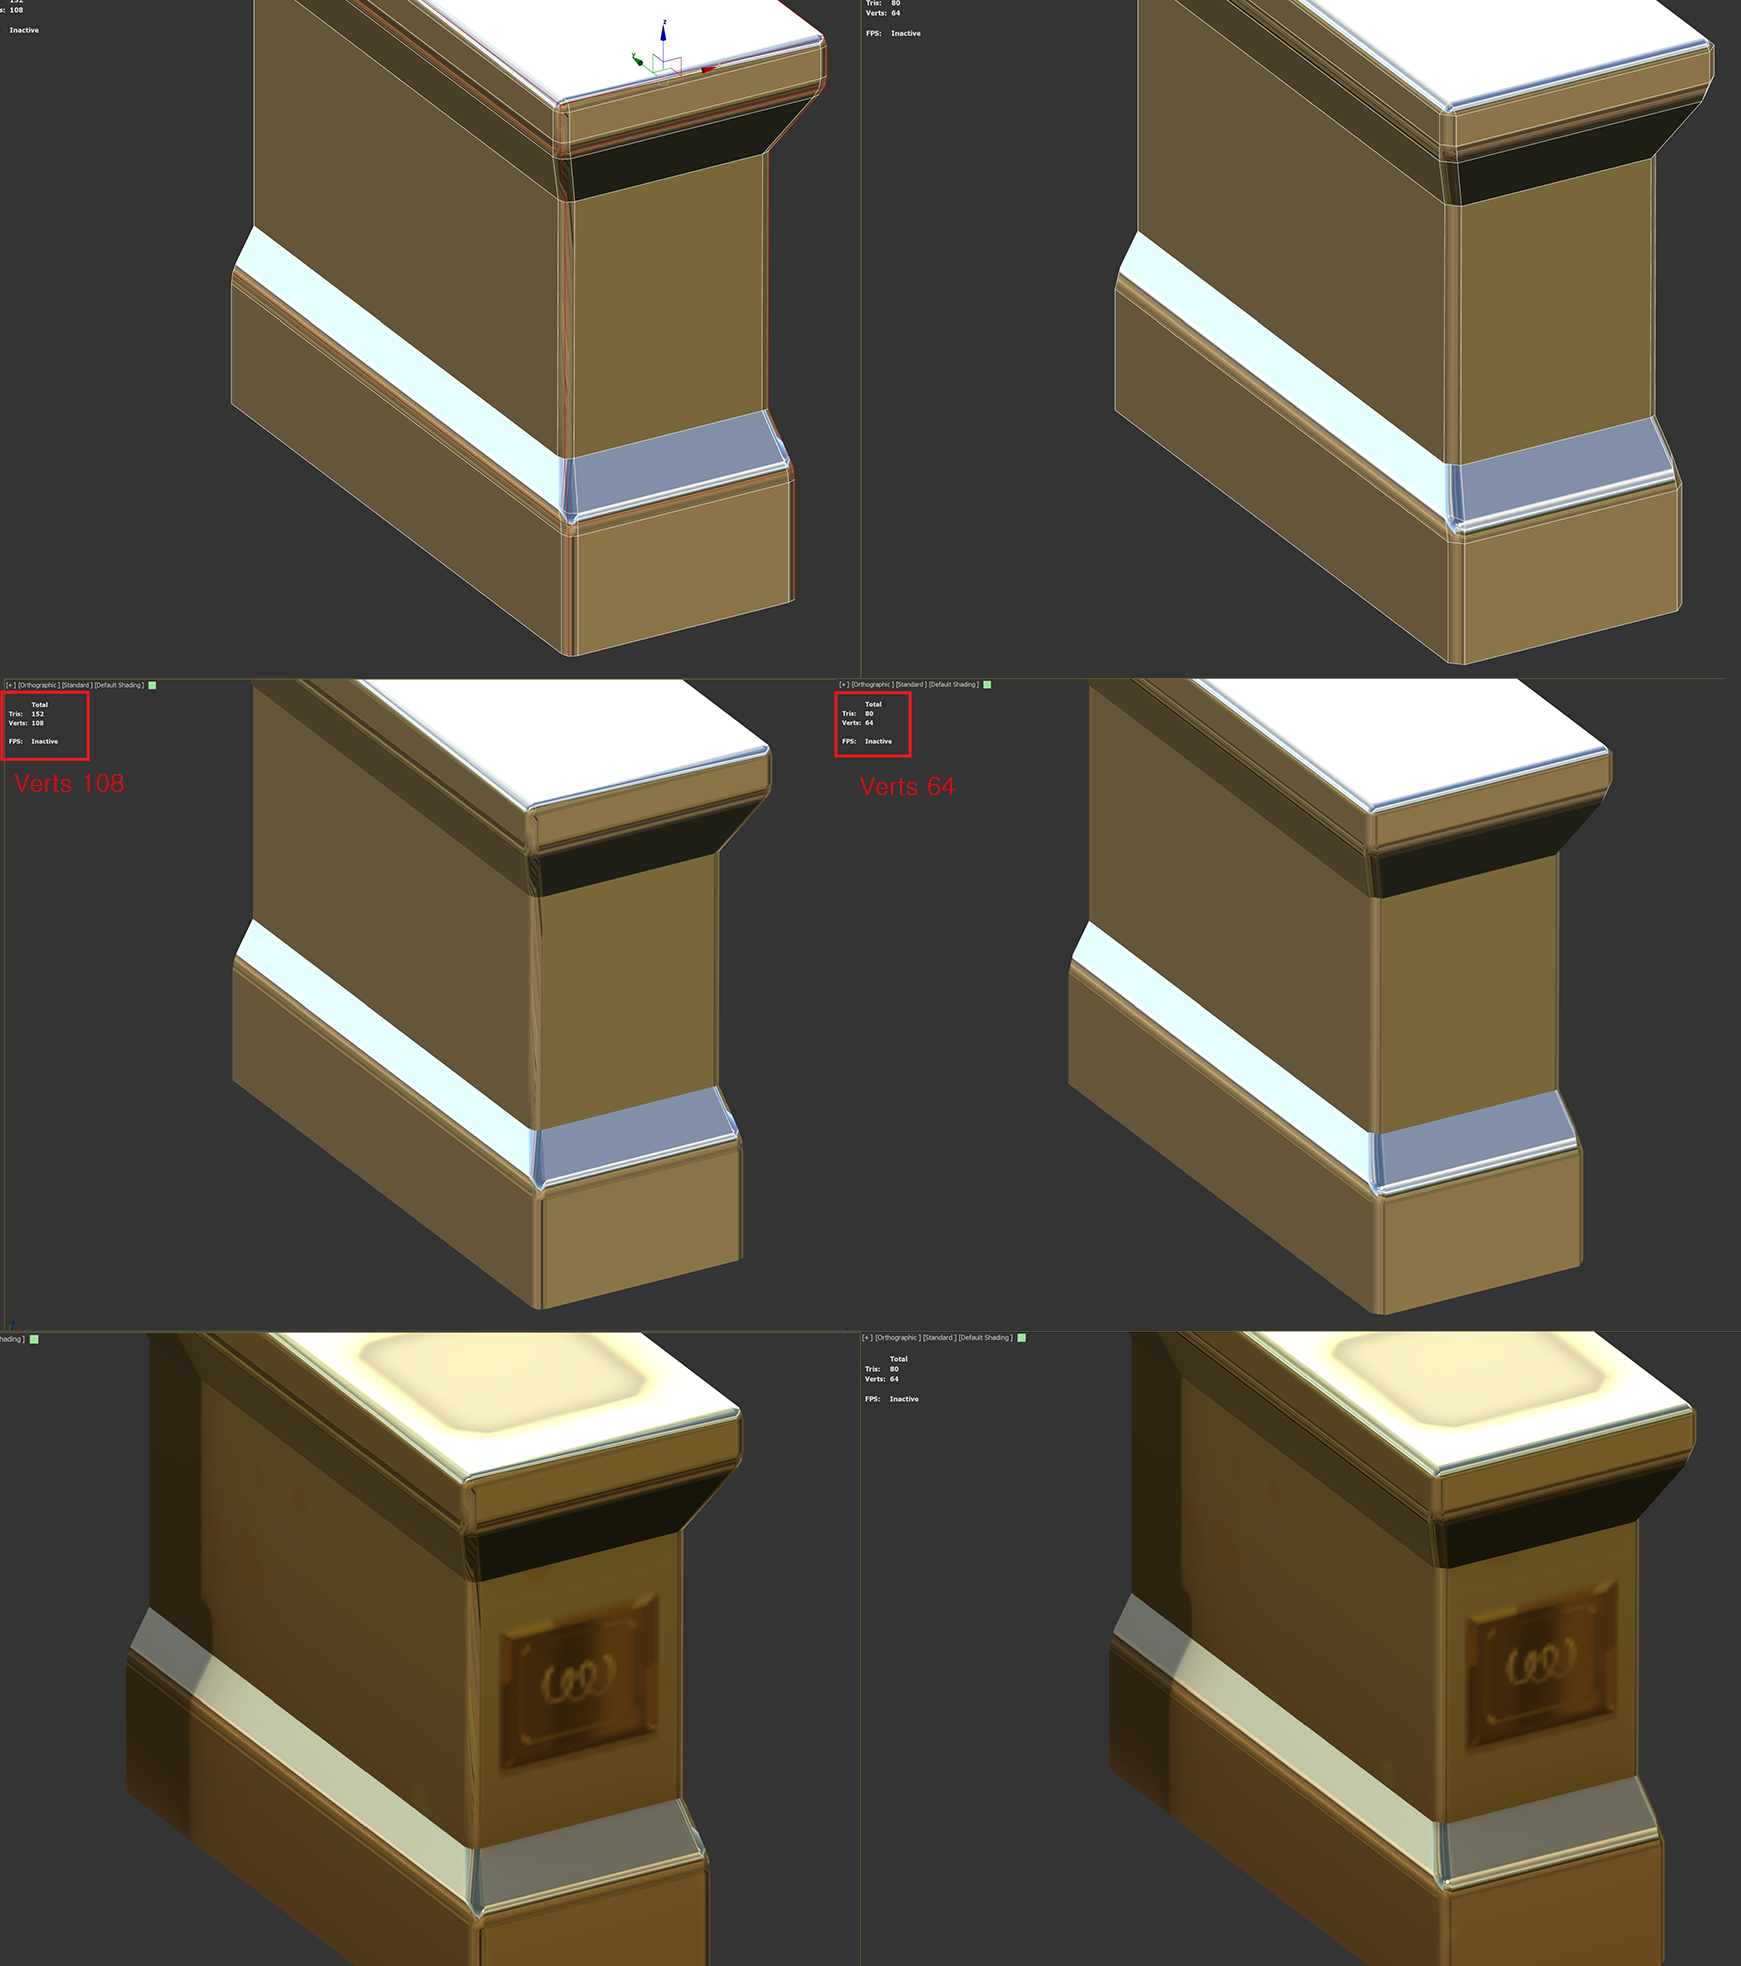
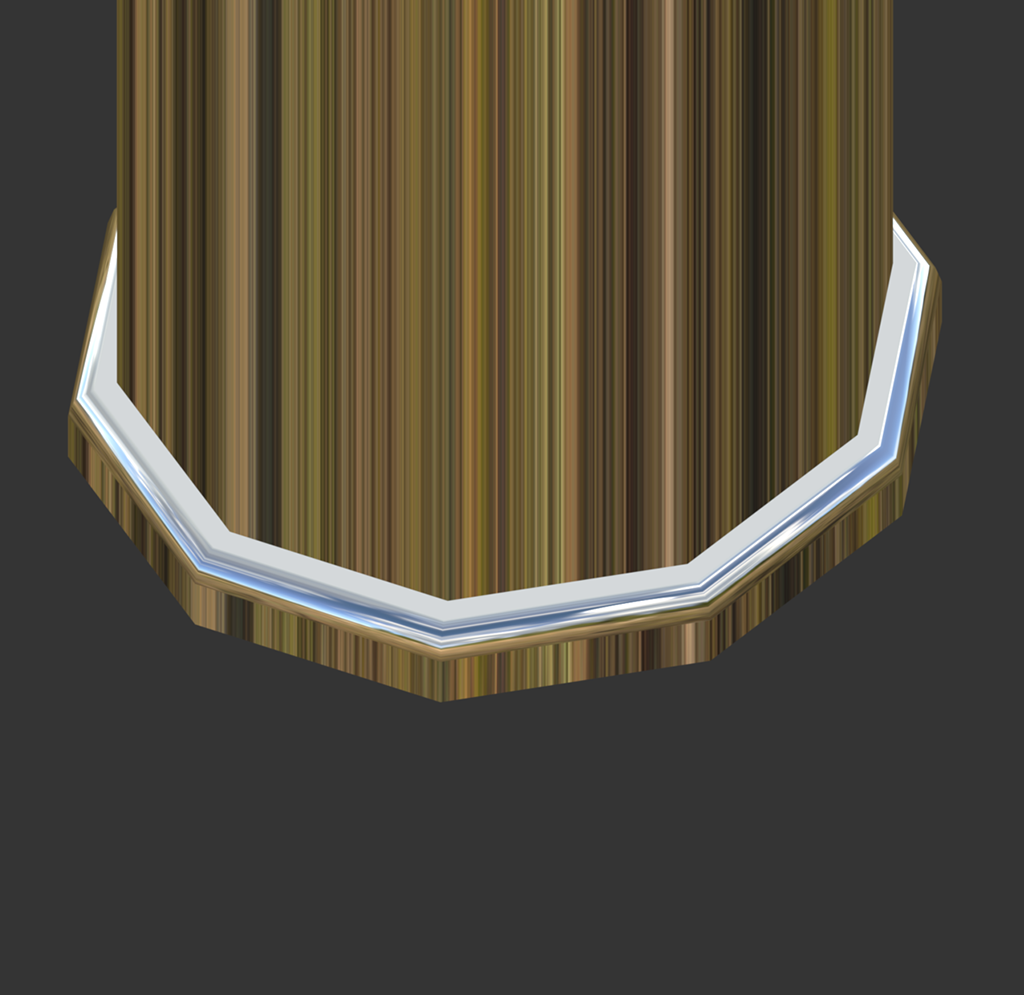
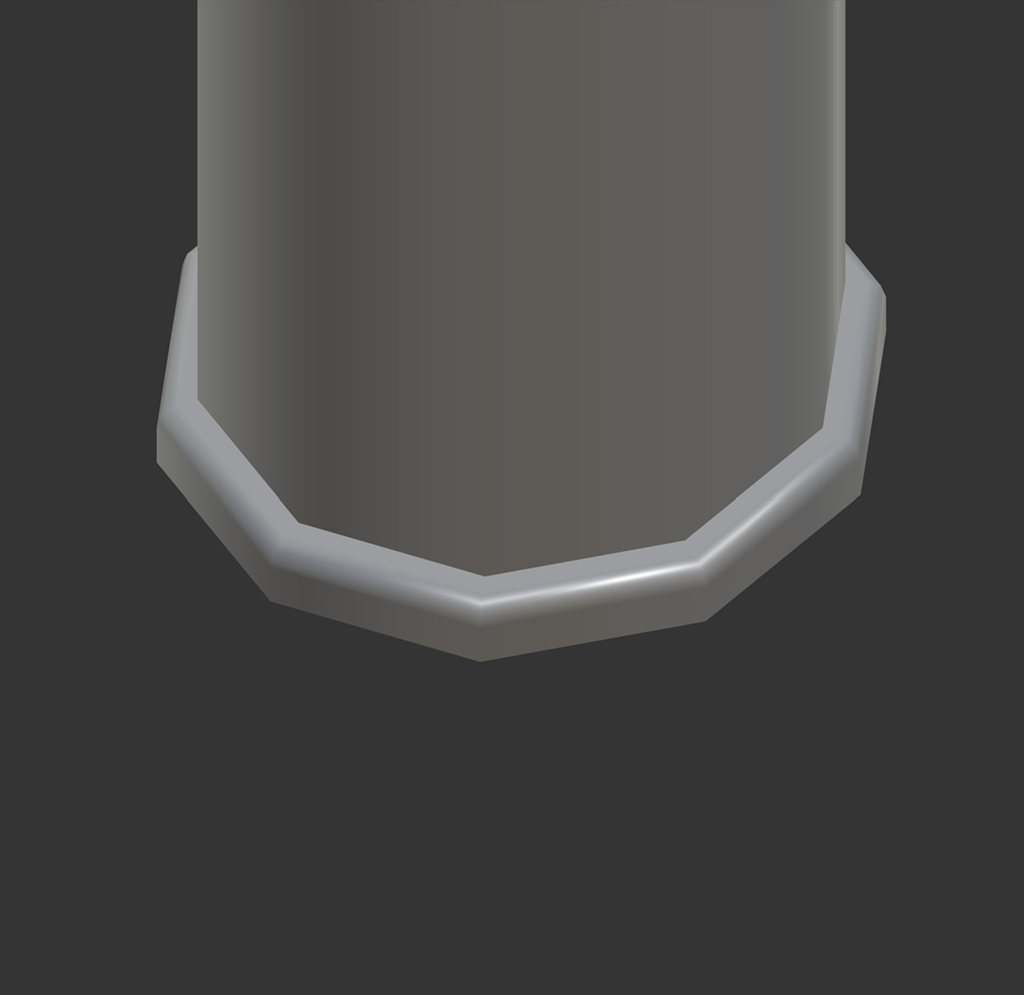
Before correction
 1. Even in Weighted Normals state, it doesn't look right.
 2. Remove the back face (no chamfer)
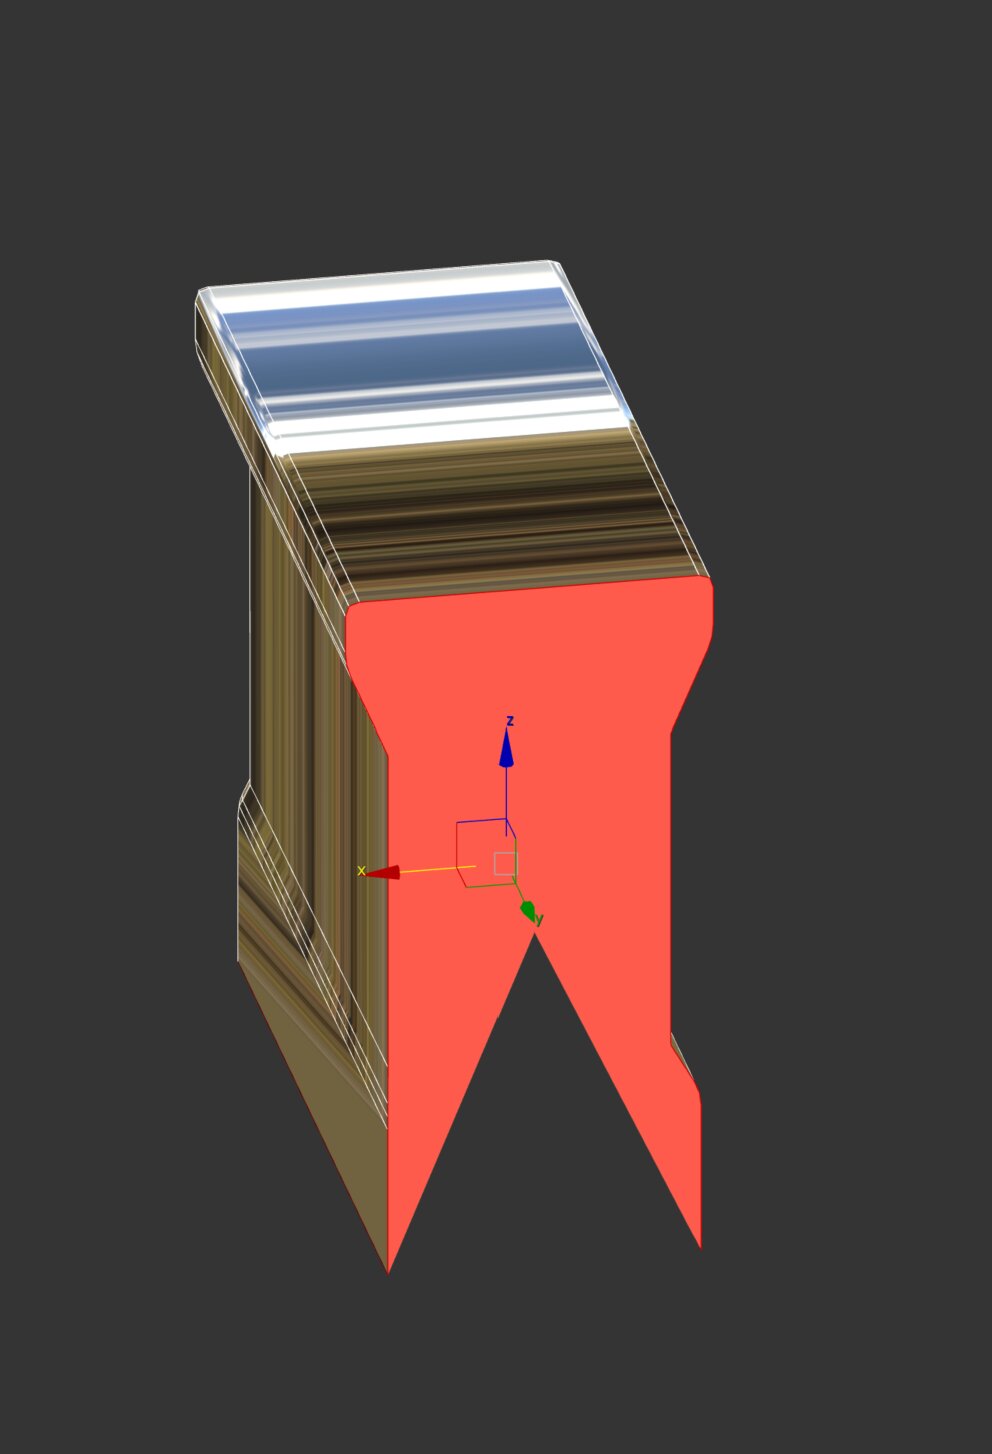 3. Even after removing the back face and applying Weighted Normal, the desired curvature is not produced.
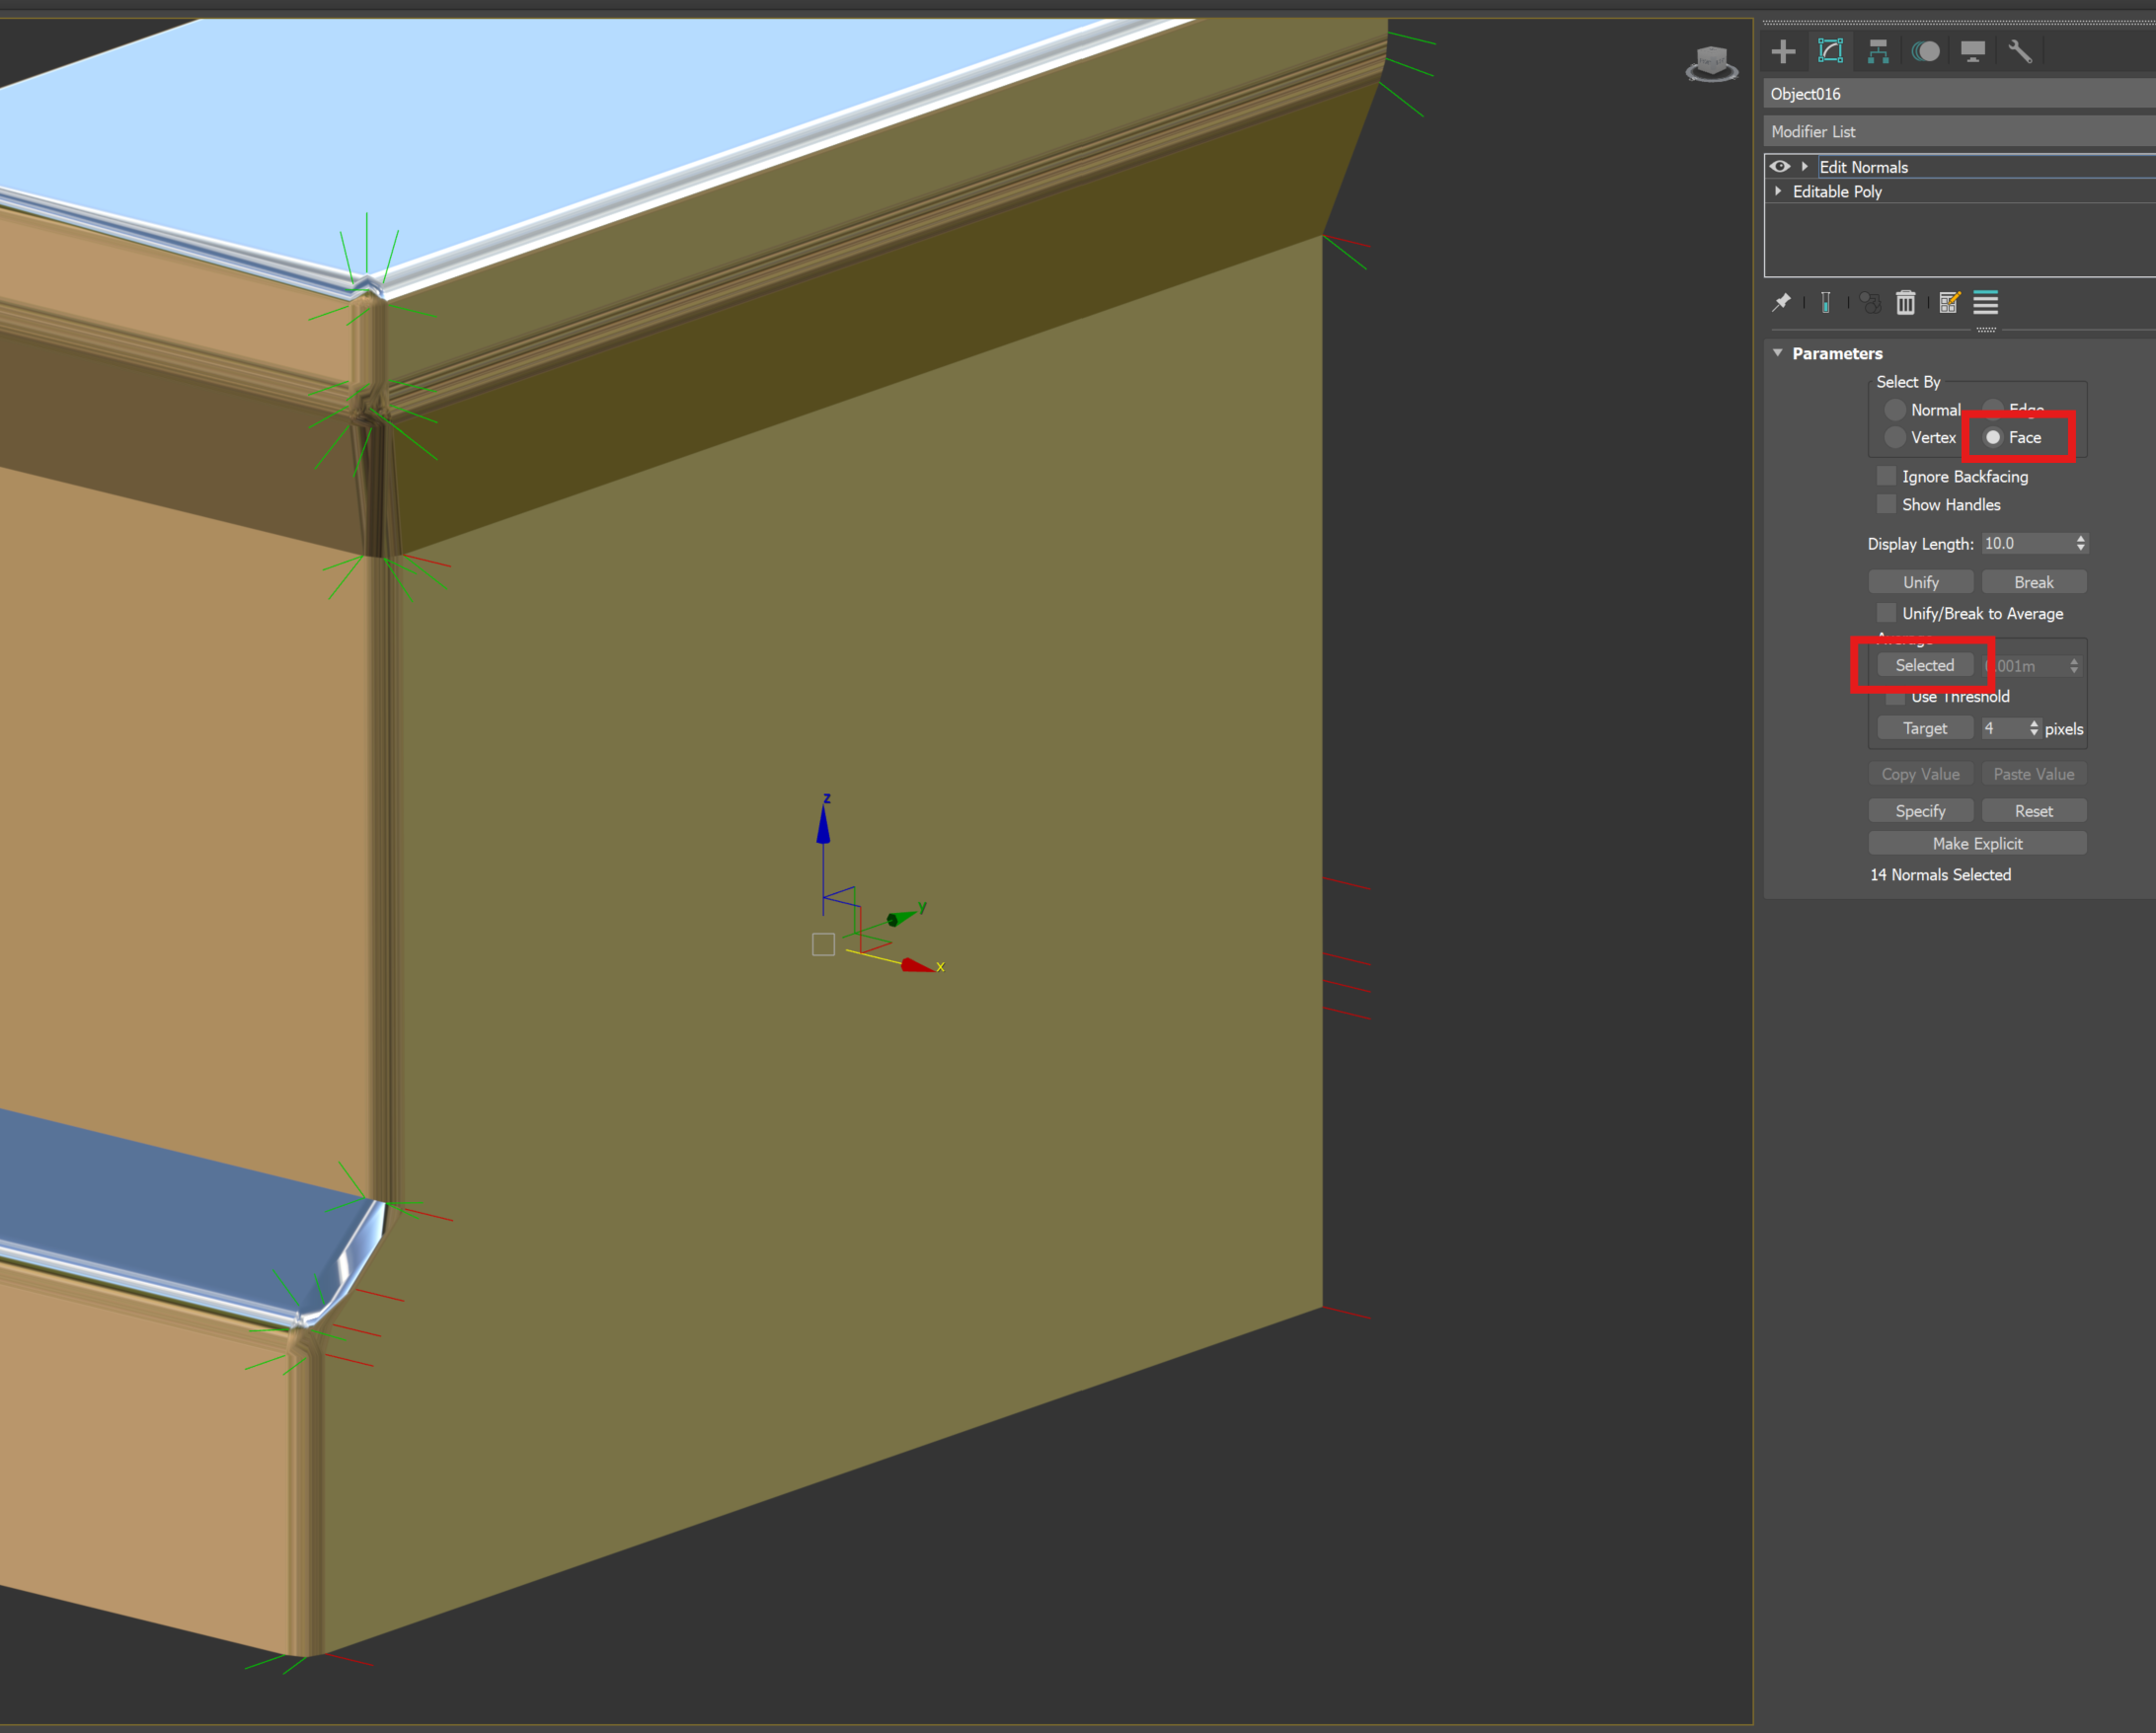
 4. Checking with Edit Normal shows that the area which should be split has only one vertex normal direction.
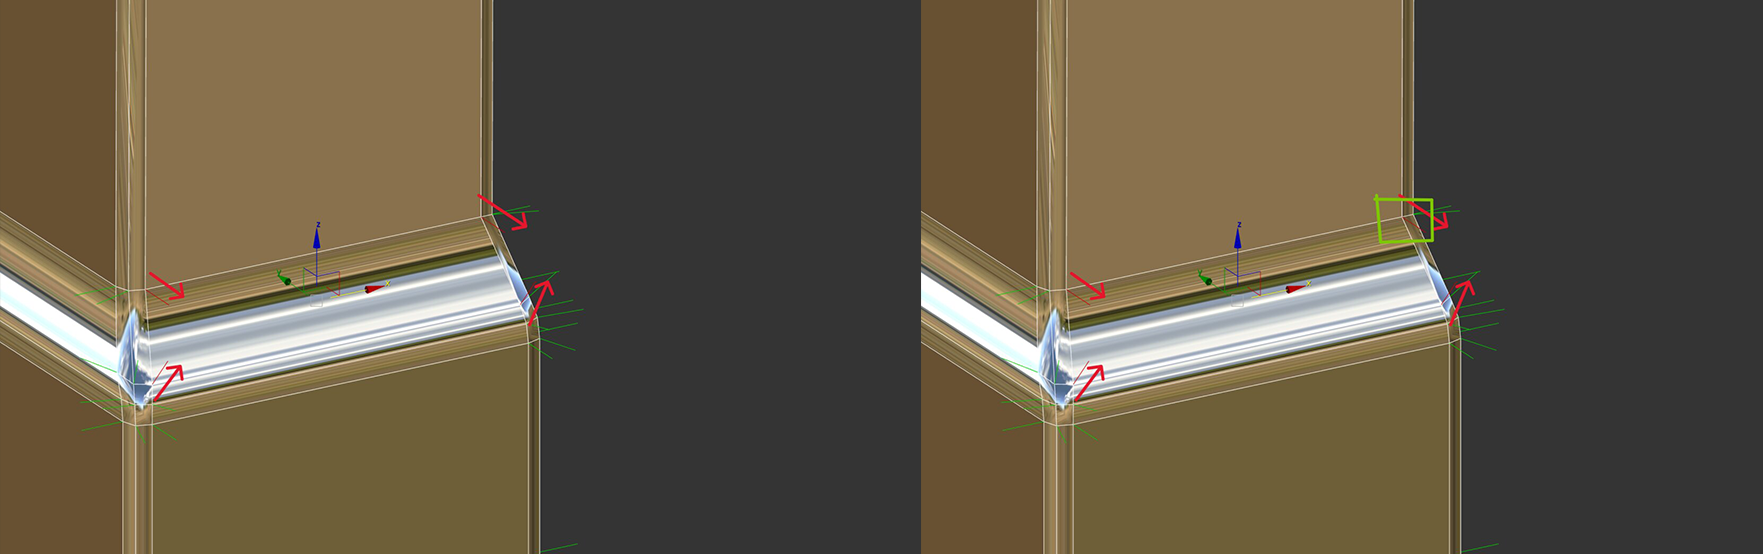
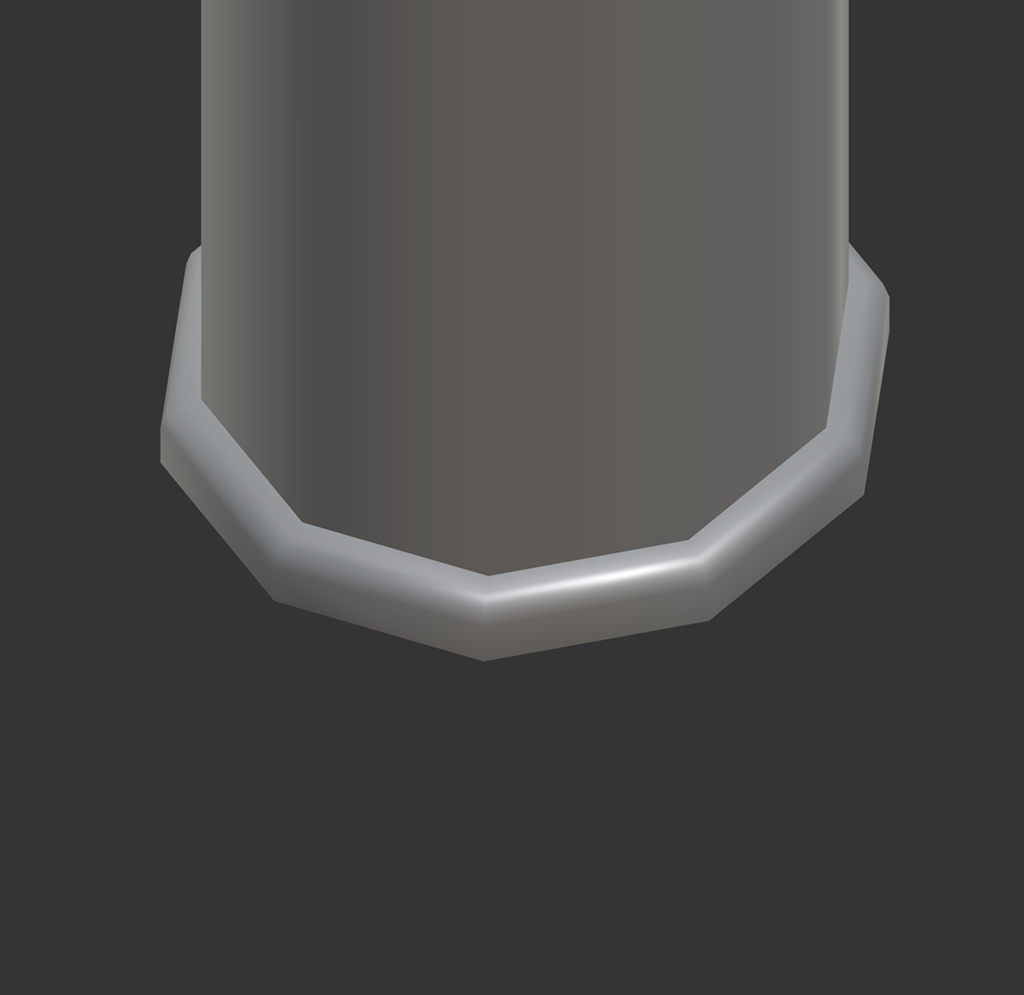
Edge Split
Applying Weighted Normal afterwards now lets the split vertices each have their own direction.
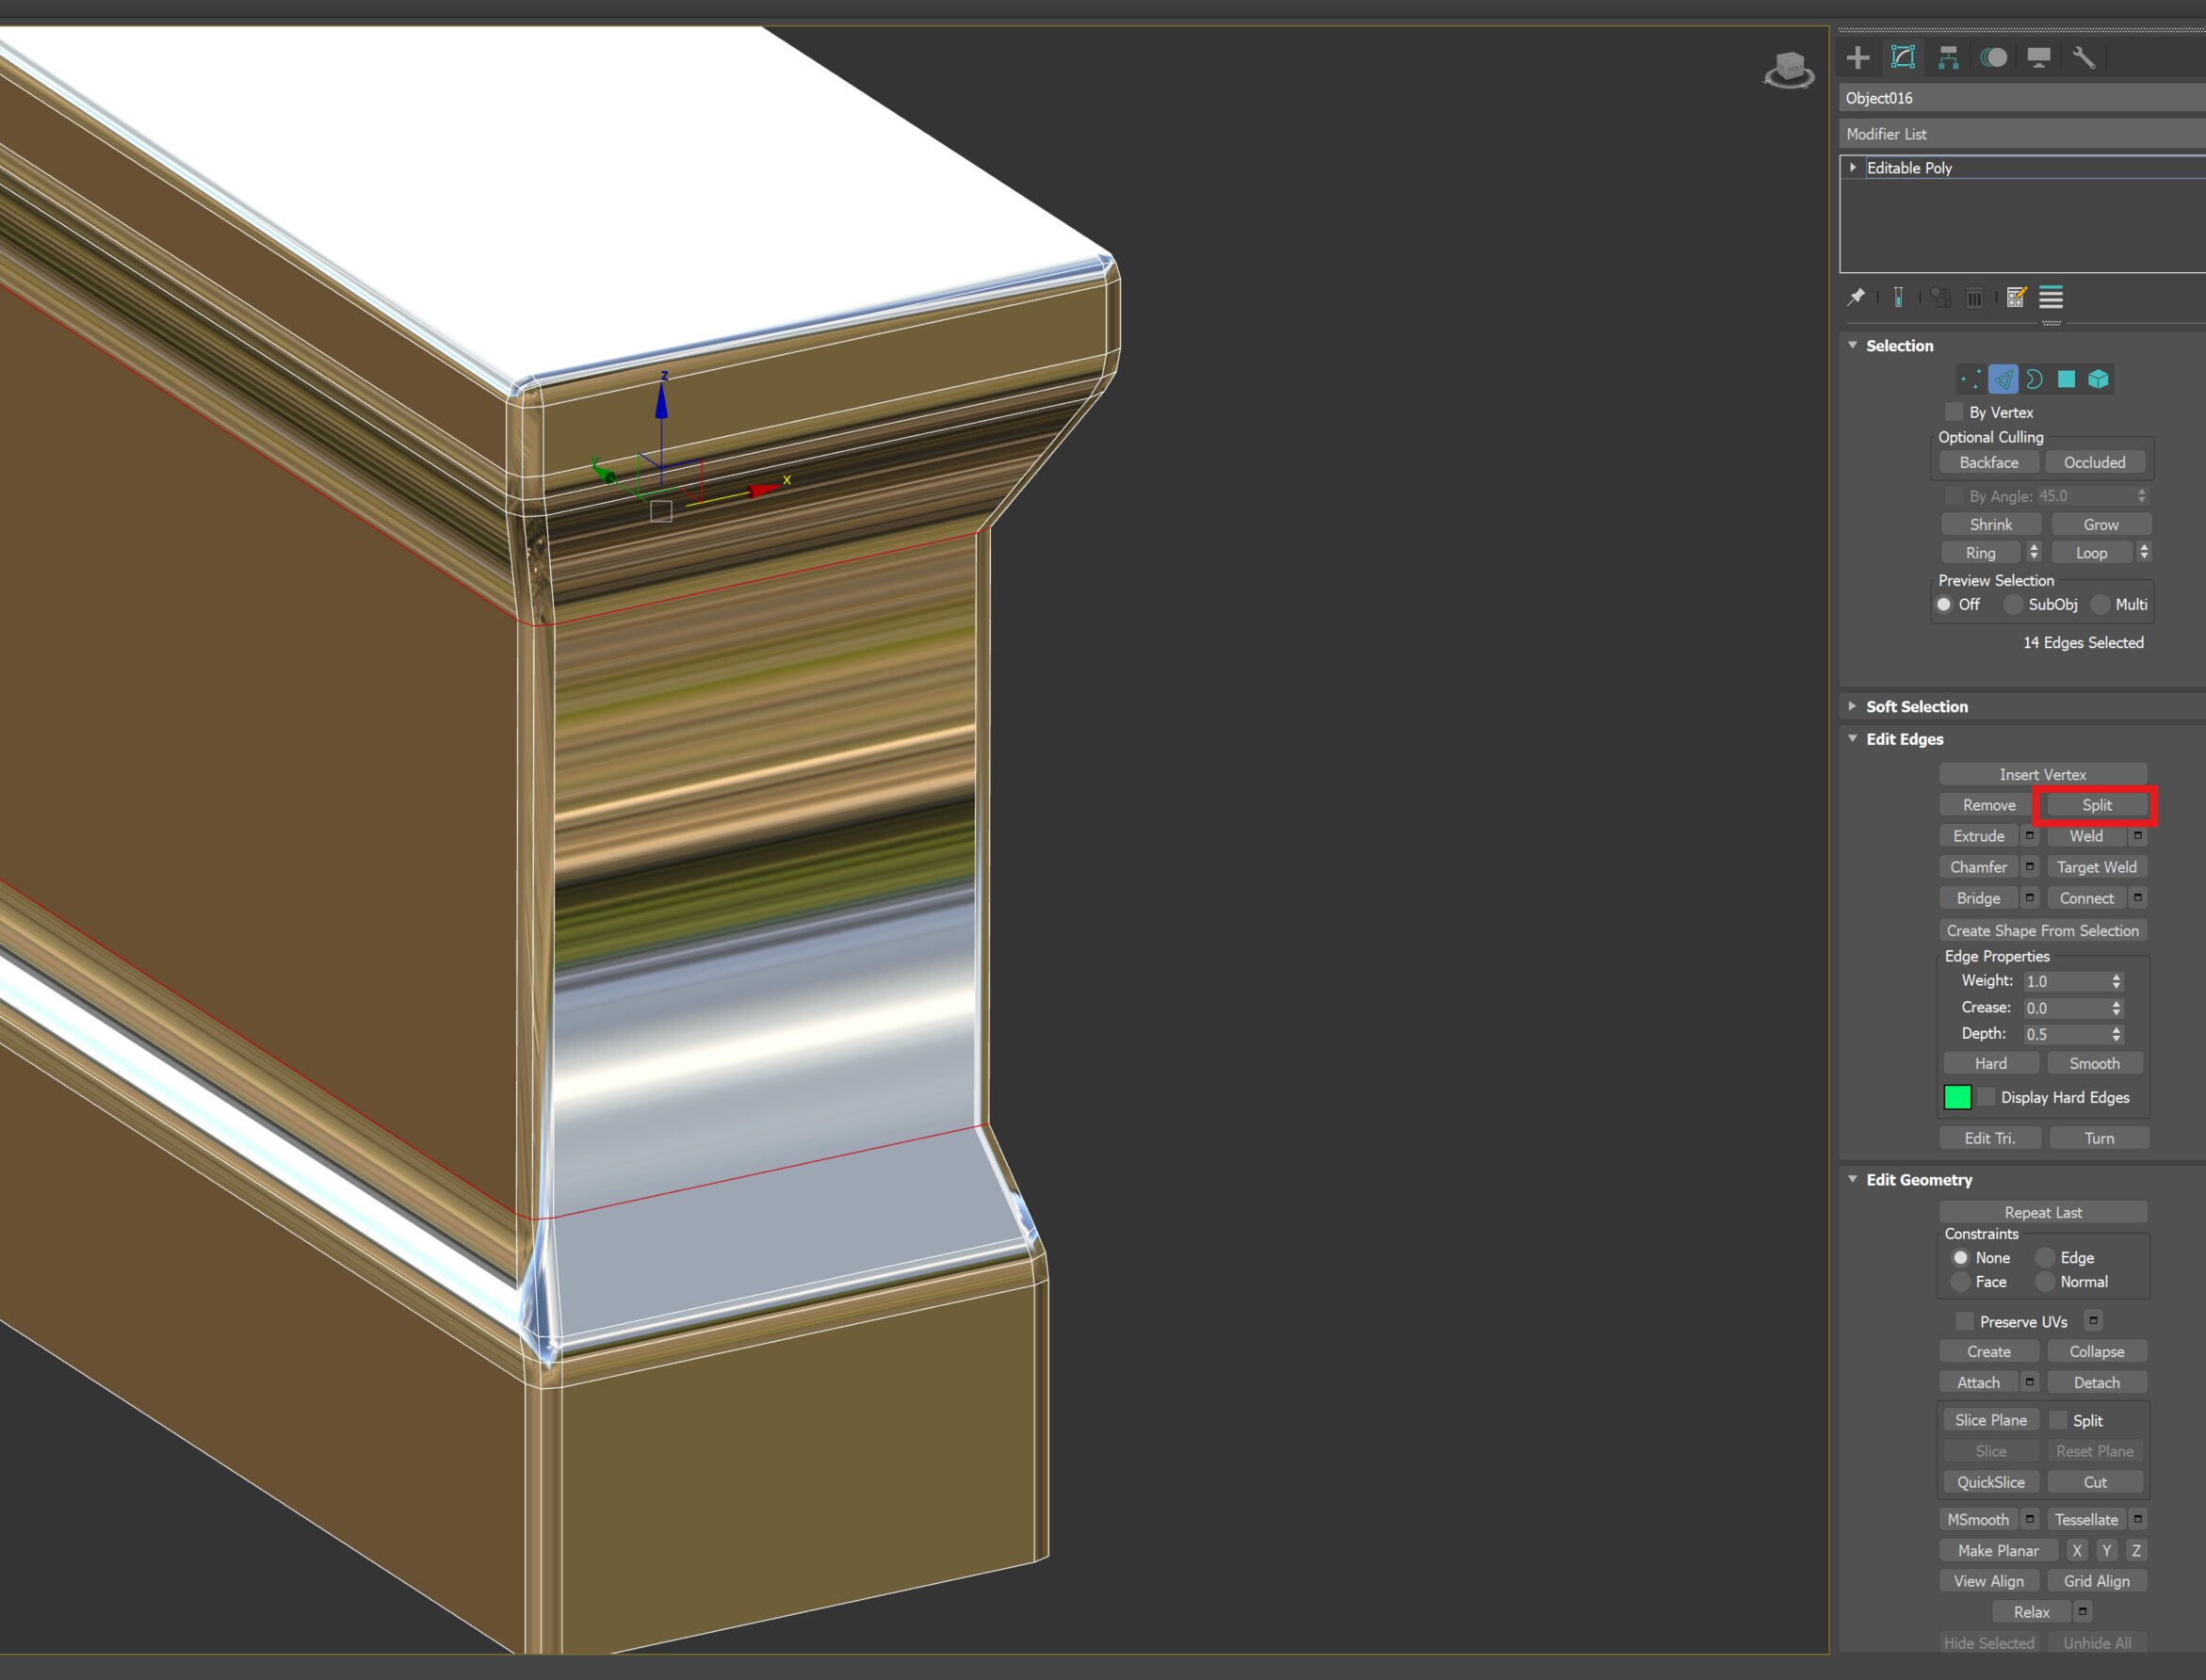
If a part that should be flat is slightly skewed by the split
Edit Normal → Face → Selected to unify the direction
Remove the unnecessary middle edges
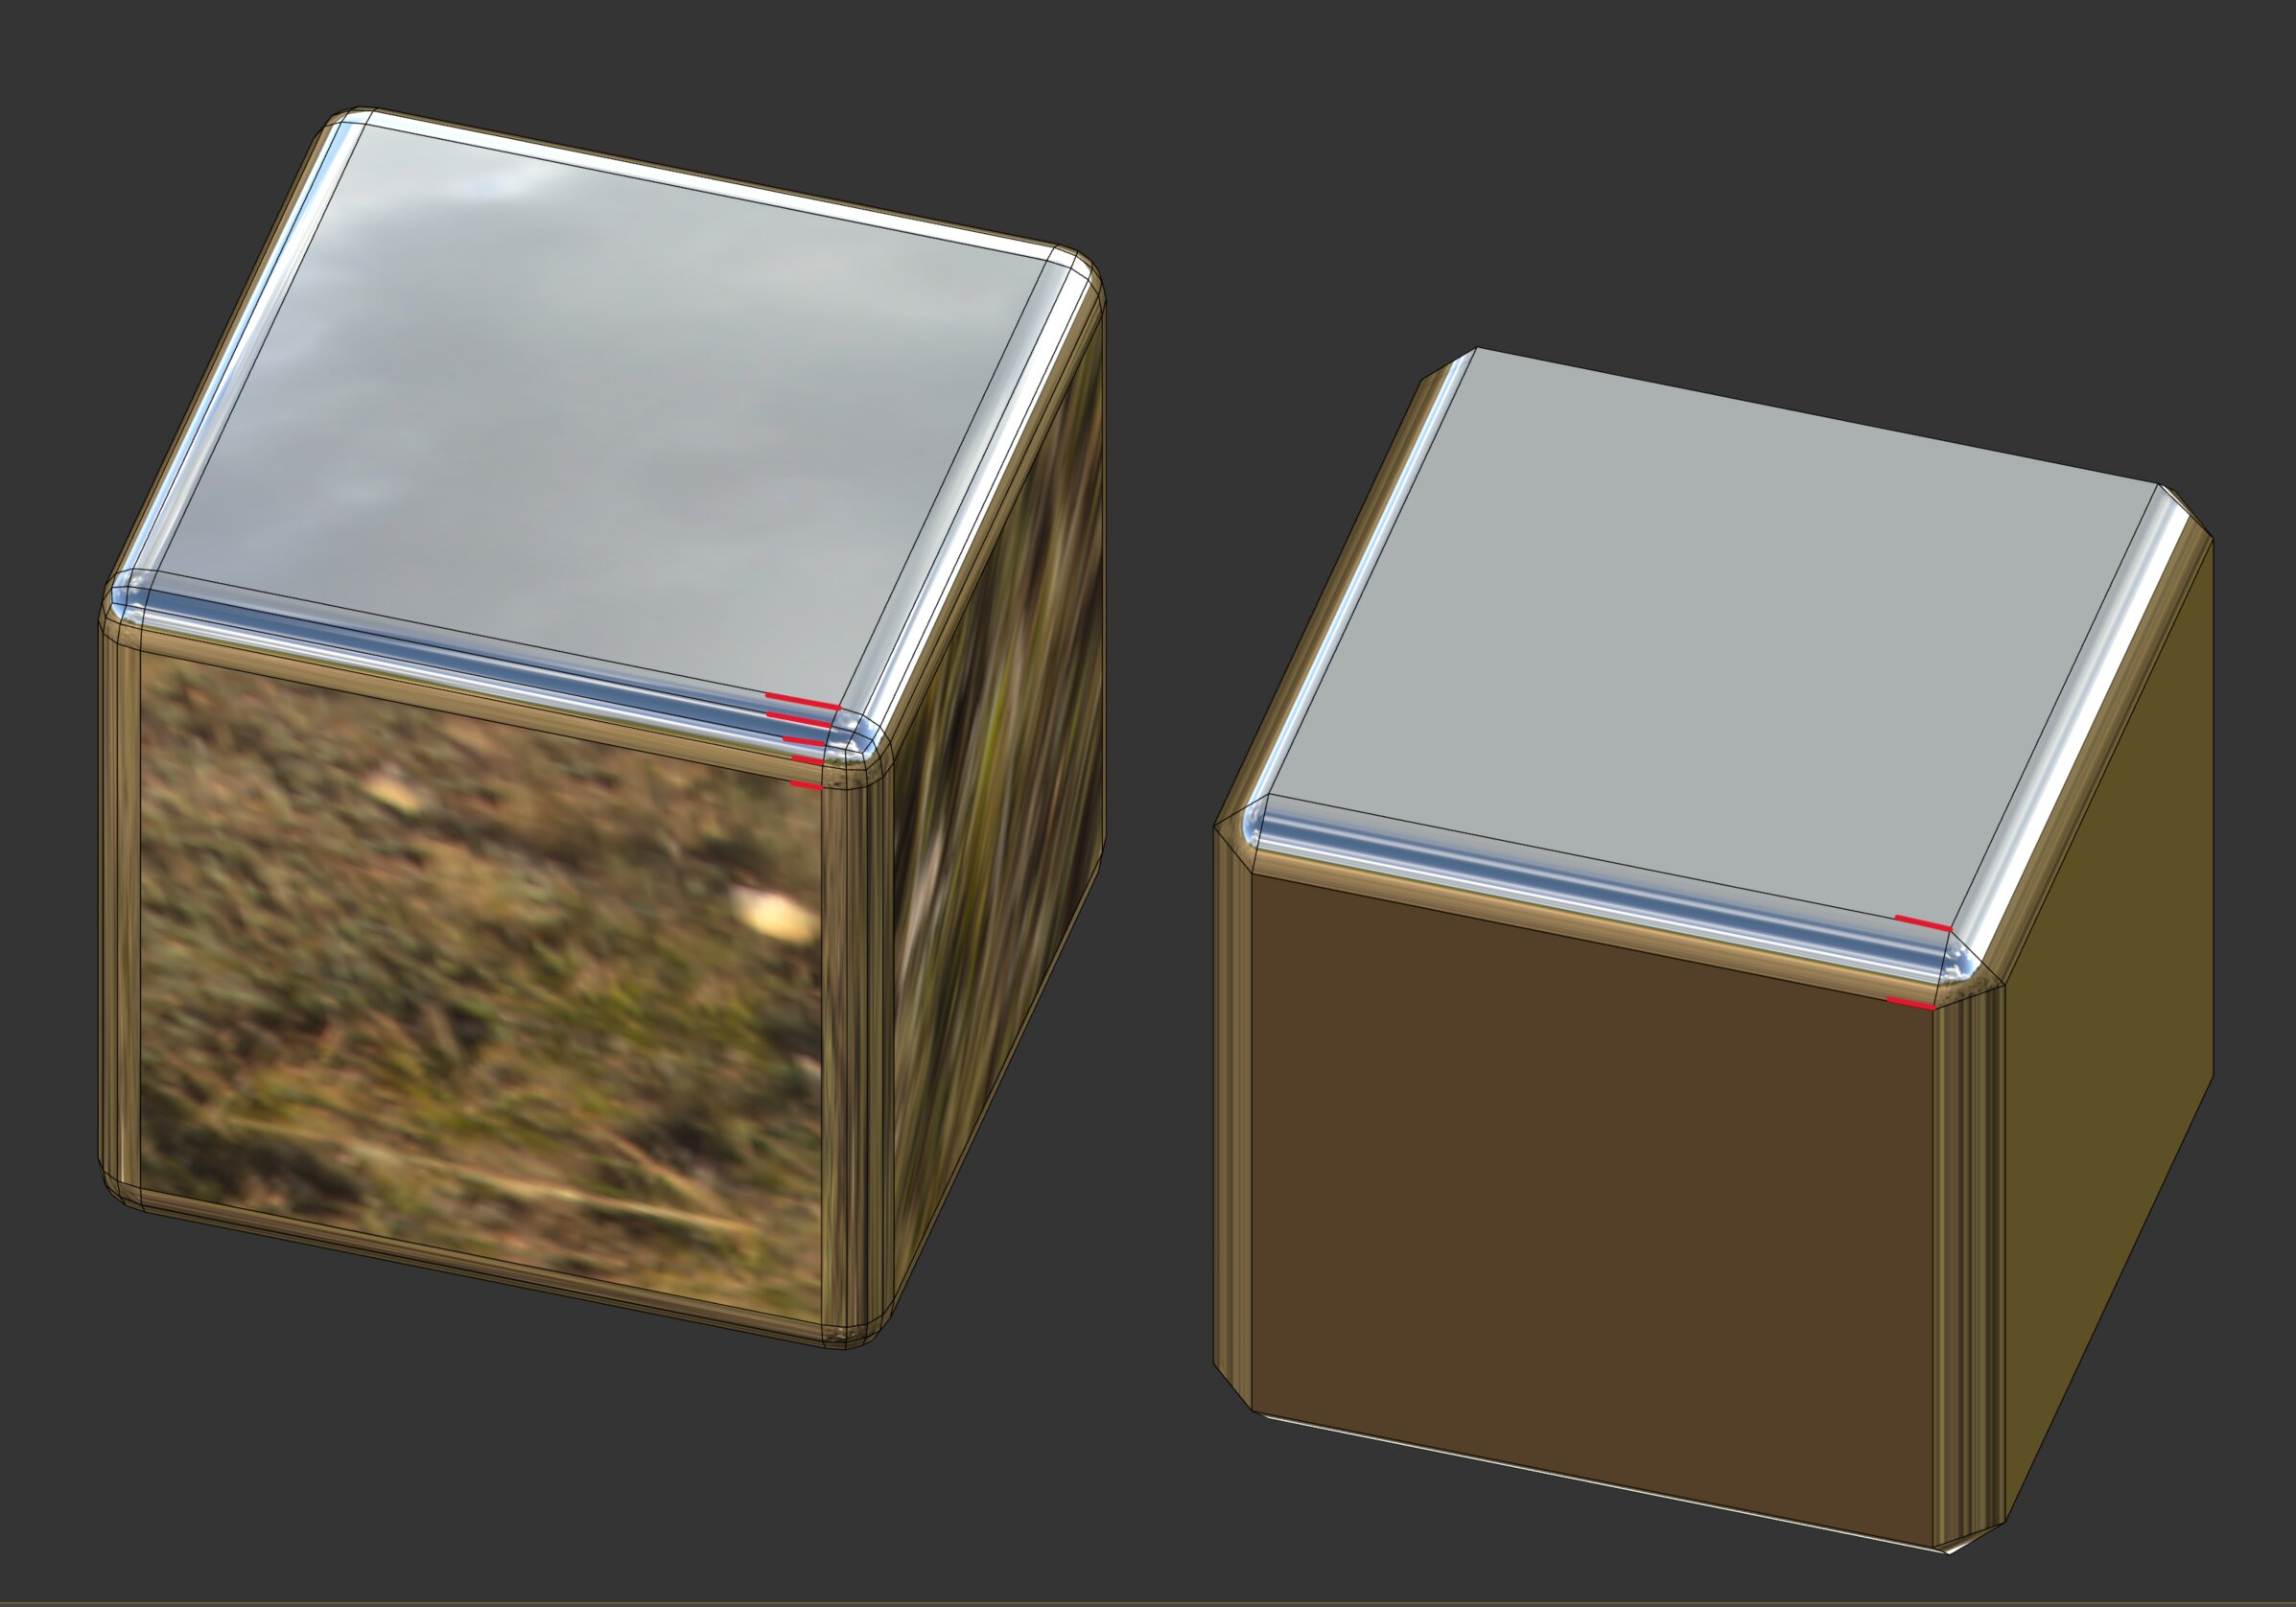
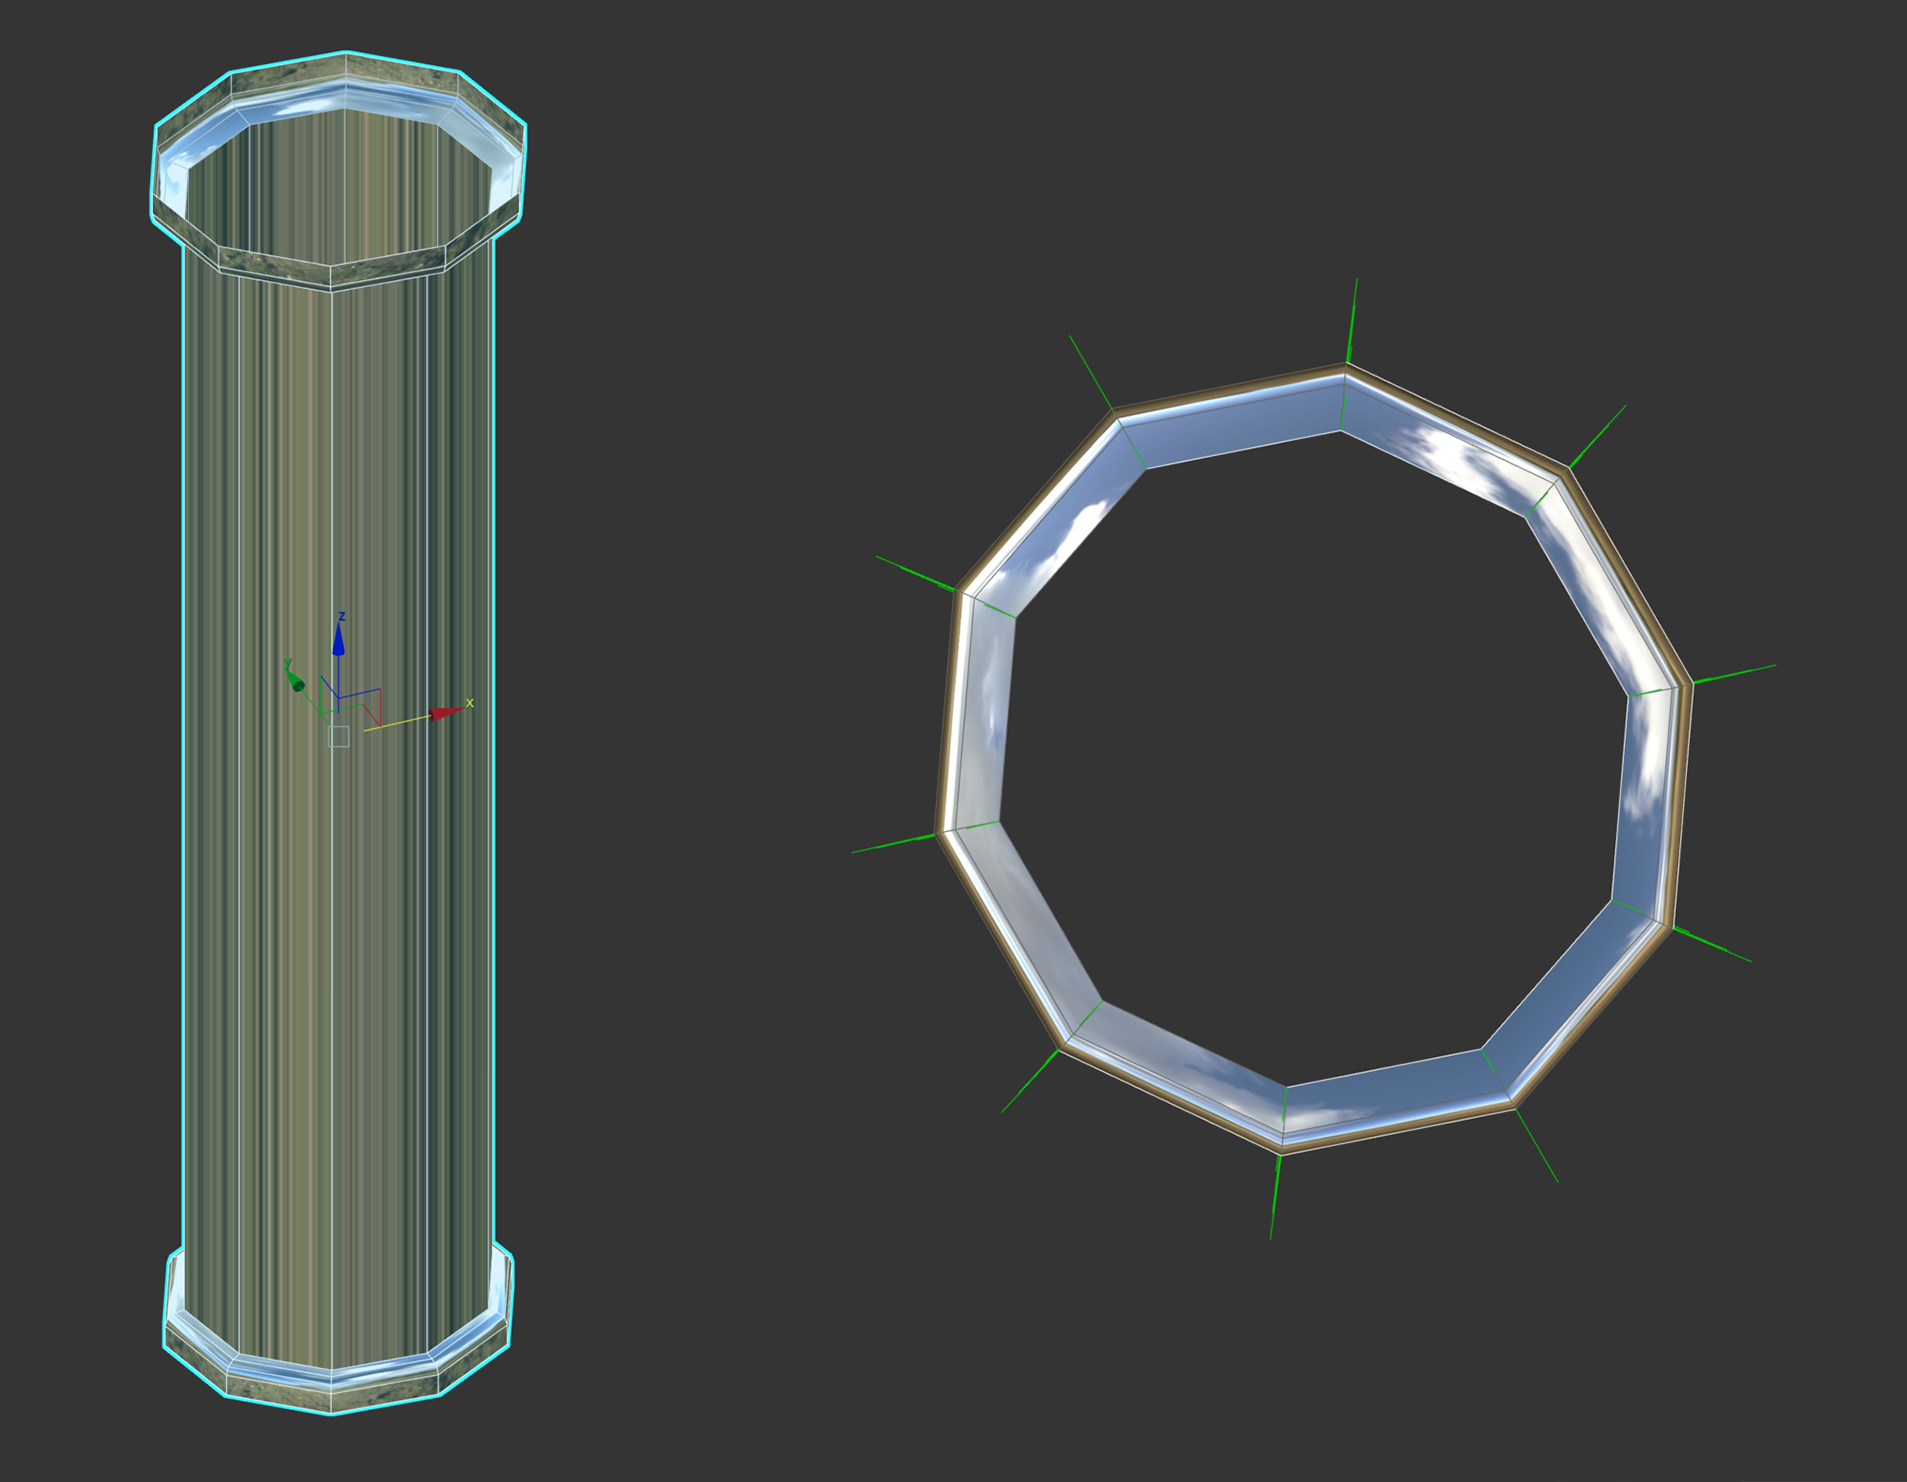
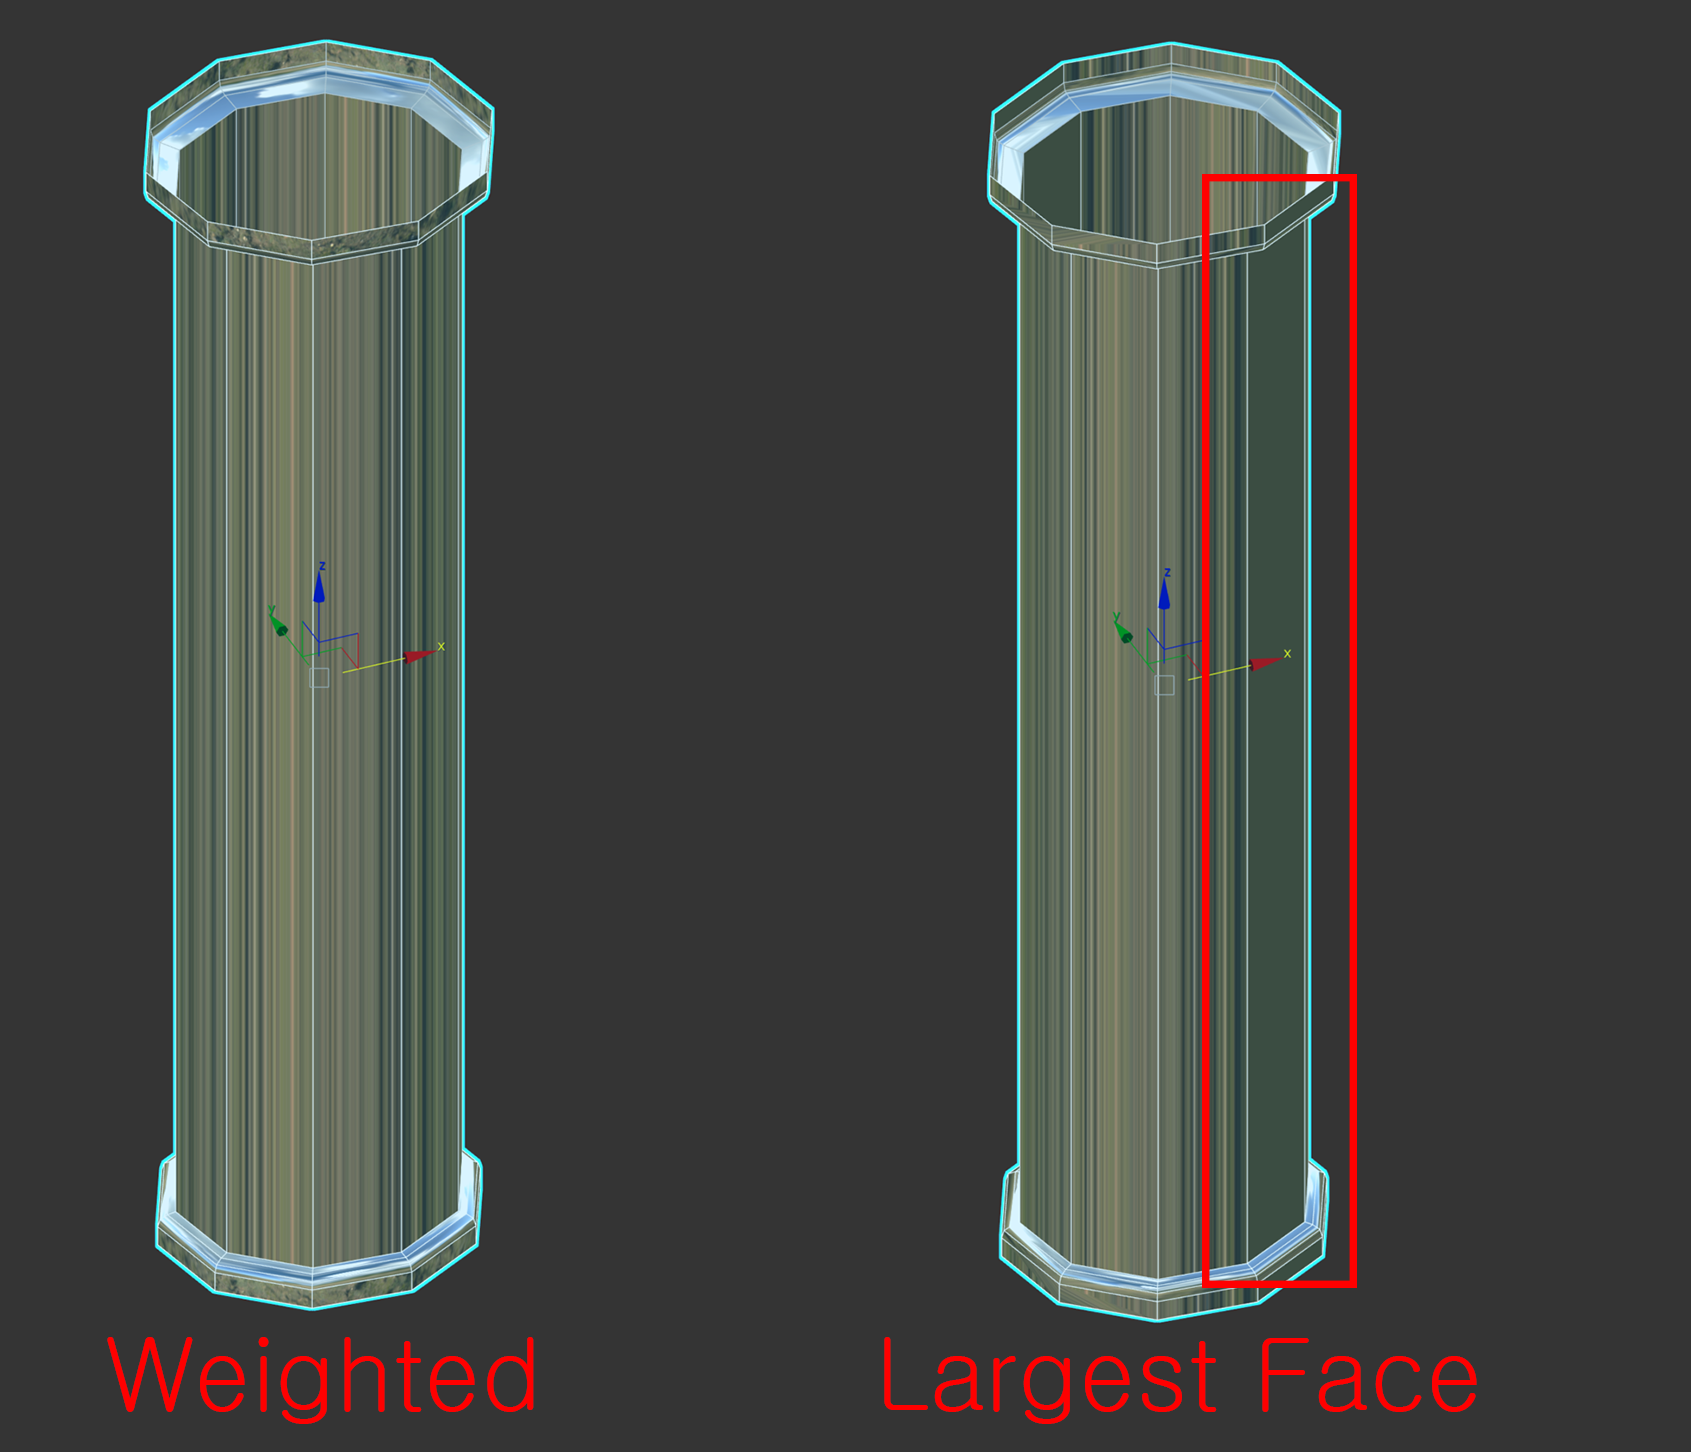
Cylinders and spheres already have well-defined normal directions by default, so applying Weighted Normals or Largest Face can cause problems.
Weighted / Largest Face
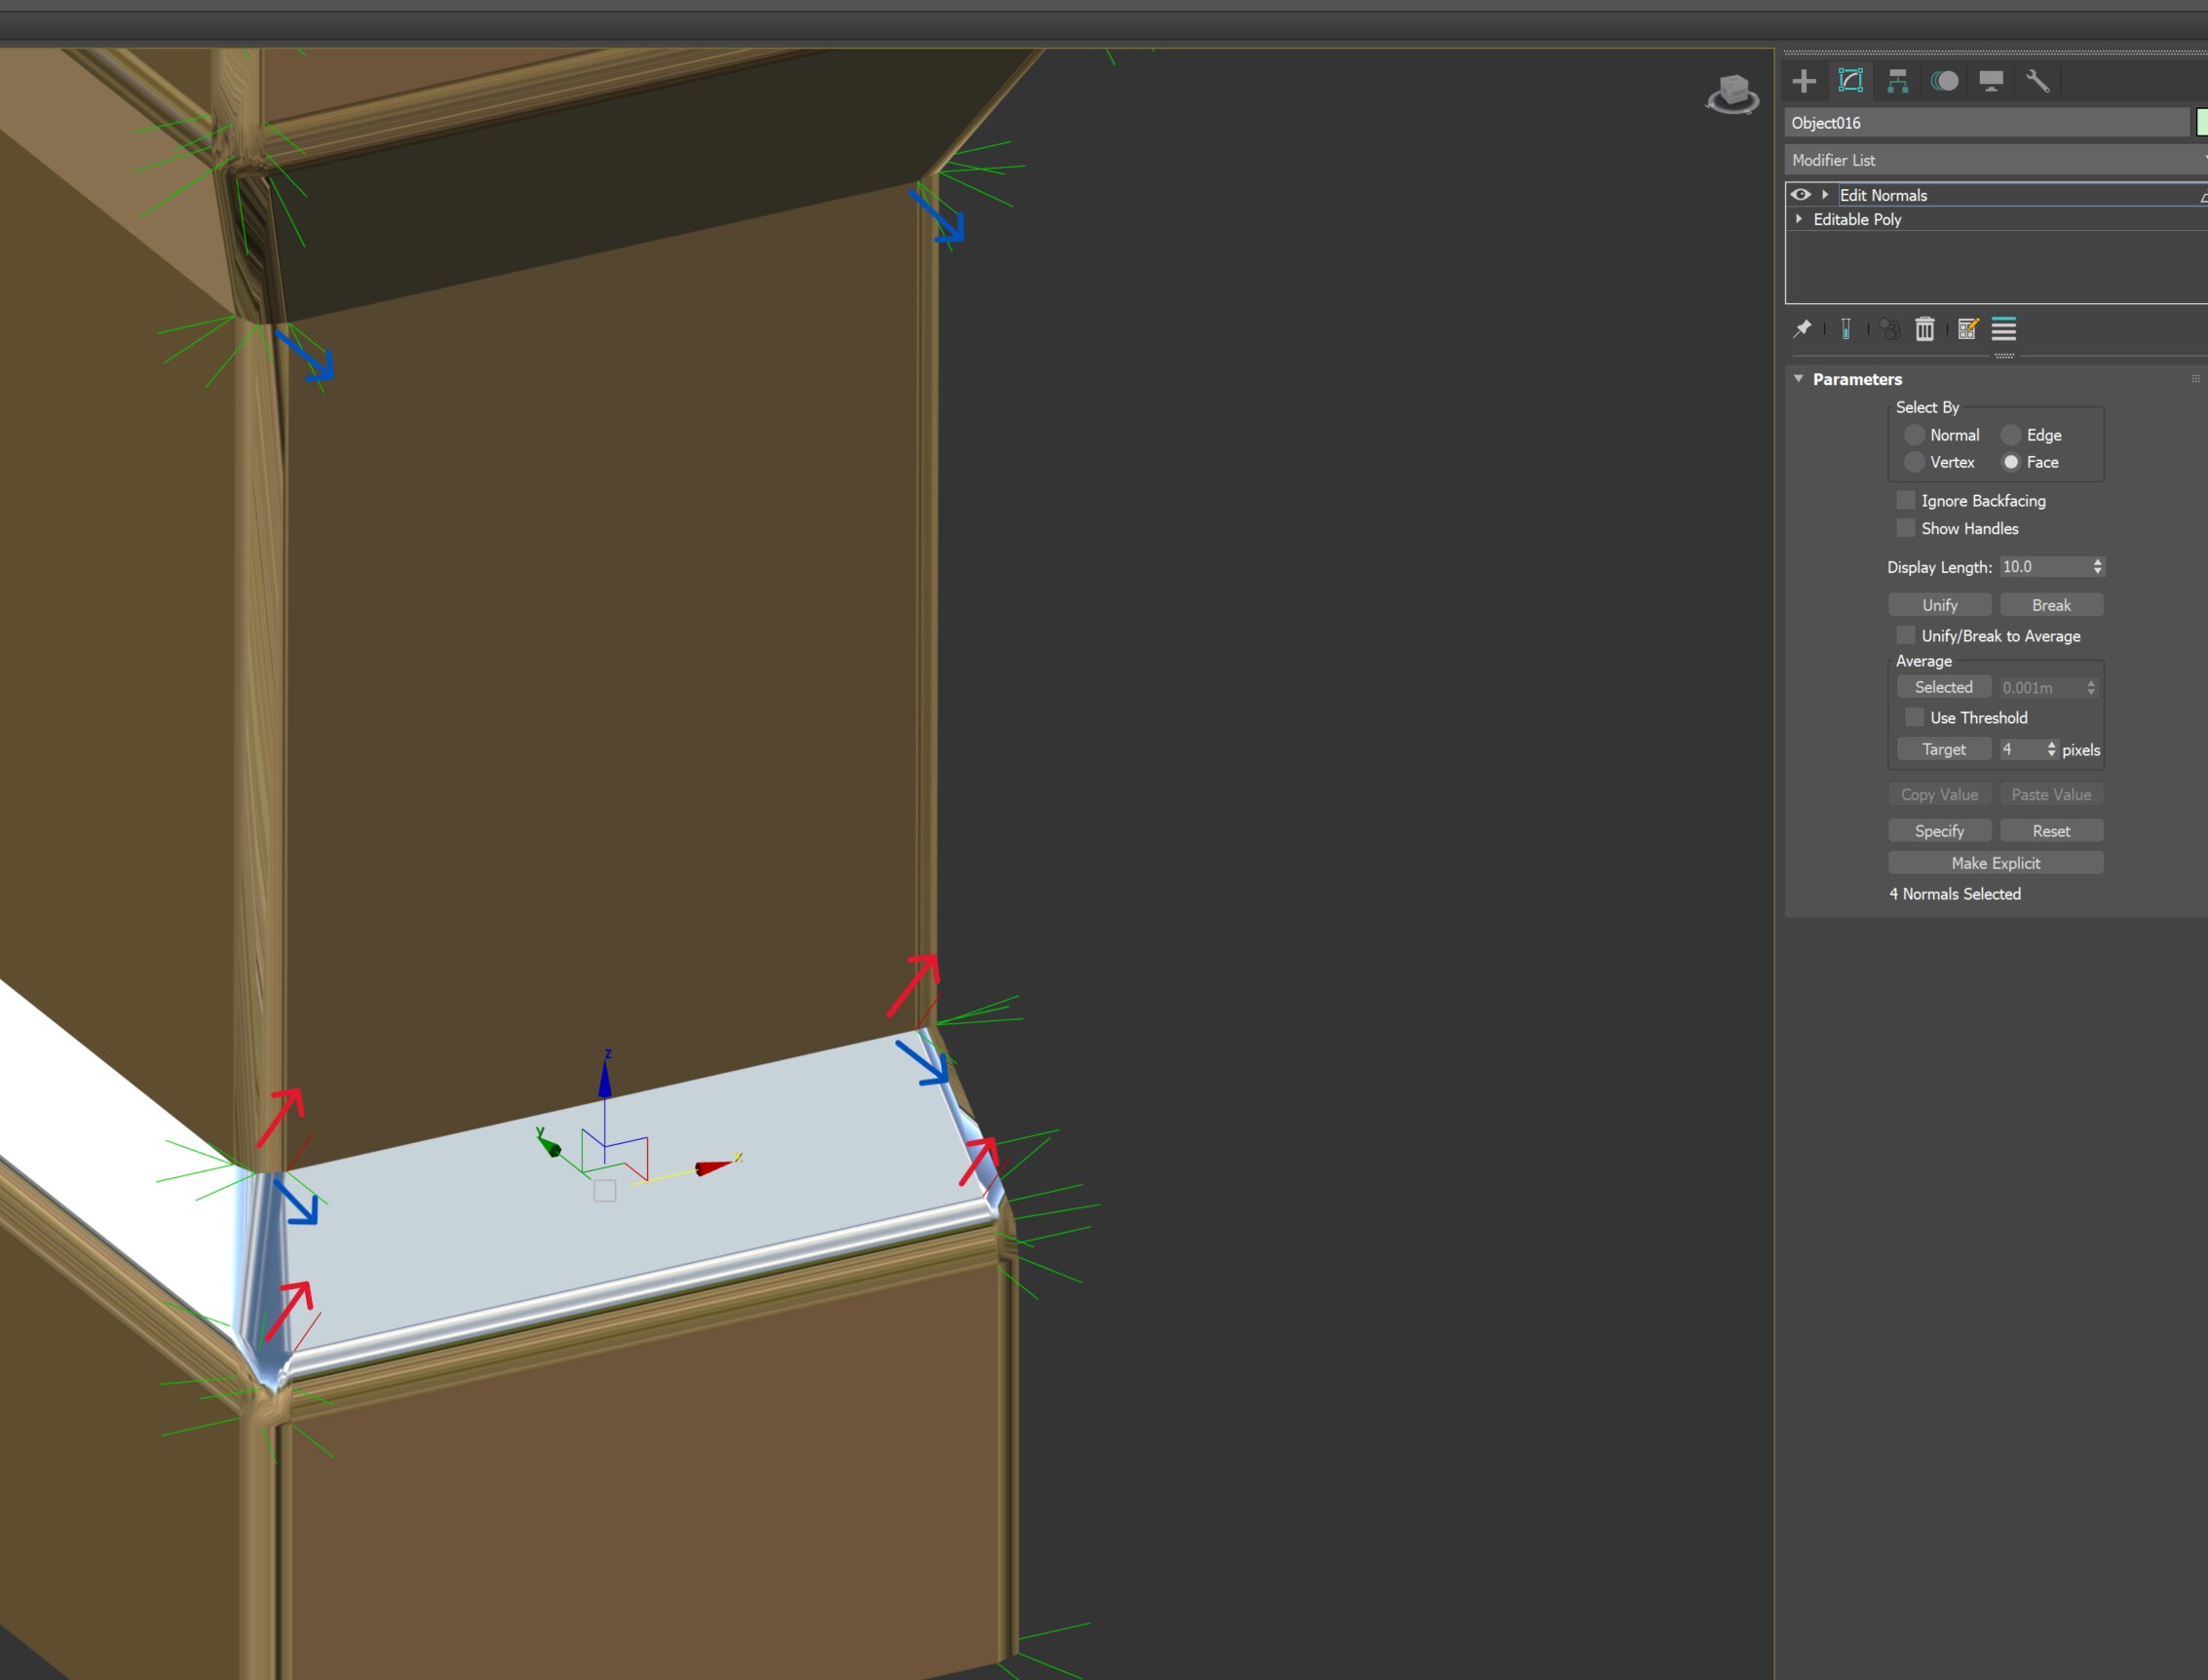
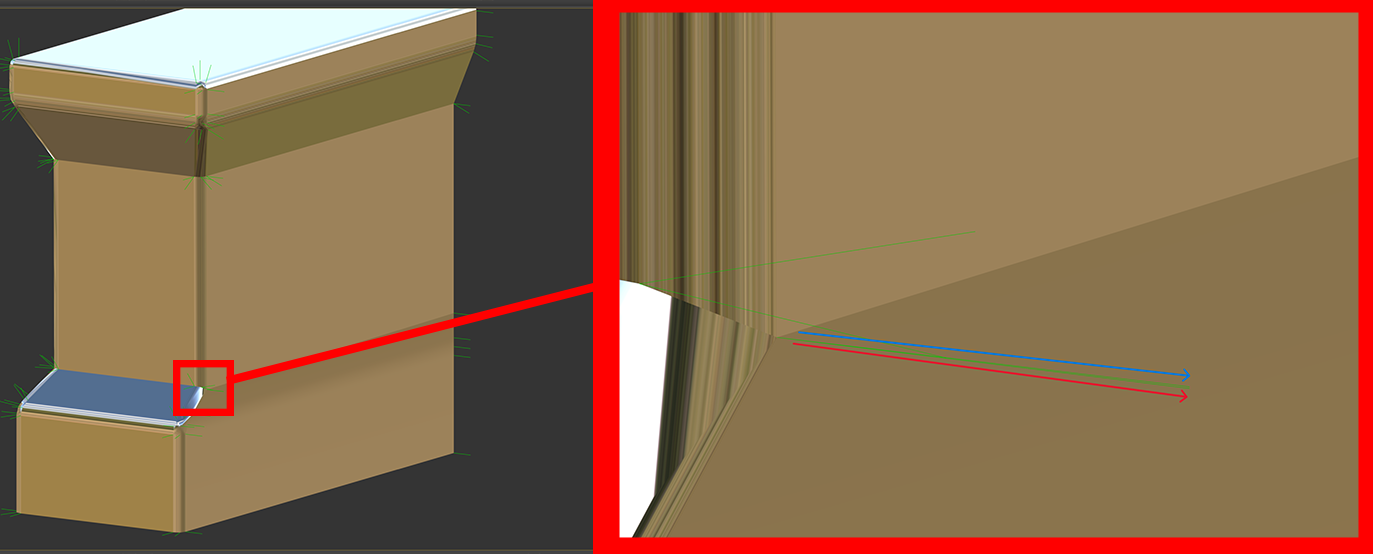
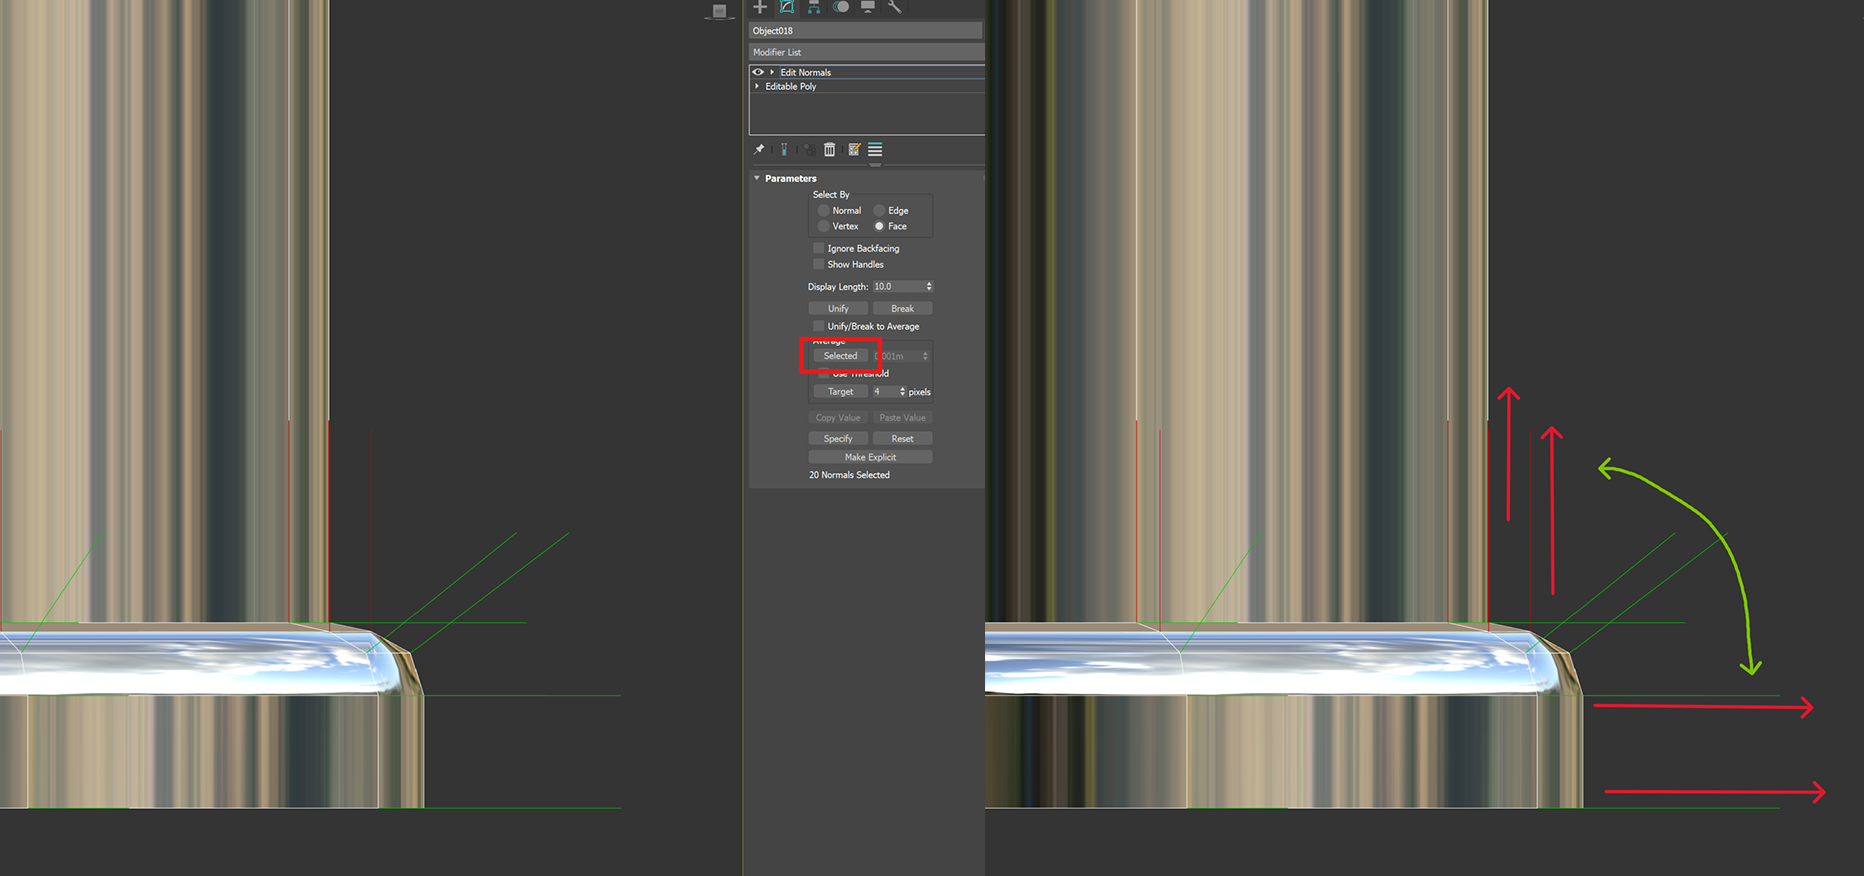
But if you want to refine the lower chamfer area more nicely, you need to edit it with Edit Normal.
The slightly upward-tilted normal direction must be aligned horizontally with the normal direction below.
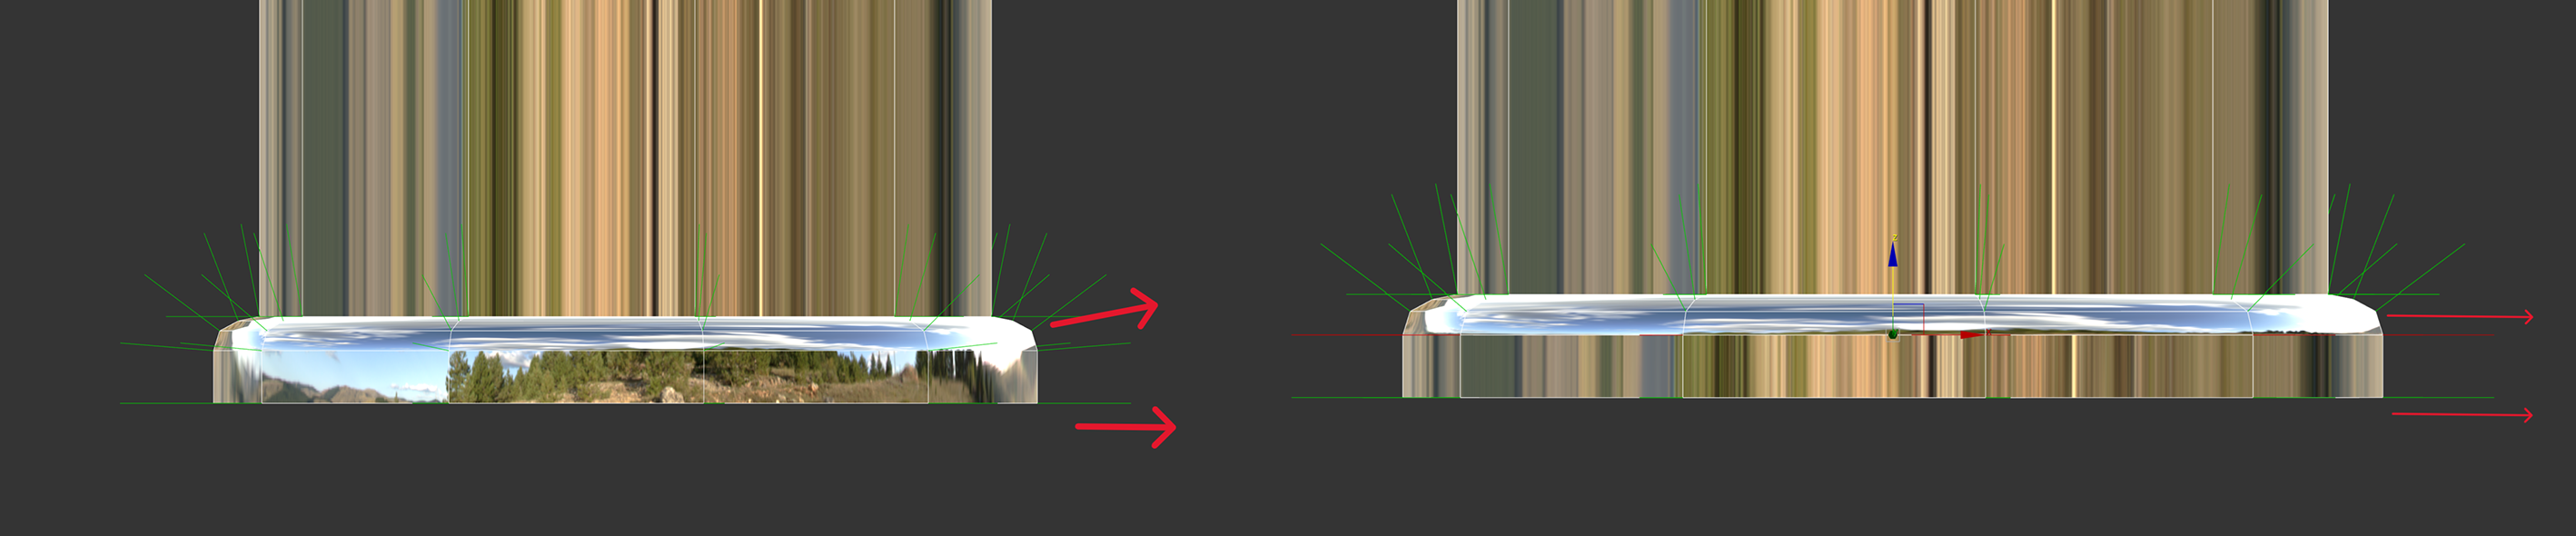
The top area is also adjusted with Edit Normal.

To make the top surface vertical, select the face and click Selected — it snaps vertical.
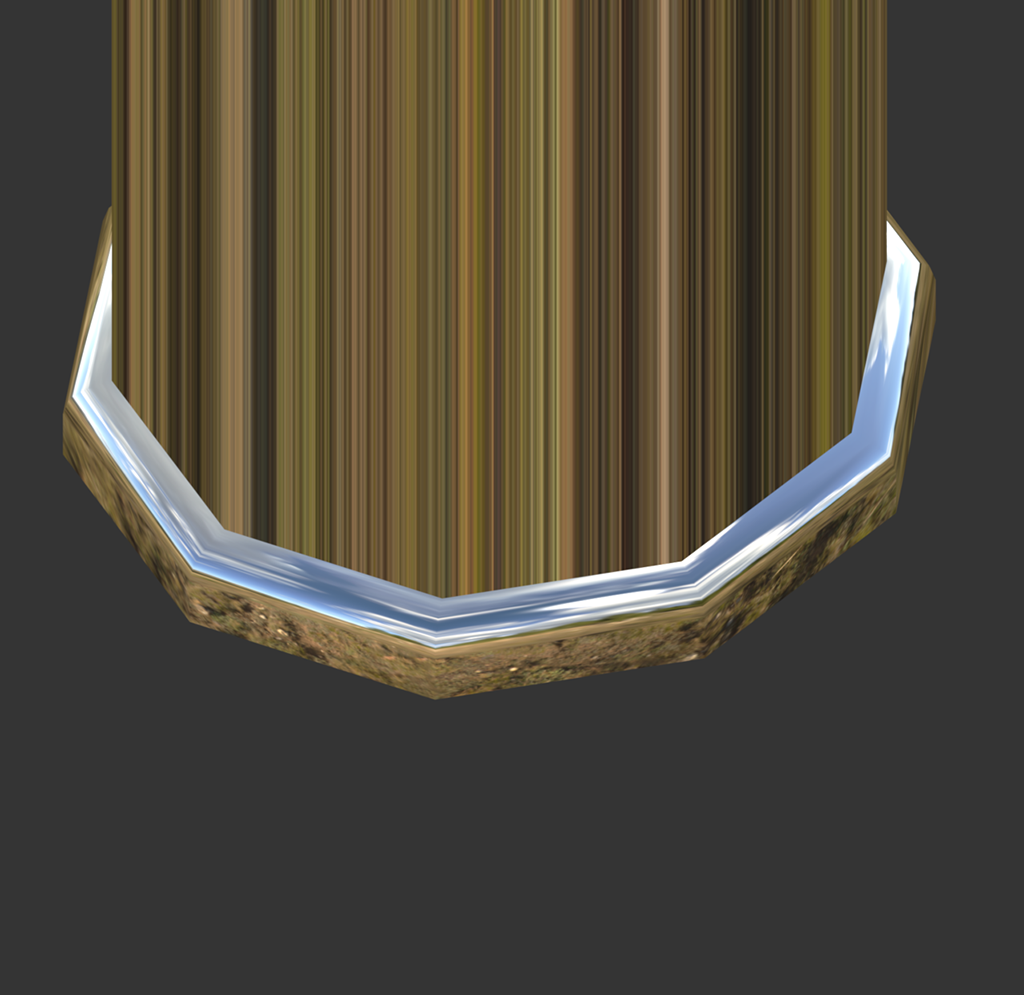
Replaced the normal-map-dependent correction approach with a vertex normal / custom normal workflow,
reducing texture memory pressure while keeping the intended highlights.